Love this? Save it for later!
Share the inspiration with your friends
“I wasn’t expecting to find a festive treat that everyone could safely enjoy until I stumbled upon this recipe scribbled on the back of a grocery receipt at my local community center’s summer fair.” It was a hot, buzzing Saturday afternoon, and I was helping set up the kid’s activity table when a friendly volunteer handed me a tiny, crumpled note. It promised a simple, nut-free recipe for patriotic rice krispie treats that even the kids with allergies could indulge in without worry. Honestly, I was skeptical at first—rice krispie treats are classic, but adding a festive twist without complicated ingredients seemed too good to be true.
Still, I gave it a shot that evening, mixing in the vibrant reds and blues with a little food coloring and a sprinkle of stars. The first bite was pure nostalgia with a fun, colorful spin. These easy nut-free patriotic rice krispie treats quickly became my go-to for summer barbecues, school parties, and last-minute celebrations. You know that feeling when a recipe just clicks? That’s exactly what happened here, and I’ve been making them ever since—even when I’m pressed for time.
Maybe you’ve been there too—wanting something festive and fun but needing to keep things safe and simple. Let me tell you, this recipe stays in my arsenal because it combines that childhood comfort with a holiday pop of color. Plus, no nuts means no worries about allergic reactions, which means everyone can join the fun. So, let’s get right to it and whip up some easy nut-free patriotic rice krispie treats that’ll brighten up any celebration!
Why You’ll Love This Recipe
After testing and tweaking this recipe dozens of times (sometimes with a curious toddler as my sous-chef), I can confidently say these easy nut-free patriotic rice krispie treats are a winner. Here’s why you’ll want to keep this one handy:
- Quick & Easy: Ready in under 20 minutes, perfect for last-minute festive fun or when you’re juggling a million things.
- Simple Ingredients: No fancy or hard-to-find items here—you probably have everything in your pantry right now.
- Perfect for All Ages: Kid-friendly, allergy-conscious, and guaranteed to be a hit at birthday parties, picnics, or backyard barbecues.
- Crowd-Pleaser: The colors and crunch get rave reviews every time, and honestly, who doesn’t love a classic rice krispie treat with a twist?
- Nut-Free & Allergy Safe: Keeps everyone included, especially important if you’re hosting a mixed group with allergies.
This isn’t just another rice krispie treat recipe. What makes it stand out is the easy method of layering patriotic colors while keeping the texture perfectly chewy and light. I experimented with different food colorings and found that gel colors work best for vibrant hues without adding extra moisture. Plus, the careful melting technique ensures the marshmallows bind just right without turning the treats into a sticky mess (trust me, I learned that the hard way once!).
It’s the kind of recipe that makes you close your eyes after the first bite and smile. Whether you’re prepping for a spirited Fourth of July picnic or a casual neighborhood block party, these treats bring that nostalgic vibe with a festive twist—and they do it without fuss or fancy gadgets.
What Ingredients You Will Need
This recipe uses simple, wholesome ingredients to deliver bold flavor and satisfying texture without the fuss. Most are pantry staples, and the patriotic colors come from easy-to-find food coloring gels, so you won’t need to raid specialty stores.
- Rice Krispies cereal (6 cups / 150 g) – The classic base; I recommend Kellogg’s for its crisp texture.
- Mini marshmallows (10 oz / 280 g) – Key for that gooey, chewy texture; regular or vegan marshmallows work.
- Unsalted butter (3 tbsp / 45 g), softened – Adds richness and helps bind everything together.
- Vanilla extract (1 tsp) – For a hint of warmth and depth (optional but recommended).
- Gel food coloring – Red and blue colors (use gel for vibrant shades without thinning the mixture).
- Non-stick cooking spray or butter – To grease the pan for easy removal (a small amount).
Optional festive toppings:
- White nonpareil sprinkles or edible stars (for extra patriotic flair)
- Additional mini marshmallows for layering or decoration
Since this is a nut-free recipe, I avoid any nut-based ingredients or oils. If you need a gluten-free version, double-check the cereal brand (many Rice Krispies are gluten-free, but some varieties contain malt). For dairy-free adaptations, swap the butter for a vegan margarine and use vegan marshmallows.
Equipment Needed
- Large mixing bowl – For combining the cereal and melted marshmallow mixture; a heatproof bowl is best.
- Medium saucepan – To melt the butter and marshmallows gently.
- Spatula – A sturdy silicone spatula works great for stirring and spreading.
- 9×13 inch baking pan – Ideal for pressing and setting the treats; glass or metal pans both work.
- Non-stick cooking spray or butter – To grease the pan and your hands when shaping the treats.
If you don’t have a 9×13 pan, you can use an 8×8 for thicker treats or a larger pan for thinner ones. I’ve also used parchment paper to line the pan for even easier removal. Personally, my silicone spatula has taken a beating but still works like a charm for scraping every last bit out of the pot.
Preparation Method
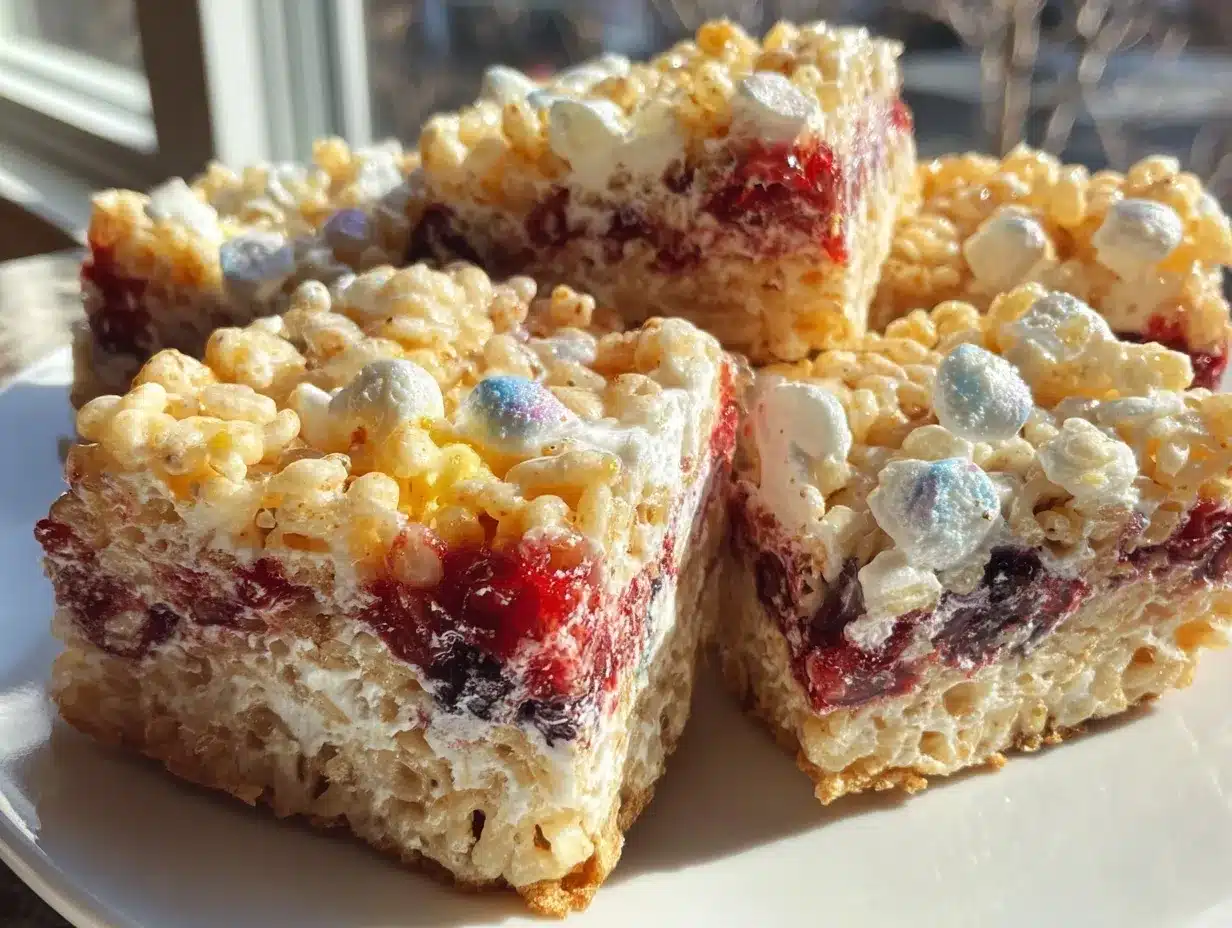
- Prepare your workspace and pan: Lightly grease a 9×13 inch baking pan with non-stick spray or butter. This makes removing the treats much easier later. Set aside.
- Melt the butter and marshmallows: In a medium saucepan over low heat, melt 3 tablespoons (45 g) of unsalted butter. Once melted, add 10 ounces (280 g) of mini marshmallows. Stir constantly until the marshmallows are completely melted and smooth. This should take about 5–7 minutes. Be patient—you don’t want to burn the marshmallows!
- Add vanilla extract: Remove the pan from heat and stir in 1 teaspoon of vanilla extract for extra flavor, if using.
- Divide the marshmallow mixture: Quickly divide the melted marshmallow mixture into three equal parts in separate bowls. This step requires swift action as the mixture hardens fast.
- Color the marshmallow portions: Add a few drops of red gel food coloring to the first bowl and blue gel food coloring to the second. Leave the third bowl plain (white). Stir each until the color is evenly distributed. Use gloves or a clean spatula to avoid staining your hands.
- Mix each colored marshmallow portion with Rice Krispies: To each bowl, add 2 cups (50 g) of Rice Krispies cereal. Gently fold with a spatula until the cereal is well coated. Don’t overmix or the mixture will become too dense.
- Layer the treats in the pan: Starting with the red mixture, press it evenly into the bottom of the prepared pan. Next, layer the white mixture on top, pressing gently but firmly. Finally, add the blue mixture as the top layer and press evenly. For best results, grease your hands to avoid sticking while pressing.
- Add optional festive sprinkles: If you like, sprinkle white nonpareil or edible stars on top while the mixture is still warm so they stick nicely.
- Let the treats cool: Allow the layered treats to set at room temperature for about 30 minutes. If you’re in a hurry, placing the pan in the refrigerator for 15 minutes speeds up the process.
- Cut and serve: Once firm, use a sharp knife (run under warm water and dry before cutting to prevent sticking) to slice into squares or fun shapes. Serve fresh and enjoy!
Quick tip: If the marshmallow mixture starts to harden while coloring or mixing, gently warm it over low heat again—but don’t overdo it, or you’ll end up with sticky, tough treats.
Cooking Tips & Techniques
Making rice krispie treats might seem straightforward, but a few tricks can make a big difference in texture and appearance.
- Low and slow melting: Always melt butter and marshmallows over low heat, stirring constantly. High heat burns marshmallows quickly, creating a bitter taste and grainy texture.
- Use gel food coloring: Liquid colors can thin your marshmallow mixture, making it harder to set. Gels give you vibrant colors without affecting texture.
- Divide and color quickly: Marshmallow mixture sets fast. Prepare your bowls and colors ahead of time, and work swiftly once melted.
- Grease your hands: Pressing the cereal mixture into the pan can get sticky. Lightly butter or spray your hands to avoid mess and keep the layers even.
- Don’t overmix: Fold the cereal gently to keep the treats light and crunchy, not dense and chewy.
- Cut with a warm knife: To slice neat squares without crumbling, run your knife under hot water, dry it, and cut in one smooth motion.
- Multitasking tip: While the treats cool, prep a simple fruit platter or cold drinks to round out your festive spread.
One time, I forgot to grease my hands and ended up with a sticky mess (and a few swears). Now, it’s a non-negotiable step for me. Honestly, these small details make the difference between a so-so batch and a batch everyone asks for again.
Variations & Adaptations
One of the best things about this recipe is how easy it is to tweak for different needs or flavor preferences. Here are some ideas I’ve tried or recommend:
- Dairy-free version: Substitute the butter with coconut oil or a vegan margarine and use vegan marshmallows to keep it allergy-friendly and dairy-free.
- Gluten-free option: Ensure you use certified gluten-free rice cereal; many brands offer this, including some Kellogg’s varieties.
- Flavor twists: Add a teaspoon of almond extract (if nuts aren’t an issue) or lemon zest to the marshmallow mixture for a subtle flavor boost.
- Seasonal colors: Swap the red and blue for fall tones like orange and green for a harvest-themed treat, or pink and purple for a spring celebration.
- Texture add-ins: Mix in a handful of mini chocolate chips or rainbow sprinkles into one of the colored layers for a fun surprise.
Personally, I once made these with a layer of crushed peppermint candy between the white and blue layers during the holidays—it was a festive hit and added a pleasant crunch. Don’t be afraid to get creative based on your event or what you have on hand!
Serving & Storage Suggestions
These easy nut-free patriotic rice krispie treats are best served at room temperature for that perfect chewy texture. Here’s how I like to present and store them:
- Serving: Cut into neat squares or use cookie cutters for star shapes to add that extra festive touch. Arrange on a colorful platter or a tiered tray for parties.
- Pairings: They go wonderfully with cold lemonade, iced tea, or even a scoop of vanilla ice cream for a fun dessert.
- Storing: Store leftovers in an airtight container at room temperature for up to 3 days to keep the treats soft and chewy.
- Freezing: Wrap individual portions tightly in plastic wrap and place in a freezer-safe bag. Freeze for up to 1 month. Thaw at room temperature before serving.
- Reheating: If the treats get a bit hard, microwave for 10-15 seconds to soften—just don’t overdo it or they’ll melt.
- Flavor development: These treats are best enjoyed fresh but can hold flavors well for a day or two. The marshmallow flavor tends to mellow slightly, making them even more nostalgic.
Nutritional Information & Benefits
Each serving (about one square) of these easy nut-free patriotic rice krispie treats contains roughly:
| Calories | Carbs | Fat | Protein |
|---|---|---|---|
| 150 | 31g | 3.5g | 1g |
The key ingredients like rice cereal provide quick energy from carbohydrates, while the butter adds a little richness and fat. Marshmallows primarily add sweetness but are low in fat and protein.
This recipe is naturally nut-free and can be made gluten-free with the right cereal. It’s a great option for families managing allergies who still want festive treats without compromise.
From a wellness perspective, these treats are an occasional indulgence that bring joy and connection—sometimes, that’s just as important as the nutrition facts!
Conclusion
Why should you try these easy nut-free patriotic rice krispie treats? Because they perfectly blend childhood nostalgia, vibrant holiday spirit, and allergy-friendly ingredients into a simple, quick recipe anyone can make. Whether you’re planning a backyard barbecue, a classroom party, or just craving a sweet, festive snack, these treats deliver every time.
Feel free to customize the colors, add your favorite mix-ins, or adjust for dietary needs. Honestly, this recipe has become one of my favorite go-to’s because it’s forgiving, fun, and always brings smiles.
If you try it out, I’d love to hear how you made it your own—drop a comment below or share your festive photos. Let’s keep the celebration going with easy, safe, and delicious treats everyone can enjoy!
FAQs
Can I use regular food coloring instead of gel food coloring?
You can, but regular liquid food coloring might thin the marshmallow mixture, making it less sturdy. Gel food coloring is best for vibrant colors without affecting texture.
How do I store these treats to keep them fresh?
Store them in an airtight container at room temperature for up to 3 days. You can also freeze them wrapped tightly for up to a month.
Are these treats safe for kids with nut allergies?
Yes! This recipe is specifically nut-free and safe for those with nut allergies, but always double-check your ingredients for cross-contamination if needed.
Can I make these treats ahead of time for a party?
Absolutely. They hold up well for a day or two at room temperature and can be made a day ahead for convenience.
What’s the best way to cut the treats without them crumbling?
Use a sharp knife warmed under hot water and dried before slicing. This helps you get clean cuts without sticking or crumbling.
Pin This Recipe!
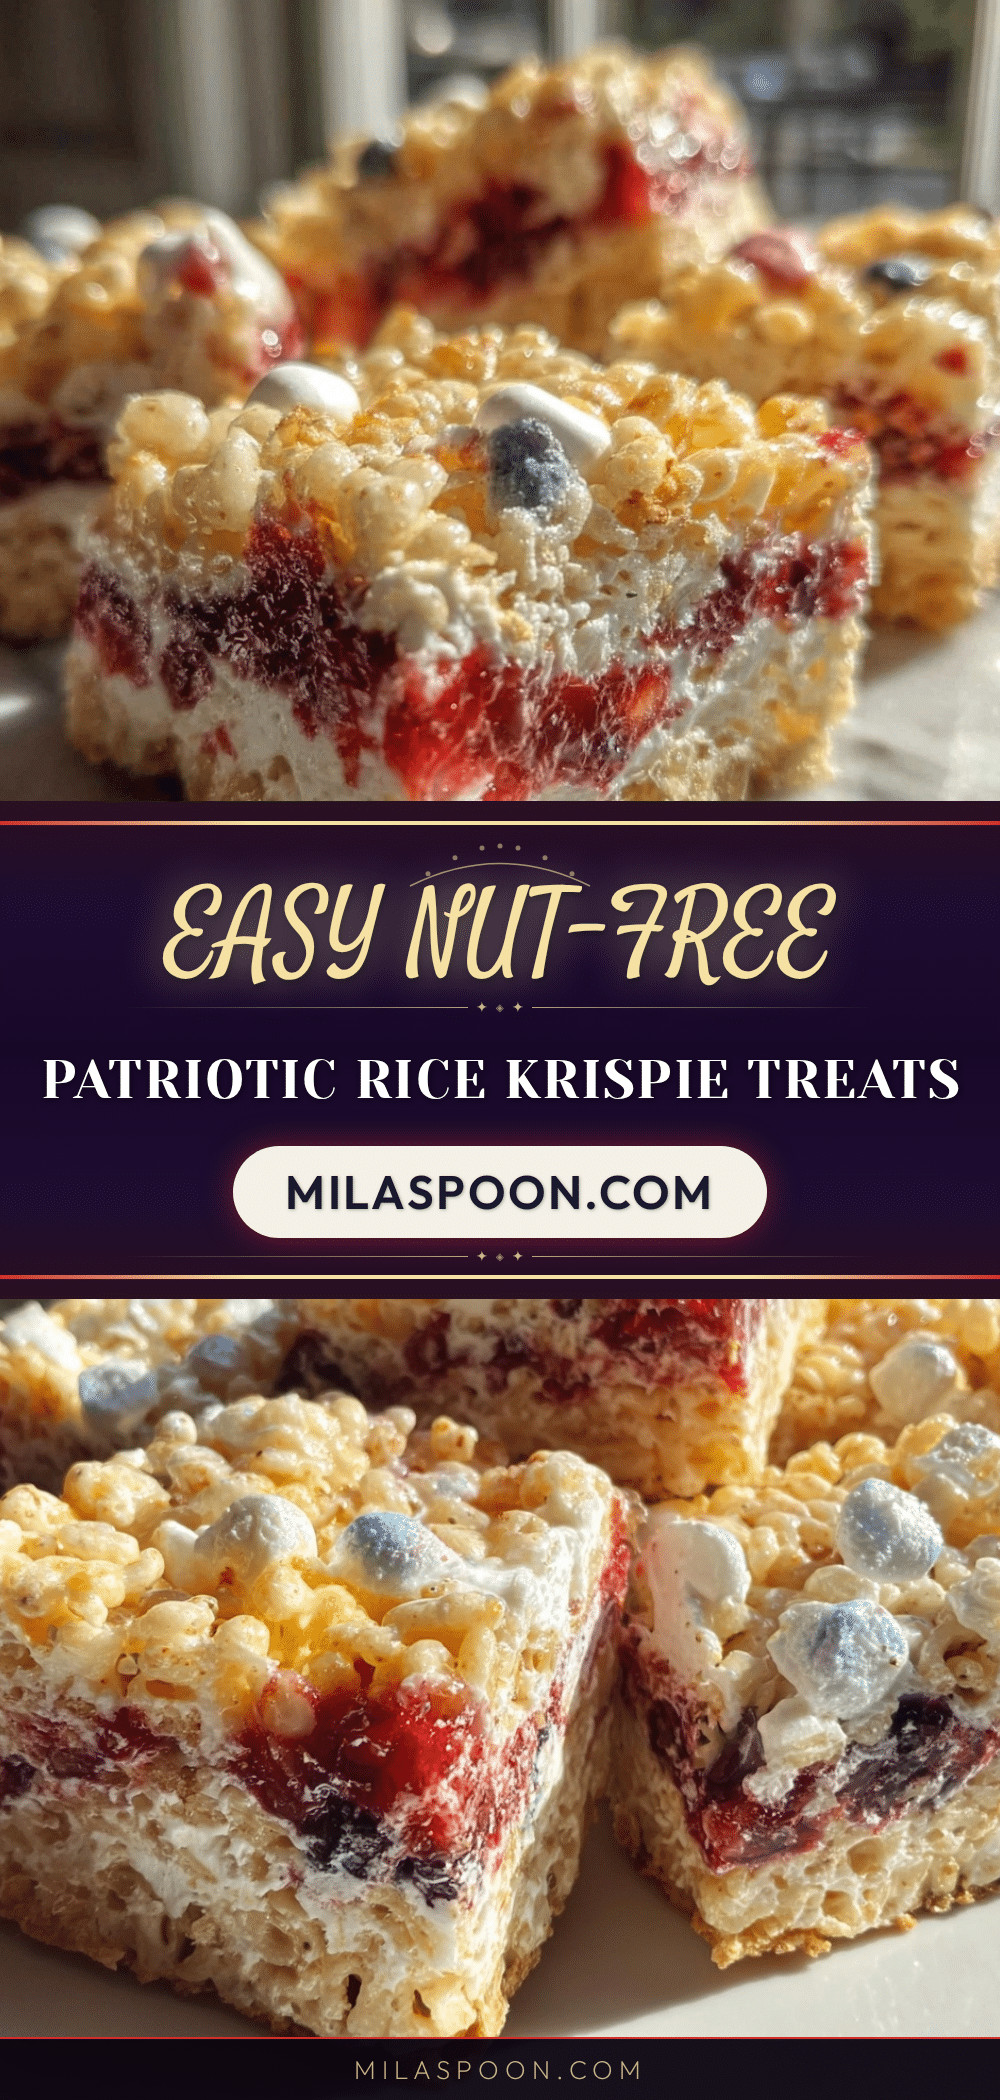
Easy Nut-Free Patriotic Rice Krispie Treats Recipe for Festive Fun
A quick and easy nut-free recipe for colorful patriotic rice krispie treats that are perfect for all ages and allergy-conscious celebrations.
- Prep Time: 10 minutes
- Cook Time: 10 minutes
- Total Time: 40 minutes
- Yield: 12 servings 1x
- Category: Dessert
- Cuisine: American
Ingredients
- 6 cups (150 g) Rice Krispies cereal
- 10 oz (280 g) mini marshmallows
- 3 tbsp (45 g) unsalted butter, softened
- 1 tsp vanilla extract (optional)
- Red gel food coloring
- Blue gel food coloring
- Non-stick cooking spray or butter for greasing
- Optional toppings: white nonpareil sprinkles or edible stars, additional mini marshmallows
Instructions
- Lightly grease a 9×13 inch baking pan with non-stick spray or butter and set aside.
- In a medium saucepan over low heat, melt 3 tablespoons (45 g) of unsalted butter.
- Add 10 ounces (280 g) of mini marshmallows to the melted butter and stir constantly until completely melted and smooth, about 5–7 minutes.
- Remove from heat and stir in 1 teaspoon of vanilla extract if using.
- Quickly divide the melted marshmallow mixture into three equal parts in separate bowls.
- Add a few drops of red gel food coloring to the first bowl, blue gel food coloring to the second bowl, and leave the third bowl plain (white). Stir each until color is evenly distributed.
- To each bowl, add 2 cups (50 g) of Rice Krispies cereal and gently fold until well coated.
- Press the red mixture evenly into the bottom of the prepared pan.
- Layer the white mixture on top of the red, pressing gently but firmly.
- Add the blue mixture as the top layer and press evenly.
- If desired, sprinkle white nonpareil or edible stars on top while the mixture is still warm.
- Allow the treats to set at room temperature for about 30 minutes, or refrigerate for 15 minutes to speed up setting.
- Use a sharp knife warmed under hot water and dried to cut into squares or shapes. Serve fresh.
Notes
Use gel food coloring for vibrant colors without thinning the marshmallow mixture. Grease your hands when pressing the mixture to avoid sticking. Warm the knife before cutting to prevent crumbling. For dairy-free, substitute butter with vegan margarine or coconut oil and use vegan marshmallows. Check cereal brand for gluten-free options.
Nutrition
- Serving Size: One square (about 1/
- Calories: 150
- Fat: 3.5
- Carbohydrates: 31
- Protein: 1
Keywords: nut-free, patriotic, rice krispie treats, allergy-friendly, easy dessert, colorful treats, kid-friendly


