Love this? Save it for later!
Share the inspiration with your friends
The clock was ticking down to midnight on a chilly November evening when my phone buzzed with a last-minute request: “Can you make a birthday cake? Something special for my friend who’s obsessed with astrology?” Honestly, I wasn’t exactly prepared—my kitchen was half-packed from a recent move, and I was fresh out of fancy decorations. But you know that feeling when you just can’t say no? I found myself rummaging through the scattered baking tools, determined to whip up something memorable.
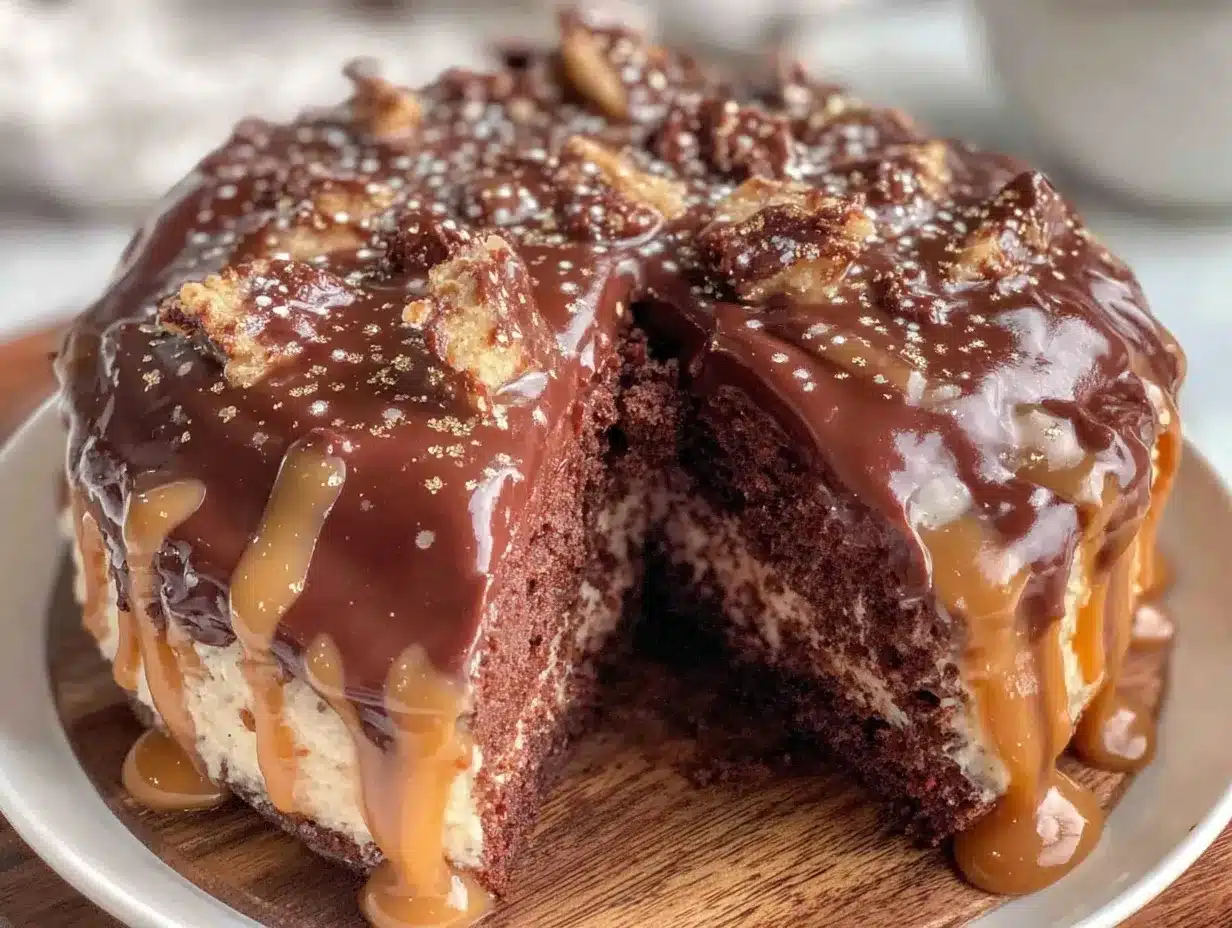
What started as a bit of a scramble turned into the creation of what I now call the Perfect Gold Drip Chocolate Birthday Cake with Zodiac Design. The idea came to me as I glanced at a small constellation poster taped to my fridge—why not blend rich, indulgent chocolate with shimmering gold accents and a celestial twist? The result? A cake that wasn’t just a dessert but a statement: elegant, personalized, and surprisingly easy to make (even when you’re juggling a dozen other things).
Maybe you’ve been there—the pressure of a last-minute celebration, the desire to impress without spending hours. This recipe has stuck with me because it hits that sweet spot between stunning and doable. Plus, it’s got that little touch of magic from the zodiac design that feels like it was made just for the birthday star. Let me tell you, the first bite of that silky chocolate paired with the glossy gold drip was enough to make me forget the kitchen chaos entirely.
Why You’ll Love This Recipe
This Perfect Gold Drip Chocolate Birthday Cake with Zodiac Design isn’t just another chocolate cake—it’s the kind of recipe that earns you compliments and second helpings. After testing it multiple times (and yes, eating my fair share of the “test slices”), I know this recipe delivers every time. Here’s why it’s a keeper:
- Quick & Easy: You can have this cake ready in about 2 hours, which means less stress and more time to enjoy the party.
- Simple Ingredients: No need for exotic items or specialty shops. Most ingredients are pantry staples, and the gold drip uses edible gold paint that’s easy to find.
- Perfect for Celebrations: Whether it’s a birthday, anniversary, or just a fun get-together, the zodiac design adds a personal, meaningful touch.
- Crowd-Pleaser: From kids to adults, everyone loves the rich chocolate flavor paired with the elegant gold drip—it looks fancy but tastes like comfort food.
- Unbelievably Delicious: The moist chocolate layers combined with a creamy ganache filling make it a slice of heaven every time.
What makes this cake stand out is the balance between show-stopping design and down-to-earth baking. The gold drip isn’t just for looks—it adds a subtle crunch and a hint of sweetness that complements the chocolate perfectly. Plus, the zodiac design is hand-painted, so it feels like a gift made just for the person celebrating. Honestly, it’s the kind of dessert that makes you want to close your eyes and savor every bite. If you’ve ever wanted to impress without the fuss, this is your go-to.
What Ingredients You Will Need
This recipe relies on straightforward, wholesome ingredients to create bold chocolate flavor and a silky texture without complicated steps. You probably have most of these on hand, which makes it even better for last-minute plans or casual celebrations.
- For the Chocolate Cake Layers:
- All-purpose flour – 2 cups (240g), sifted
- Granulated sugar – 1 ¾ cups (350g)
- Cocoa powder (unsweetened) – ¾ cup (75g), I recommend Valrhona for rich flavor
- Baking powder – 1 ½ tsp
- Baking soda – 1 ½ tsp
- Salt – 1 tsp
- Large eggs – 2, room temperature
- Buttermilk – 1 cup (240ml), or milk with 1 tbsp lemon juice
- Vegetable oil – ½ cup (120ml)
- Boiling water – 1 cup (240ml)
- Vanilla extract – 2 tsp
- For the Chocolate Ganache Filling:
- Heavy cream – 1 cup (240ml)
- Bittersweet or semi-sweet chocolate chips – 8 oz (225g)
- Unsalted butter – 2 tbsp, softened (adds silkiness)
- For the Gold Drip:
- White chocolate chips – ½ cup (90g)
- Heavy cream – ¼ cup (60ml)
- Edible gold luster dust – 1 tsp mixed with 1 tbsp clear vanilla extract or vodka
- For the Zodiac Design:
- Black edible food coloring gel
- Fine food-safe paintbrush
- Optional: silver edible dust for constellation stars
If you want to swap for gluten-free, almond or oat flour blends work well here with a slight texture change. You can also use coconut cream in place of heavy cream for a dairy-free ganache, though the flavor will be a bit different. For the gold drip, some brands like Wilton or PME offer reliable edible gold dust that mixes smoothly.
Equipment Needed
This cake requires some basic baking tools that most home cooks will recognize, plus a few extras to help nail the design.
- Two 8-inch (20cm) round cake pans – non-stick or lined with parchment paper for easy release
- Mixing bowls – medium and large sizes
- Electric mixer or stand mixer – for smooth batter and whipped ganache
- Spatulas – rubber and offset for spreading and smoothing
- Measuring cups and spoons – preferably both metric and US for accuracy
- Cooling racks – to cool cake layers evenly
- Small saucepan – for heating cream and melting chocolate
- Pastry brush – fine, food-safe, for painting the zodiac design
- Palette knife or bench scraper – for smoothing frosting and ganache
If you don’t have a stand mixer, a hand mixer works just fine, though it might take a bit more time to get the batter right. For the zodiac painting, any small, fine brush works, but be sure it’s one dedicated to food to avoid any contamination. I once tried using a regular art brush and ended up with a weird metallic taste, so lesson learned!
Preparation Method
- Preheat and Prepare Pans (10 minutes): Preheat your oven to 350°F (175°C). Grease two 8-inch cake pans and line the bottoms with parchment paper. This step ensures your cakes come out cleanly.
- Mix Dry Ingredients (5 minutes): In a large bowl, sift together 2 cups of flour, 1 ¾ cups sugar, ¾ cup cocoa powder, 1 ½ tsp baking powder, 1 ½ tsp baking soda, and 1 tsp salt. Whisk to combine thoroughly.
- Combine Wet Ingredients (5 minutes): In a separate bowl, beat 2 large eggs, 1 cup buttermilk, ½ cup vegetable oil, and 2 tsp vanilla extract until smooth. Pour this mixture into the dry ingredients and stir gently.
- Add Boiling Water (3 minutes): Slowly pour 1 cup boiling water into the batter, stirring carefully. The batter will be thin—that’s expected and what keeps the cake moist.
- Bake the Cakes (30-35 minutes): Divide the batter evenly between the prepared pans. Bake for 30-35 minutes or until a toothpick inserted in the center comes out clean. Keep an eye near the end to avoid overbaking.
- Cool the Layers (1 hour): Let the cakes cool in the pans for 10 minutes, then transfer to wire racks. Cooling fully before frosting prevents melting.
- Make the Ganache (15 minutes): In a small saucepan, heat 1 cup heavy cream until just simmering. Pour over 8 oz chocolate chips in a bowl. Let sit for 5 minutes, then stir until smooth. Add 2 tbsp softened butter and mix until glossy. Chill until spreadable but not hard.
- Assemble the Cake (15 minutes): Place one cake layer on your serving plate. Spread a thick layer of ganache evenly. Top with the second layer and cover the whole cake with a thin crumb coat of ganache. Chill for 20 minutes to set.
- Prepare Gold Drip (10 minutes): Heat ¼ cup heavy cream and pour over ½ cup white chocolate chips. Stir gently until smooth. Mix 1 tsp edible gold dust with 1 tbsp clear vanilla extract (or vodka) and brush onto the white chocolate ganache to create a shimmering gold drip effect.
- Apply the Gold Drip (10 minutes): Using a spoon or piping bag, carefully drip the gold ganache over the edges of the chilled cake, allowing it to run down naturally. Chill again briefly to set the drip.
- Paint the Zodiac Design (20 minutes): With a fine food-safe brush and black edible gel, paint the zodiac constellation and symbols gently onto the top or side of the cake. Add silver edible dust dots to mimic stars. Take your time—this step adds the personal touch that makes the cake truly special.
Pro tip: If the ganache is too runny for the drip, chill it a few minutes longer. And when painting the zodiac, try sketching lightly with a toothpick first if you’re nervous. I’ve found that slow, deliberate strokes work best to avoid smudging.
Cooking Tips & Techniques
Getting this cake just right involves a few little tricks I picked up after some trial and error. Let me share what helped me avoid common pitfalls:
- Thin Batter Is Normal: The chocolate cake batter will be thinner than you expect. That’s because of the boiling water, and it’s what keeps the cake moist. Don’t add extra flour!
- Ganache Consistency Matters: For the ganache filling, let it cool until spreadable but not firm. Too warm and it will slide off the cake; too cold and it’s hard to spread.
- Drip Control: Use a spoon or small piping bag to control the gold drip. Practice on parchment paper first if you’re unsure—it helps build confidence.
- Patience with the Zodiac Design: Painting the constellation takes a delicate hand. I once rushed and smudged half the design, so go slow and keep a damp paper towel nearby for quick corrections.
- Multitasking: While the cake layers bake, prepare the ganache and mix the drip glaze. This keeps the process flowing smoothly and saves time.
Honestly, the first few times I made this cake, I had ganache spills and drips that ran away from the edges. But I learned that chilling the crumb coat thoroughly sets a nice base, so the drip stays where it should. Also, I highly recommend using a turntable if you have one—it makes frosting and decorating way less frustrating.
Variations & Adaptations
This cake is versatile, and you can tweak it to suit different tastes or dietary needs without losing that wow factor:
- Flavor Variations: Swap the cocoa powder for espresso powder for a mocha twist, or add a teaspoon of cinnamon for warmth.
- Dietary Adaptations: Use gluten-free flour blends to make it gluten-free. Coconut cream works well instead of heavy cream for a dairy-free ganache, though texture changes slightly.
- Design Alternatives: Instead of a zodiac design, paint floral motifs or geometric patterns using the same edible gels and dusts.
- Baking Methods: If you don’t have two pans, bake the batter in one pan and slice it horizontally once cooled to create layers.
- Personal Touch: I once added edible silver stars alongside the gold drip to make a night sky effect for a friend who adored astronomy. It looked incredible and was surprisingly simple!
Serving & Storage Suggestions
This cake is best served at room temperature to bring out the full chocolate richness and let the ganache’s creaminess shine. I like to slice it with a sharp serrated knife to keep the edges neat.
Pair it with fresh berries or a dollop of whipped cream to balance the sweetness. For drinks, a rich coffee or a light dessert wine complements beautifully.
Store any leftovers covered in the refrigerator for up to 4 days. Before serving again, let the slices sit out for 20-30 minutes to soften. You can also freeze the cake layers separately for up to 2 months—wrap tightly to avoid freezer burn.
The gold drip and painted design hold up well in the fridge, but keep the cake covered to prevent any drying out. Over time, the flavors meld nicely, making it even more delicious the next day.
Nutritional Information & Benefits
Each slice (assuming 12 slices per cake) contains approximately:
| Calories | 380 kcal |
|---|---|
| Fat | 22g |
| Carbohydrates | 42g |
| Protein | 5g |
| Sugar | 30g |
Chocolate and cocoa powder are rich in antioxidants and may boost mood and heart health, making this cake a little celebration of both taste and wellness. Using buttermilk adds a tangy depth while keeping the crumb tender and moist.
If you’re mindful of allergens, note that this recipe contains dairy, gluten, and eggs. The substitutions mentioned earlier can help make it more inclusive.
Conclusion
The Perfect Gold Drip Chocolate Birthday Cake with Zodiac Design is more than just a cake; it’s a celebration of chocolate, art, and personality all rolled into one. Whether you’re baking for a last-minute birthday or planning ahead for a special occasion, this recipe proves that you don’t need to be a pro to create something stunning and delicious.
I keep coming back to this cake because it brings joy not only in the eating but in the making—the gold drip that sparkles, the hand-painted zodiac that tells a story. Give it a try, make it your own, and don’t be afraid to add your own creative spin.
If you try this recipe, I’d love to hear how your cake turned out or what zodiac signs you painted! Share your photos or tips in the comments below—let’s celebrate these little baking victories together.
FAQs
Can I use a different size cake pan for this recipe?
Yes! If you use a 9-inch pan, expect slightly thinner layers and adjust baking time to about 25-30 minutes. For smaller pans, increase baking time accordingly.
How do I prevent the gold drip from running too far down the cake?
Chill your cake’s crumb coat well before applying the drip. Use a slightly thicker drip ganache and apply slowly, controlling the drip length with a spoon or piping bag.
Can I make the cake ahead of time?
Absolutely. Bake the layers up to 2 days in advance and keep wrapped tightly in the fridge. Assemble and decorate the day of serving for best results.
What if I don’t have edible gold dust?
You can skip the gold or use edible gold leaf sheets for a different but equally stunning look. Alternatively, white chocolate drip alone still looks elegant.
Is the zodiac design difficult to paint?
It takes a steady hand, but with a fine brush and a little patience, anyone can do it. Practice on parchment paper first if needed, and remember that imperfections add charm!
Pin This Recipe!
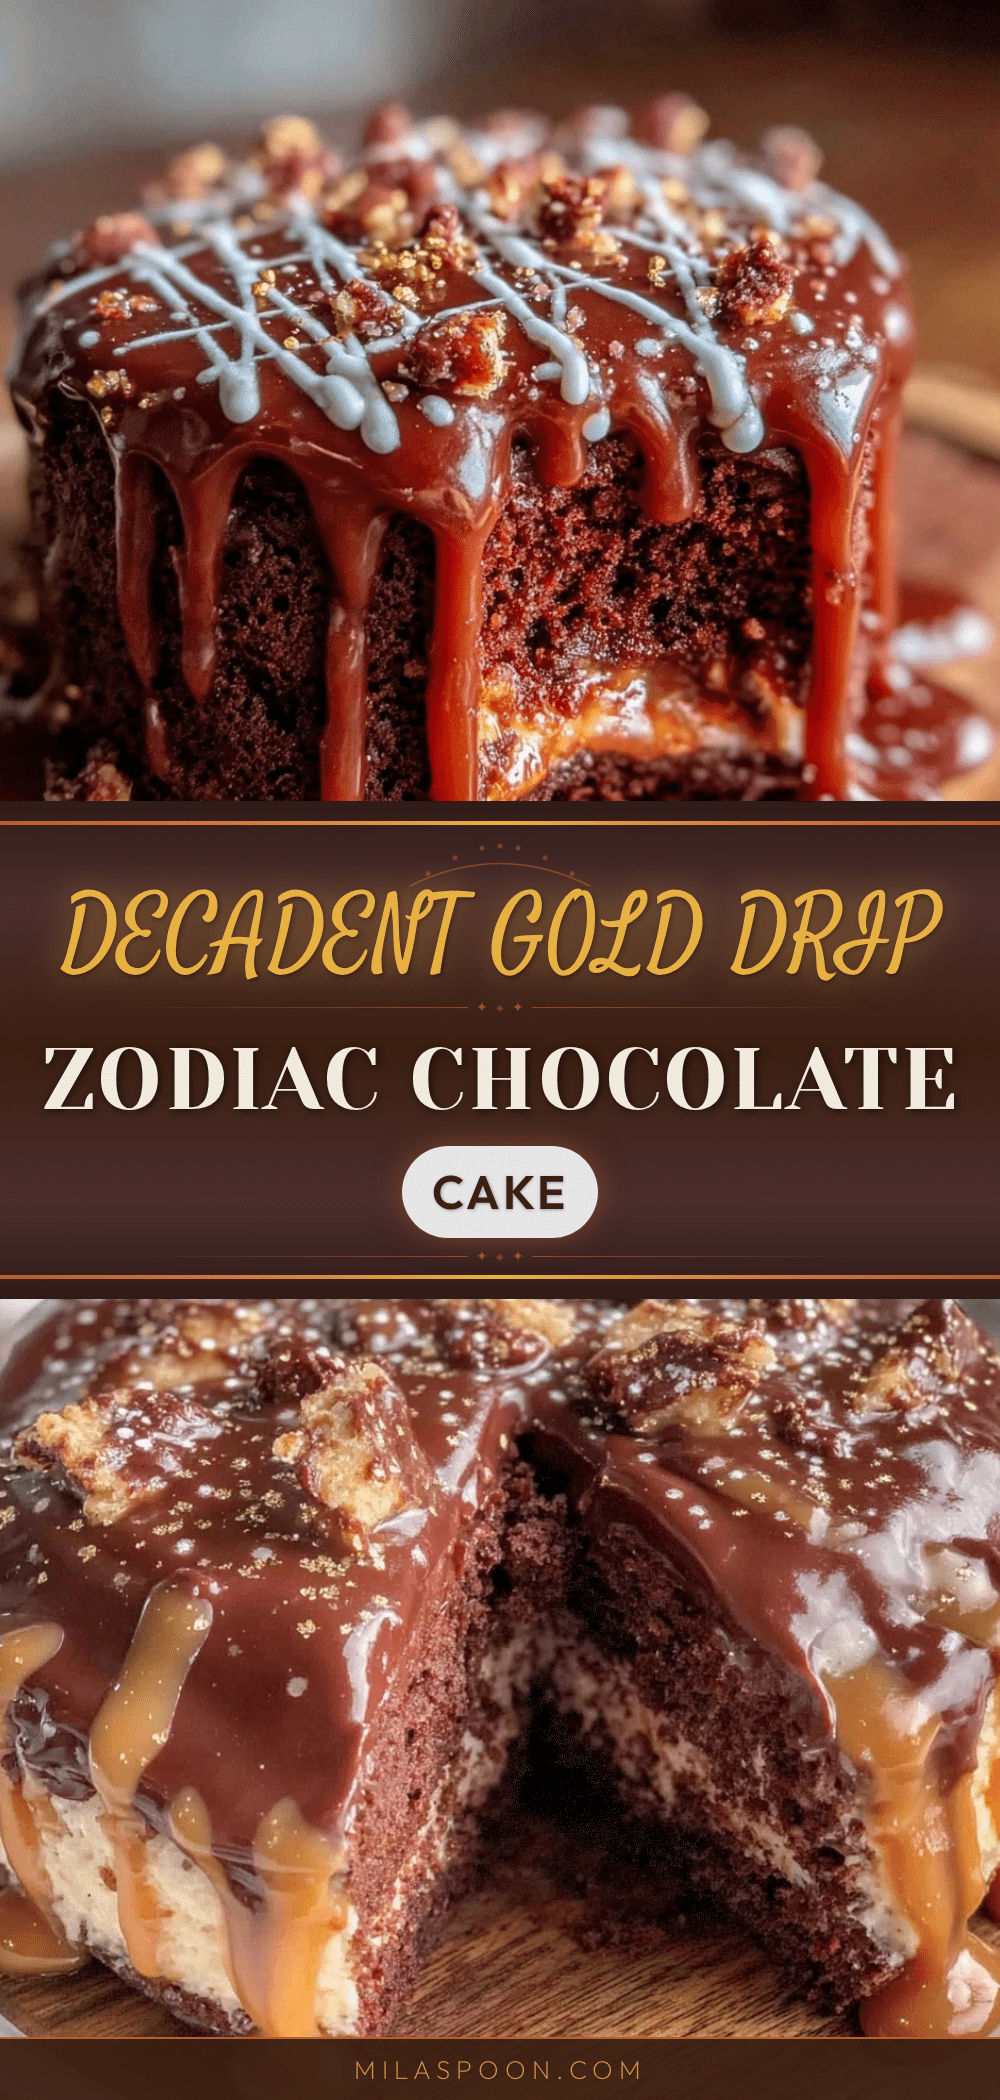
Perfect Gold Drip Chocolate Birthday Cake with Zodiac Design
An elegant and personalized chocolate birthday cake featuring moist chocolate layers, creamy ganache filling, a shimmering gold drip, and a hand-painted zodiac design. Perfect for celebrations and impressing guests with minimal fuss.
- Prep Time: 30 minutes
- Cook Time: 35 minutes
- Total Time: 2 hours
- Yield: 12 servings
- Category: Dessert
- Cuisine: American
Ingredients
- All-purpose flour – 2 cups (240g), sifted
- Granulated sugar – 1 ¾ cups (350g)
- Cocoa powder (unsweetened) – ¾ cup (75g)
- Baking powder – 1 ½ tsp
- Baking soda – 1 ½ tsp
- Salt – 1 tsp
- Large eggs – 2, room temperature
- Buttermilk – 1 cup (240ml) or milk with 1 tbsp lemon juice
- Vegetable oil – ½ cup (120ml)
- Boiling water – 1 cup (240ml)
- Vanilla extract – 2 tsp
- Heavy cream – 1 cup (240ml) for ganache
- Bittersweet or semi-sweet chocolate chips – 8 oz (225g)
- Unsalted butter – 2 tbsp, softened
- White chocolate chips – ½ cup (90g) for gold drip
- Heavy cream – ¼ cup (60ml) for gold drip
- Edible gold luster dust – 1 tsp mixed with 1 tbsp clear vanilla extract or vodka
- Black edible food coloring gel for zodiac design
- Fine food-safe paintbrush
- Optional: silver edible dust for constellation stars
Instructions
- Preheat oven to 350°F (175°C). Grease two 8-inch cake pans and line bottoms with parchment paper.
- In a large bowl, sift together flour, sugar, cocoa powder, baking powder, baking soda, and salt. Whisk to combine.
- In a separate bowl, beat eggs, buttermilk, vegetable oil, and vanilla extract until smooth. Pour into dry ingredients and stir gently.
- Slowly add boiling water to the batter, stirring carefully. Batter will be thin.
- Divide batter evenly between prepared pans. Bake 30-35 minutes or until toothpick inserted comes out clean.
- Cool cakes in pans for 10 minutes, then transfer to wire racks to cool completely (about 1 hour).
- For ganache, heat 1 cup heavy cream until simmering. Pour over chocolate chips in a bowl. Let sit 5 minutes, then stir until smooth. Add softened butter and mix until glossy. Chill until spreadable.
- Assemble cake by placing one layer on serving plate. Spread ganache evenly. Top with second layer and cover entire cake with thin crumb coat of ganache. Chill 20 minutes.
- For gold drip, heat ¼ cup heavy cream and pour over white chocolate chips. Stir until smooth. Mix edible gold dust with vanilla extract or vodka and brush onto white chocolate ganache to create gold drip effect.
- Using spoon or piping bag, drip gold ganache over edges of chilled cake. Chill briefly to set.
- Paint zodiac constellation and symbols on cake with black edible gel using fine food-safe brush. Add silver edible dust dots for stars. Take time for precision.
Notes
The batter will be thin due to boiling water—do not add extra flour. Chill ganache until spreadable but not firm. Control gold drip with spoon or piping bag and chill crumb coat well before applying drip. Practice zodiac painting on parchment paper first. Use a turntable if available for easier decorating.
Nutrition
- Serving Size: 1 slice (1/12th of c
- Calories: 380
- Sugar: 30
- Fat: 22
- Carbohydrates: 42
- Protein: 5
Keywords: chocolate cake, birthday cake, gold drip cake, zodiac cake, chocolate ganache, edible gold, celebration cake, easy chocolate cake