Love this? Save it for later!
Share the inspiration with your friends
“These wings are better than the ones from that place on Third Street.” My brother-in-law, Dave, said that halfway through the first quarter, and honestly? I nearly dropped the platter. He’s the guy who will critique a restaurant’s wing sauce down to the level of cayenne used. So hearing him say that, with a greasy chin and a look of genuine surprise, felt like winning a small, very delicious Super Bowl.
That was the Sunday everything clicked. I had been chasing the perfect homemade wing for years – something that had the crackly skin of a deep-fried wing but didn’t leave my kitchen smelling like a fast-food joint for days. I wanted that same satisfying crunch, the kind that shatters when you bite into it, but I wanted it from my oven. This recipe for crispy baked chicken wings for football Sunday was the result of that obsession. It wasn’t a quick win, either. There were batches that came out chewy, batches that were dry, and one particularly sad attempt that was just steamed chicken skin. Not good.
But that Sunday, with the game on and a house full of people, everything was different. The secret wasn’t a fancy gadget or a deep fryer. It was a simple technique I’d stumbled upon – a little patience and a very specific drying method. The wings came out bronzed, shatteringly crisp, and so juicy inside that even my notoriously picky uncle went back for thirds. This isn’t just a snack; it’s the anchor of a good game day spread. It’s the thing that keeps people hovering around the kitchen island instead of just the TV. And honestly, it’s the recipe that made me the permanent wing-duty person in our family. I’m not mad about it.
Why You’ll Love This Recipe
Let’s be real – game day snacks can be a minefield of soggy, disappointing options. You want something that feels like a treat, something that delivers on that primal craving for salty, crispy, savory goodness. These crispy baked chicken wings for football Sunday do exactly that, and they do it without the mess and hassle of deep frying.
- Oven-Baked, Not Deep-Fried: You get that incredible, crackling crunch without the gallon of oil. Your kitchen stays clean, and you don’t have to deal with disposing of hot oil after the game.
- Perfect for a Crowd: This recipe scales beautifully. You can easily double or triple it for a party without needing any special equipment. Just a couple of baking sheets and you’re good.
- Simple, Pantry Ingredients: No weird, hard-to-find ingredients here. Chances are, you have almost everything you need right now. The magic is all in the technique, not a shopping list.
- Customizable Flavor: The base recipe is a classic, salty, peppery wing that’s perfect for tossing in any sauce you love. Buffalo, BBQ, garlic parmesan – you name it. This is your blank canvas.
- Always a Crowd-Pleaser: I have never, and I mean never, set down a platter of these wings and had them last longer than the first commercial break. They disappear. It’s a universal truth.
What sets this recipe apart is the “baking powder trick.” It’s not a secret in professional kitchens, but it’s a game-changer for home cooks. Baking powder raises the skin’s pH, which helps it break down and crisp up better than it ever could on its own. Combined with a long, slow dry in the fridge, it creates a texture that rivals any fried wing. This isn’t just another baked wing recipe – it’s the best version of itself. It’s the kind of snack that makes you close your eyes after the first bite, the kind that makes people ask for the recipe before the game is even over.
What Ingredients You Will Need
This recipe relies on a handful of simple, high-impact ingredients. Each one plays a crucial role in building flavor and achieving that perfect, shatteringly crisp skin. Don’t be tempted to skip or swap these without understanding the consequences.
- Chicken Wings (3 lbs): Look for party wings, which are already separated into drums and flats. If you buy whole wings, you’ll need to cut them yourself. I prefer a mix of drums and flats because everyone has a favorite. Make sure the wings are fresh, not frozen, for the best texture. If using frozen, thaw them completely in the refrigerator overnight.
- Baking Powder (2 teaspoons): This is the non-negotiable secret to crispy skin. It’s not baking soda – do not swap them! Baking powder is a different chemical compound and is essential for creating that bubbly, crispy exterior. Make sure it’s aluminum-free to avoid a metallic taste.
- Kosher Salt (1 ½ teaspoons): I use Diamond Crystal kosher salt. It’s less dense than table salt, so if you’re using a different brand or fine table salt, use half the amount. Salt is crucial for drawing out moisture and seasoning the meat all the way through.
- Garlic Powder (1 teaspoon): Adds a savory, aromatic depth without the moisture of fresh garlic, which would steam the skin. It’s a must.
- Onion Powder (1 teaspoon): Works in tandem with the garlic powder to build a savory, almost umami-like base flavor. It’s subtle but important.
- Black Pepper (1 teaspoon): Freshly ground is best. It adds a gentle heat and earthiness that complements the chicken.
- Neutral Oil (2 tablespoons): You need a light coating of oil to help the seasonings stick and to promote browning. Avocado oil, grapeseed oil, or canola oil all work perfectly. Avoid olive oil, which has a lower smoke point and can burn.
- For Serving (Optional but Recommended): Your favorite wing sauce (I love a classic buffalo sauce made with butter and Frank’s RedHot), celery sticks, carrot sticks, and blue cheese or ranch dressing for dipping.
For the best results, I recommend using a brand like Kirkland Signature for your party wings – they are consistently well-trimmed and fresh. When it comes to baking powder, I trust Rumford because it’s aluminum-free. These small brand choices can make a big difference in the final flavor and texture of your crispy baked chicken wings for football Sunday.
Equipment Needed
You don’t need a professional kitchen to make these wings, but a few key tools will make the process much easier and more successful. Don’t stress if you don’t have everything – I’ve included alternatives.
- Baking Sheets (2): Rimmed baking sheets are essential to catch any drips. I use half-sheet pans. You need two to avoid overcrowding, which traps steam and prevents crisping.
- Wire Racks (2): These are the real heroes. Placing the wings on a wire rack set inside the baking sheet allows hot air to circulate all around the chicken, ensuring even cooking and maximum crispiness. If you don’t have them, you can flip the wings halfway through cooking, but the results won’t be as good.
- Paper Towels: A lot of them. You will use these to thoroughly dry the chicken wings, which is the single most important step for crispy skin.
- Large Mixing Bowl: For tossing the wings with the oil and seasonings.
- Chef’s Knife & Cutting Board: If you bought whole wings, you’ll need these to separate the drums from the flats and to discard the wing tips (or save them for stock).
- Tongs: For moving the hot wings around on the baking sheet and for tossing them in sauce.
- Instant-Read Thermometer (Optional but Recommended): To ensure the chicken is cooked to a safe internal temperature of 165°F (74°C) without overcooking it.
If you don’t have wire racks, don’t panic. You can still make this recipe. Just line your baking sheets with aluminum foil and place the wings directly on the foil. You’ll need to flip them halfway through the cooking time, and the bottom skin won’t be quite as crispy, but they’ll still be delicious. I’ve been there, and a good sauce covers a multitude of sins!
Preparation Method
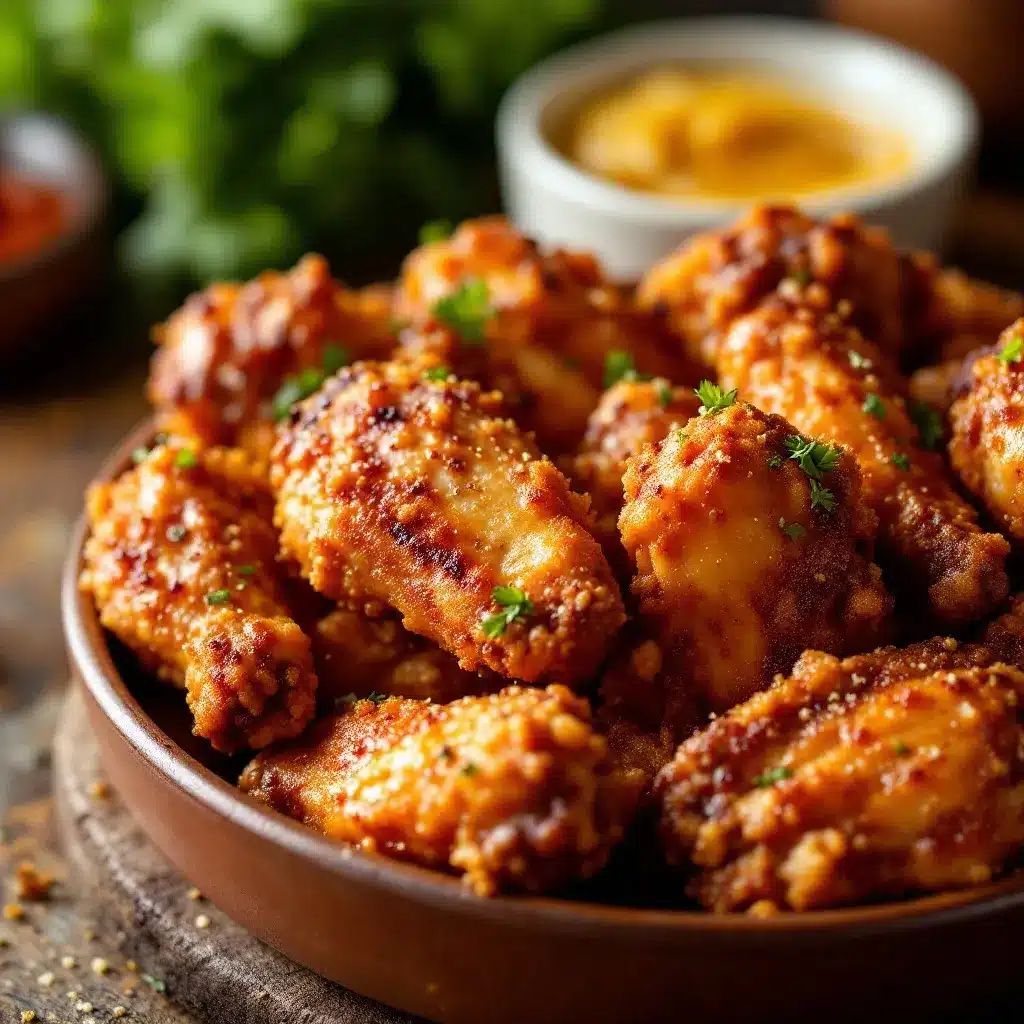
This is where the magic happens. Follow these steps carefully, and you will be rewarded with the best crispy baked chicken wings for football Sunday you’ve ever made. Patience is your friend here.
- Prep the Wings (15 minutes): Rinse the chicken wings under cold water and pat them extremely dry with paper towels. This is not a step to rush. You want the skin to be as dry as humanly possible. If you bought whole wings, use a sharp chef’s knife to cut through the joint to separate the drumette from the flat. Discard the wing tip or save it for stock. Place the separated pieces in a large mixing bowl.
- Dry Brine (8-24 hours, but at least 1 hour): This is the step that separates good wings from great wings. In a small bowl, combine the baking powder, kosher salt, garlic powder, onion powder, and black pepper. Sprinkle this mixture over the wings and toss well to coat every piece evenly. Place a wire rack inside each of your baking sheets. Arrange the wings in a single layer on the racks, making sure none of them are touching. Place the baking sheets, uncovered, in the refrigerator. This allows the skin to dry out further, which is the key to that shatteringly crispy texture. If you can do this for 8-24 hours, you’ll be rewarded with the best results. Even an hour makes a noticeable difference.
- Preheat and Prep for Roasting (20 minutes): When you’re ready to cook, take the wings out of the refrigerator and let them sit at room temperature for about 20 minutes. Meanwhile, preheat your oven to 425°F (220°C). Position one rack in the upper third and one rack in the lower third of the oven.
- Roast the Wings (45-50 minutes): Drizzle the neutral oil over the wings and toss gently to coat. You can do this right on the baking sheet. Make sure the wings are still in a single, non-touching layer on the wire racks. Place one sheet on the top rack and one on the bottom rack. Roast for 25 minutes. Then, remove the sheets from the oven, flip each wing over using tongs, and swap the positions of the baking sheets (the one on top goes to the bottom, and vice versa). This ensures even cooking. Roast for another 20-25 minutes, or until the wings are deep golden brown, the skin is incredibly crispy, and the internal temperature of the thickest part of the wing reaches 165°F (74°C) on an instant-read thermometer.
- Sauce and Serve (5 minutes): If you’re tossing them in a sauce, do it right away while they’re hot. Place the wings in a large bowl, pour your desired sauce over them, and toss vigorously until every wing is evenly coated. Return them to the wire rack for a minute to let any excess sauce drip off, or serve them immediately on a platter with your favorite dipping sauces and veggies.
Pro-Tip: For an even crispier finish, after you flip the wings at the 25-minute mark, you can turn the oven up to 450°F (230°C) for the last 10-15 minutes. Keep a close eye on them to prevent burning. The smell in your kitchen will be absolutely unreal.
Cooking Tips & Techniques
Over the years, I’ve made every mistake in the book with these wings. I’ve served soggy wings, burnt wings, and wings that were somehow both undercooked and dry. Here’s what I’ve learned so you don’t have to repeat my failures.
The Drying is Everything. I cannot stress this enough. Moisture is the enemy of crispy skin. If you skip the drying step or rush through it, your wings will steam instead of roast. The combination of a thorough pat-down with paper towels and an overnight rest in the fridge is the absolute best way to get that crackling skin. If you’re short on time, at least let them sit uncovered in the fridge for an hour after seasoning.
Don’t Crowd the Pan. This is the second most common mistake. If the wings are touching each other on the baking sheet, they will trap steam and become soggy. They need space for the hot air to circulate around each piece. Use two baking sheets if you need to, and make sure there’s a little gap between each wing. It’s better to roast them in batches than to overcrowd them.
The Baking Powder is Not Optional. I’ve had people ask me if they can skip it or use baking soda. Don’t. Baking powder is what creates that bubbly, shatteringly crisp skin. Baking soda will leave a horrible metallic taste. If you don’t have baking powder, you can try using cornstarch (about 1 tablespoon per pound of wings), but the texture will be different – more of a coating than an integrated crispiness.
Timing is Everything. The cooking time can vary slightly depending on your oven and the size of the wings. The first time you make these, start checking them at the 40-minute mark. You’re looking for a deep, golden brown color and skin that looks tight and bubbly. An instant-read thermometer is your best friend here. Once they hit 165°F, they’re done. Overcooking them will dry out the meat, even if the skin is perfect.
My Biggest Failure: I once tried to speed things up by using a convection oven without adjusting the temperature. The wings were burnt on the outside and raw on the inside. If you’re using a convection oven, reduce the temperature by 25°F (about 15°C) and start checking for doneness a few minutes earlier.
Variations & Adaptations
One of the best things about these crispy baked chicken wings for football Sunday is how versatile they are. Once you have the perfect crispy base, the flavor possibilities are endless. Here are a few of my favorite variations.
- Classic Buffalo Wings: The most popular variation, and for good reason. While the wings are roasting, melt ½ cup of unsalted butter in a small saucepan. Whisk in ¾ cup of your favorite hot sauce (Frank’s RedHot is the gold standard), 1 tablespoon of white vinegar, and a pinch of cayenne pepper. Toss the hot wings in this sauce and serve immediately with blue cheese dressing and celery sticks. If you love this style, you might also enjoy our crispy bang bang shrimp for another game day favorite.
- Garlic Parmesan Wings: A rich, savory, and utterly addictive option. While the wings are hot, toss them in a mixture of ¼ cup of melted butter, 4 finely minced garlic cloves (or 1 teaspoon of garlic powder), ½ cup of freshly grated Parmesan cheese, and 2 tablespoons of chopped fresh parsley. The cheese will stick to the hot wings and create a delicious, savory crust.
- Honey Sriracha Glaze: For those who love a sweet and spicy kick. Whisk together ¼ cup of honey, 3 tablespoons of sriracha, 1 tablespoon of rice vinegar, and a pinch of sesame seeds. Toss the hot wings in this glaze and garnish with sliced green onions and more sesame seeds.
- Smoky Chipotle Lime Wings: This is my personal go-to when I want something a little different. Blend ½ cup of sour cream or Greek yogurt with 2 chipotle peppers in adobo sauce, the juice of 2 limes, and a pinch of salt. Toss the wings in this creamy, smoky, and tangy sauce. It’s a flavor explosion.
- Dry Rub Wings: If you want to skip the sauce altogether, you can create a custom dry rub. My favorite is a mix of 1 tablespoon of smoked paprika, 1 teaspoon of brown sugar, 1 teaspoon of cumin, ½ teaspoon of cayenne, and ½ teaspoon of dried oregano. Add this to the baking powder and salt mixture in step 2 of the preparation method.
For a lighter game day option that’s still packed with flavor, try our crunchy Asian sesame cucumber noodle salad. It’s a refreshing counterpoint to all the rich, savory wings.
Serving & Storage Suggestions
These wings are best served immediately, straight from the oven, while the skin is at its peak crispiness. But I know that’s not always possible, especially on game day when you’re juggling a million things. Here’s how to serve and store them like a pro.
Serving: Pile the hot, sauced wings onto a large platter. I like to line the platter with a few layers of paper towels to absorb any excess sauce or grease. Arrange celery sticks, carrot sticks, and small bowls of blue cheese and ranch dressing around the wings for dipping. For a heartier spread, these wings pair beautifully with a cozy roasted tomato basil soup and some grilled cheese croutons for dipping. If you’re serving them as part of a larger buffet, keep them warm in a low oven (200°F) on the wire racks for up to 30 minutes.
Storage: Leftover wings (if you have any!) should be cooled completely to room temperature. Store them in an airtight container in the refrigerator for up to 4 days. The skin will soften significantly during storage, but don’t worry – you can bring the crispiness back.
Reheating: This is crucial. Do not use the microwave! It will turn your beautiful wings into a rubbery, sad mess. The best way to reheat them is in the oven. Preheat your oven to 400°F (200°C). Place the wings on a wire rack set over a baking sheet (this allows air to circulate). Reheat for 8-12 minutes, or until they are hot and the skin has crisped back up. You can also use an air fryer at 375°F (190°C) for 4-6 minutes.
Flavor Development: Here’s a little secret: These wings actually taste even better the next day if you’re eating them cold or reheated. The flavors in the dry brine have more time to penetrate the meat, making the chicken itself more flavorful. Cold wings from the fridge are a guilty pleasure of mine, especially with a little extra hot sauce.
Nutritional Information & Benefits
Let’s be honest – chicken wings aren’t a health food, but they can be a part of a balanced diet, especially when baked instead of fried. Here’s a general breakdown for a serving of about 4-5 wings (without sauce).
- Estimated Values (per serving): Calories: 350-400, Fat: 25-30g, Protein: 28-32g, Carbohydrates: 0-1g.
- High-Quality Protein: Chicken wings are a great source of lean protein, which is essential for muscle building and repair. The protein content helps keep you feeling full and satisfied, which is a good thing when you’re snacking all day.
- Healthy Fats: The skin contains a good amount of monounsaturated and polyunsaturated fats, which are healthier than the saturated fats found in fried foods. Baking them with a neutral oil like avocado oil adds more of these beneficial fats.
- Dietary Considerations: This recipe is naturally gluten-free, low-carb, and keto-friendly, as long as you avoid sugary sauces. It’s also free of most common allergens (dairy, nuts, soy) when made with a simple dry rub.
- Potential Allergens: Be mindful of the sauces you use. Buffalo sauce is typically dairy-free, but blue cheese dressing obviously is not. Always check labels if you’re cooking for someone with allergies.
From a personal wellness perspective, I love that I can enjoy a game day classic without the heavy, greasy feeling that comes from deep-fried wings. Knowing exactly what’s in them – just chicken, spices, and a little oil – makes me feel a lot better about going back for that third helping. It’s about making smarter choices, not depriving yourself.
Conclusion
These crispy baked chicken wings for football Sunday are more than just a snack. They’re a ritual. They’re the smell that pulls everyone into the kitchen before the kickoff. They’re the first thing to disappear from the coffee table. They’re the recipe that will earn you a permanent spot in your friends’ and family’s game day rotation. I’ve made these for Super Bowl parties, regular season games, and even just a quiet Sunday afternoon with a good movie. They never disappoint.
I really hope you give this recipe a try. Don’t be afraid to make it your own – play with the spices, experiment with different sauces, and find your perfect wing. That’s the beauty of cooking. And when you do make them, I’d love to hear about it. Leave a comment below and tell me how they turned out, or share a photo of your wing spread on social media. Tag me so I can see your creation!
Trust me on this one. Your game day will never be the same. Go make some wings, gather your people, and enjoy every single crispy, delicious bite. You’ve got this.
Frequently Asked Questions
Can I use frozen chicken wings for this recipe?
Yes, you can, but you must thaw them completely in the refrigerator first. Frozen wings will release too much water as they cook, which will steam the skin and prevent it from getting crispy. Make sure they are fully thawed and then pat them very dry before starting the dry brine.
My wings came out soggy. What did I do wrong?
The most common reasons for soggy wings are not drying them thoroughly enough before cooking, overcrowding the baking sheet, or not using enough baking powder. Make sure you pat the wings very dry with paper towels, give them space on the wire rack, and don’t skip the baking powder.
Can I make these wings in an air fryer?
Absolutely! The air fryer is fantastic for wings. Follow the same dry brine steps. Preheat your air fryer to 400°F (200°C). Cook the wings in a single layer (you may need to do it in batches) for 20-25 minutes, shaking the basket halfway through, until they are golden and crispy. The cooking time will be shorter than the oven.
Is the overnight dry brine really necessary?
It’s not strictly necessary, but it makes a huge difference. The overnight rest in the fridge allows the skin to dry out significantly, which is the key to that shatteringly crispy texture. If you’re short on time, even a 1-hour rest will help. If you’re really in a rush, just make sure the wings are as dry as possible before seasoning.
What’s the best way to reheat leftover wings?
The oven or air fryer is your best bet. Avoid the microwave at all costs, as it will make the skin rubbery. Reheat them in a 400°F (200°C) oven on a wire rack for 8-12 minutes, or in an air fryer at 375°F (190°C) for 4-6 minutes. This will restore their crispiness perfectly.
Pin This Recipe!
Crispy Baked Chicken Wings for Football Sunday: Best Game Day Snack

These oven-baked chicken wings are shatteringly crisp and juicy inside, thanks to a simple baking powder trick and a dry brine. Perfect for game day, they rival any deep-fried wing without the mess.
- Prep Time: 15 minutes (plus 8-24 hours dry brine)
- Cook Time: 45-50 minutes
- Total Time: 1 hour 5 minutes to 1 hour 10 minutes (plus dry brine time)
- Yield: 4 servings 1x
- Category: Appetizer
- Cuisine: American
Ingredients
- 3 lbs chicken wings (party wings, drums and flats)
- 2 teaspoons baking powder (aluminum-free)
- 1 ½ teaspoons kosher salt (Diamond Crystal recommended; use half if using table salt)
- 1 teaspoon garlic powder
- 1 teaspoon onion powder
- 1 teaspoon black pepper (freshly ground)
- 2 tablespoons neutral oil (avocado, grapeseed, or canola oil)
- For serving (optional): your favorite wing sauce (e.g., buffalo sauce made with butter and Frank’s RedHot), celery sticks, carrot sticks, blue cheese or ranch dressing
Instructions
- Prep the Wings (15 minutes): Rinse the chicken wings under cold water and pat them extremely dry with paper towels. If using whole wings, cut through the joint to separate drumettes from flats; discard wing tips or save for stock. Place separated pieces in a large mixing bowl.
- Dry Brine (8-24 hours, but at least 1 hour): In a small bowl, combine baking powder, kosher salt, garlic powder, onion powder, and black pepper. Sprinkle mixture over wings and toss well to coat evenly. Place a wire rack inside each of two rimmed baking sheets. Arrange wings in a single layer on racks, ensuring none are touching. Place baking sheets, uncovered, in the refrigerator for at least 1 hour, ideally 8-24 hours.
- Preheat and Prep for Roasting (20 minutes): Remove wings from refrigerator and let sit at room temperature for 20 minutes. Preheat oven to 425°F (220°C). Position one rack in the upper third and one in the lower third of the oven.
- Roast the Wings (45-50 minutes): Drizzle neutral oil over wings and toss gently to coat. Ensure wings are still in a single, non-touching layer on wire racks. Place one sheet on the top rack and one on the bottom rack. Roast for 25 minutes. Remove sheets from oven, flip each wing using tongs, and swap the positions of the baking sheets. Roast for another 20-25 minutes, until wings are deep golden brown, skin is crispy, and internal temperature reaches 165°F (74°C).
- Sauce and Serve (5 minutes): If tossing in sauce, do so immediately while wings are hot. Place wings in a large bowl, pour desired sauce over them, and toss vigorously until evenly coated. Return to wire rack for a minute to let excess sauce drip off, or serve immediately on a platter with dipping sauces and veggies.
Notes
The baking powder trick is essential for crispy skin—do not substitute baking soda. For even crispier finish, increase oven to 450°F (230°C) for the last 10-15 minutes after flipping. If using a convection oven, reduce temperature by 25°F (15°C) and check doneness earlier. Leftover wings can be reheated in a 400°F (200°C) oven on a wire rack for 8-12 minutes or in an air fryer at 375°F (190°C) for 4-6 minutes.
Nutrition
- Serving Size: 4-5 wings
- Calories: 375
- Sodium: 800
- Fat: 28
- Saturated Fat: 8
- Carbohydrates: 1
- Protein: 30
Keywords: crispy baked chicken wings, game day snack, football Sunday, oven baked wings, buffalo wings, party wings, crispy wings, baked chicken wings


