Love this? Save it for later!
Share the inspiration with your friends
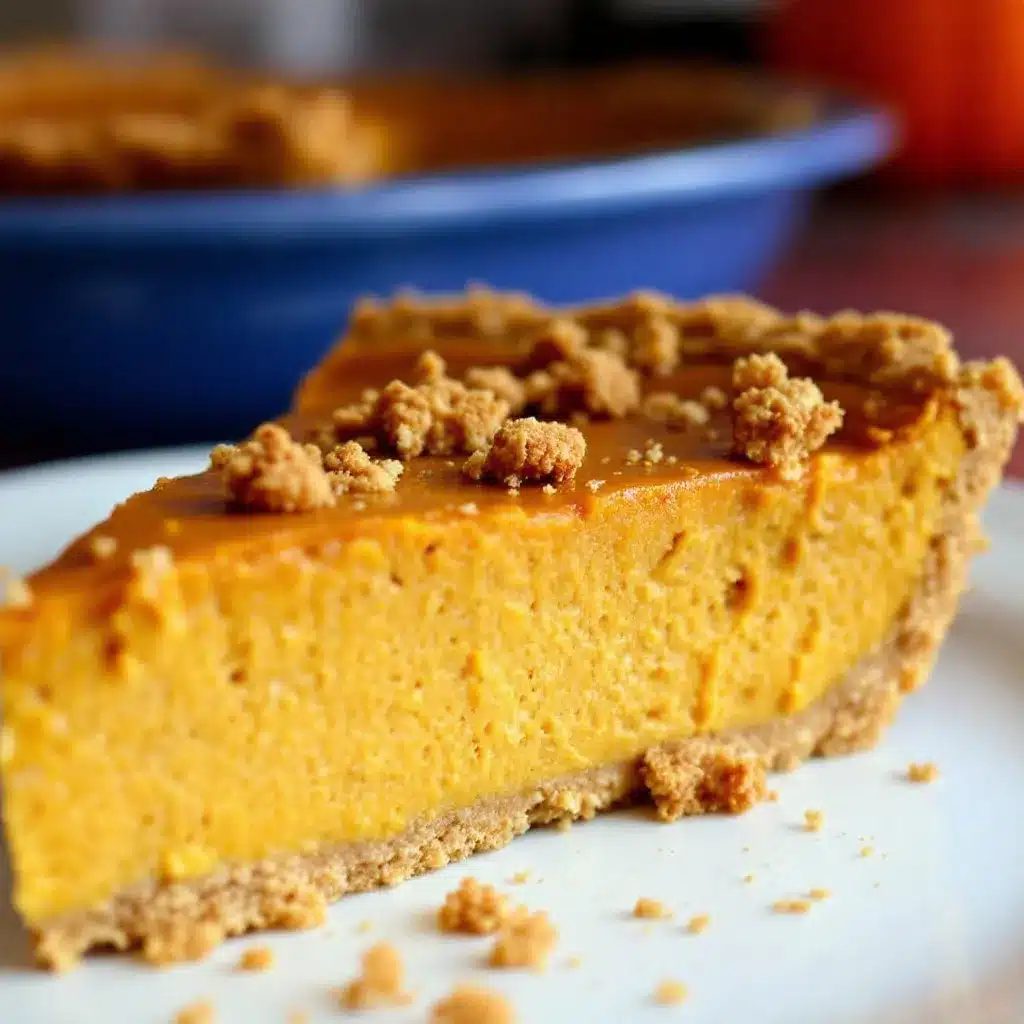
The pie dish came back to the kitchen completely empty. Not a crumb left on the plate. My sister-in-law actually licked the spatula clean when she thought no one was looking — I saw her do it. That’s when I knew this no-bake pumpkin pie was something special. I hadn’t planned on it becoming the star of Thanksgiving dessert, but there it was, stealing the show from the oven-baked pies I’d spent hours on.
Here’s the thing — I never wanted to make a pumpkin pie that required turning on the oven. The oven was already packed with stuffing, roasted vegetables, and a casserole that my aunt insists on bringing every year. So this easy no-bake pumpkin pie with graham cracker crust became my little secret weapon. It started as a backup plan, honestly. A way to have dessert without fighting for oven space.
The first time I made it, I was nervous. Could a no-bake pie really deliver that familiar pumpkin spice flavor and creamy texture we all crave? Turns out, it can — and then some. The filling sets up beautifully in the fridge, the graham cracker crust stays perfectly crunchy, and the whole thing tastes like you spent hours in the kitchen. But you didn’t. That’s the beauty of this easy no-bake pumpkin pie with graham cracker crust.
Now it’s become my go-to fall dessert for every gathering. Potlucks, Friendsgiving dinners, random Tuesday cravings — this pie shows up and delivers every single time. No oven required, no stress involved, just pure pumpkin bliss in every slice.
Why You’ll Love This Recipe
Let me tell you why this easy no-bake pumpkin pie with graham cracker crust has earned a permanent spot in my dessert rotation. I’ve tested this recipe at least a dozen times across different gatherings, and it never fails to impress. Here’s what makes it stand out:
- No Oven Needed — This is the biggest win. Your oven stays free for everything else, and you still get a perfect pumpkin pie. It’s a game-changer during the busy holiday season.
- Simple Ingredients — No fancy grocery store runs required. You probably already have most of these pantry staples in your kitchen right now. Pumpkin puree, cream cheese, whipped topping, and graham crackers — that’s the backbone of this beauty.
- Perfect for Busy Hosts — Whether you’re hosting Thanksgiving or bringing dessert to a fall potluck, this pie comes together in about 20 minutes of active prep time. The fridge does the rest of the work.
- Crowd-Pleaser — I’ve served this alongside traditional baked pumpkin pies, and people consistently reach for another slice of the no-bake version. The texture is incredibly creamy and luscious.
- Make-Ahead Friendly — This pie actually gets better after sitting in the fridge overnight. The flavors meld together, and the crust firms up perfectly. You can make it a day or two in advance.
What really sets this easy no-bake pumpkin pie apart is the texture. The filling is silky smooth without being too dense, and the graham cracker crust provides that satisfying crunch. It’s not just a compromise because you can’t use the oven — it’s genuinely the best pumpkin pie I’ve ever made. The first time I took a bite, I closed my eyes and just smiled. That’s the kind of dessert this is.
I’ve also tested this recipe with different dietary needs in mind. You can easily make it gluten-free by using gluten-free graham crackers, and it’s naturally egg-free since there’s no baking involved. Trust me, this pie delivers comfort without the complexity.
What Ingredients You Will Need
This easy no-bake pumpkin pie with graham cracker crust uses simple, everyday ingredients to create something truly special. I’ve tested each component carefully to make sure every bite is perfect. Here’s what you’ll need:
For the Graham Cracker Crust
- 2 cups graham cracker crumbs (about 14-16 full sheets) — I prefer Honey Maid brand for consistent texture. You can crush them in a food processor or place them in a zip-top bag and roll with a rolling pin.
- 1/3 cup granulated sugar — This adds just enough sweetness to balance the buttery graham crackers.
- 1/2 cup unsalted butter, melted — Use real butter here, not margarine. The flavor difference is noticeable. Salted butter works too — just reduce the added salt elsewhere.
- 1/4 teaspoon salt — A pinch enhances all the flavors and prevents the crust from tasting flat.
For the No-Bake Pumpkin Filling
- 8 ounces cream cheese, softened to room temperature — This is crucial. Cold cream cheese will leave you with lumpy filling. Let it sit on the counter for at least 30 minutes before starting.
- 1 cup pumpkin puree — Not pumpkin pie filling. Pure pumpkin puree is what you want. Libby’s brand is my go-to for consistent results.
- 1/2 cup granulated sugar — Adds sweetness without overpowering the pumpkin flavor.
- 1/4 cup packed light brown sugar — This brings depth and a hint of molasses flavor that pairs beautifully with pumpkin.
- 2 teaspoons pumpkin pie spice — You can use store-bought or make your own blend (see my tip below).
- 1 teaspoon vanilla extract — Pure vanilla extract makes a difference. Skip the imitation stuff here.
- 1 1/2 cups cold heavy cream — This gets whipped into stiff peaks to give the filling its light, airy texture. Make sure it’s well-chilled.
- 2 tablespoons powdered sugar — Helps stabilize the whipped cream and adds a touch of sweetness.
For Garnish (Optional but Recommended)
- Whipped cream — Either homemade or store-bought. I love making extra whipped cream for serving.
- Ground cinnamon or pumpkin pie spice — A light dusting on top looks beautiful.
- Caramel sauce — Drizzle over each slice for extra decadence.
Ingredient Tip: For the best pumpkin pie spice blend, mix 2 teaspoons cinnamon, 1 teaspoon ginger, 1/2 teaspoon nutmeg, 1/2 teaspoon allspice, and 1/4 teaspoon cloves. Store any extra in a small jar for future baking projects. I keep mine right next to my spice rack for easy access during fall baking season.
Equipment Needed
You don’t need a fancy kitchen to make this easy no-bake pumpkin pie with graham cracker crust. Here’s what you’ll need:
- 9-inch pie dish — A standard glass or ceramic pie dish works perfectly. I use a deep-dish pie plate for extra filling.
- Food processor or zip-top bag and rolling pin — For crushing graham crackers. The food processor gives you the most consistent crumbs, but the bag method works fine in a pinch.
- Medium mixing bowl — For combining crust ingredients.
- Large mixing bowl — For the cream cheese and pumpkin mixture.
- Electric hand mixer or stand mixer — Whipping cream by hand is possible but takes serious arm strength. A mixer makes this step effortless.
- Rubber spatula — For folding the whipped cream into the pumpkin mixture gently.
- Measuring cups and spoons — Accuracy matters, especially with the spices.
- Plastic wrap — For covering the pie while it chills.
Budget-Friendly Tip: If you don’t own a food processor, place graham crackers in a sturdy zip-top bag and crush them with a rolling pin or even a heavy-bottomed skillet. It takes a few extra minutes but works just as well. I’ve done this plenty of times when my food processor was already dirty from another recipe.
Preparation Method
Let me walk you through making this easy no-bake pumpkin pie with graham cracker crust step by step. I’ve included all the little details that make the difference between a good pie and a great one.
Step 1: Make the Graham Cracker Crust
Start by crushing your graham crackers into fine crumbs. If using a food processor, pulse until you have uniform crumbs — about 20-30 seconds. No large pieces should remain. Transfer the crumbs to a medium bowl. Add the sugar and salt, then stir to combine. Pour in the melted butter and mix with a fork until every crumb is moistened. The mixture should look like wet sand and hold together when pressed between your fingers.
Press the mixture firmly into your 9-inch pie dish. Start with the bottom, using the bottom of a measuring cup or a flat glass to press it down evenly. Then work up the sides. Make sure the crust is compact — loose crumbs will fall apart when you slice the pie. Place the crust in the refrigerator to firm up while you make the filling, at least 15 minutes.
Step 2: Whip the Heavy Cream
In a large mixing bowl, combine the cold heavy cream and powdered sugar. Using an electric hand mixer or stand mixer fitted with the whisk attachment, beat on medium-high speed until stiff peaks form. This takes about 3-4 minutes. You’ll know it’s ready when you lift the beaters and the cream holds its shape without drooping. Be careful not to over-whip, or you’ll end up with butter. Set the whipped cream aside in the refrigerator while you prepare the pumpkin mixture.
Step 3: Make the Pumpkin Cream Cheese Base
In another large bowl, beat the softened cream cheese with an electric mixer until smooth and creamy — about 2 minutes. Scrape down the sides of the bowl with a rubber spatula. Add the pumpkin puree, granulated sugar, brown sugar, pumpkin pie spice, and vanilla extract. Beat on medium speed until everything is well combined and smooth. The mixture should be thick and fragrant. Taste it here — adjust the spices if you want more warmth. I usually add an extra 1/4 teaspoon of cinnamon because I love that flavor.
Step 4: Fold Everything Together
Remove the whipped cream from the refrigerator. Using a rubber spatula, gently fold about one-third of the whipped cream into the pumpkin mixture. This lightens the base and makes it easier to incorporate the rest. Add the remaining whipped cream and fold gently until no white streaks remain. Be patient here — folding means cutting through the center, scraping along the bottom, and turning the mixture over. Don’t stir vigorously or you’ll deflate all that lovely air.
Step 5: Assemble the Pie
Remove the chilled crust from the refrigerator. Spoon the pumpkin filling into the crust and spread it evenly with your spatula. The filling should come right to the top of the crust. Give the pie dish a gentle tap on the counter to release any air bubbles. Cover the pie loosely with plastic wrap, making sure the wrap doesn’t touch the surface of the filling.
Step 6: Chill and Set
Refrigerate the pie for at least 6 hours, but overnight is better. The filling needs time to firm up completely. I know it’s tempting to rush this step, but don’t. A properly chilled pie slices cleanly and holds its shape beautifully. If you’re short on time, 4 hours is the absolute minimum, but the texture won’t be as firm.
Step 7: Garnish and Serve
Once the pie is fully set, remove it from the refrigerator. If desired, pipe or dollop additional whipped cream around the edges. Dust lightly with cinnamon or pumpkin pie spice. Slice with a sharp knife, wiping the blade clean between cuts for neat slices. Serve cold directly from the refrigerator.
Cooking Tips & Techniques
After making this easy no-bake pumpkin pie with graham cracker crust more times than I can count, I’ve picked up some tricks that make the process smoother and the results more consistent. Let me share them with you.
Softening Cream Cheese the Right Way — This is probably the most common mistake I see. Cold cream cheese creates lumps that never fully disappear, no matter how long you beat it. Take the cream cheese out of the refrigerator at least 30 minutes before you start. If you forgot, unwrap it and microwave on low power in 10-second intervals until it’s soft to the touch but not hot. Trust me, smooth cream cheese is the foundation of a silky filling.
Chill Your Bowl and Beat — For the best whipped cream, put your mixing bowl and beaters in the freezer for 10-15 minutes before you start. Cold equipment helps the cream whip faster and hold its shape longer. I learned this trick after a few batches of limp whipped cream that wouldn’t stiffen up.
Don’t Skip the Crust Chilling — I know it’s tempting to pour the filling right into a warm crust, but chilling the crust first prevents it from becoming soggy. The cold butter in the crust needs time to re-solidify, creating a barrier that keeps the crust crunchy. I once skipped this step when I was in a hurry, and the crust turned out soft and crumbly. Never again.
Folding vs. Stirring — This is where many no-bake pies go wrong. Stirring the whipped cream into the pumpkin mixture deflates all the air you worked so hard to create. Use a gentle folding motion — cut through the center, scrape the bottom, and turn the mixture over. Repeat until just combined. A few small streaks of white are fine; overmixing is not.
Patience Is a Virtue — The hardest part of this recipe is waiting for the pie to set. I know because I’ve cut into a pie after only 4 hours and watched it slump into a messy puddle. Give it the full overnight chill if you can. The texture transforms from soft and scoopable to perfectly sliceable. Your patience will be rewarded.
Variations & Adaptations
One of the best things about this easy no-bake pumpkin pie with graham cracker crust is how adaptable it is. Here are some variations I’ve tried and loved:
Gluten-Free Version
Swap the regular graham crackers for gluten-free graham crackers. Most major brands now offer a gluten-free version that works perfectly. The rest of the ingredients are naturally gluten-free, so this is an easy switch. I’ve used Schar brand gluten-free graham crackers with excellent results.
Dairy-Free Adaptation
Use dairy-free cream cheese (Kite Hill or Tofutti work well) and coconut cream instead of heavy cream. Chill a can of full-fat coconut milk overnight, then scoop out the solid cream and whip it with powdered sugar. The texture is slightly different but still delicious. I made this version for a friend with dairy allergies, and she asked for the recipe immediately.
Maple Pumpkin Pie
Replace the granulated sugar with an equal amount of pure maple syrup. Reduce the heavy cream by 2 tablespoons to compensate for the extra liquid. The maple flavor pairs beautifully with pumpkin and adds a cozy fall twist. This has become my personal favorite variation.
Chocolate Graham Cracker Crust
Use chocolate graham crackers instead of regular ones for a chocolate-pumpkin combination that’s surprisingly amazing. The slight bitterness of the chocolate crust balances the sweet pumpkin filling perfectly. I discovered this combination by accident when I ran out of regular graham crackers, and now I make it intentionally.
Pumpkin Cheesecake Style
Add an extra 4 ounces of cream cheese for a denser, cheesecake-like texture. The filling will be thicker and richer, almost like a no-bake pumpkin cheesecake. Increase the chilling time to at least 8 hours for the best results.
Serving & Storage Suggestions
This easy no-bake pumpkin pie with graham cracker crust is incredibly versatile when it comes to serving and storing. Here’s everything you need to know.
Serving Temperature: Serve this pie cold, straight from the refrigerator. The filling is at its best when well-chilled. If you let it sit at room temperature for more than 15 minutes, it will start to soften and lose its structure. I usually take the pie out of the fridge right before serving and slice it immediately.
Presentation Ideas: For a beautiful presentation, pipe rosettes of whipped cream around the edge of the pie. Sprinkle with cinnamon or pumpkin pie spice. Drizzle caramel sauce over each slice for an extra touch of indulgence. I like to serve slices on small plates with a dollop of extra whipped cream on the side.
Complementary Dishes: This pie pairs beautifully with a warm cup of coffee or spiced apple cider. For a full fall dessert spread, serve it alongside moist pumpkin cream cheese swirl muffins with crunchy pecan topping or a slice of apple cider glazed bundt cake with cardamom crumb topping. The combination of flavors is absolutely divine.
Storage Instructions: Cover the pie tightly with plastic wrap or aluminum foil and store in the refrigerator for up to 5 days. The crust will stay crunchy for the first 2-3 days, then gradually soften. The filling remains creamy and delicious throughout. I’ve never had leftovers last longer than 3 days in my house, but technically it’s safe to eat for up to 5 days.
Freezing Instructions: This pie freezes beautifully. Prepare the pie completely, then wrap it tightly in plastic wrap followed by a layer of aluminum foil. Freeze for up to 3 months. To thaw, transfer to the refrigerator overnight. The texture remains nearly identical to fresh. I often make two pies at once — one for now and one for the freezer.
Reheating Note: Do not microwave this pie. It’s meant to be served cold. If you prefer a warmer dessert, let a slice sit at room temperature for 10-15 minutes before serving.
Nutritional Information & Benefits
While this easy no-bake pumpkin pie with graham cracker crust is definitely a treat, it does offer some nutritional benefits worth noting. Here’s what you should know:
Estimated Nutritional Values (per slice, 1/8 of pie):
- Calories: 380
- Total Fat: 26g
- Saturated Fat: 15g
- Cholesterol: 75mg
- Sodium: 280mg
- Total Carbohydrates: 34g
- Dietary Fiber: 2g
- Sugars: 22g
- Protein: 5g
Health Benefits: Pumpkin is packed with vitamin A, which supports eye health and immune function. It’s also rich in fiber and antioxidants. The cream cheese provides calcium and protein, while the graham cracker crust offers carbohydrates for energy. This isn’t a health food by any means, but it’s not empty calories either.
Dietary Considerations: This recipe is naturally egg-free and contains no artificial flavors or preservatives. It can be made gluten-free or dairy-free with simple substitutions (see variations above). The pie does contain nuts if you use certain graham cracker brands, so check labels if serving to someone with allergies.
My Personal Take: I believe in enjoying dessert without guilt. This pie is made with real ingredients, and that counts for something. A slice of this after a balanced meal is perfectly reasonable. Plus, the fact that it’s no-bake means you’re not spending hours in the kitchen — that’s a win for your mental health too.
Conclusion
This easy no-bake pumpkin pie with graham cracker crust has become my most-requested dessert for a reason. It delivers all the cozy pumpkin spice flavor you crave during the fall season without the stress of baking. The creamy filling, crunchy crust, and simple preparation make it a winner every single time.
I love that this recipe gives you permission to enjoy homemade pumpkin pie even on your busiest days. No oven required, no complicated techniques, just pure deliciousness that comes together in minutes. Whether you’re hosting Thanksgiving dinner, bringing dessert to a potluck, or just treating yourself on a random Tuesday, this pie delivers.
I’d love to hear how yours turns out! Leave a comment below and let me know if you tried any variations or if this became a new favorite in your household. Don’t forget to share your photos on social media and tag me — I love seeing your creations. And if you’re looking for more easy dessert inspiration, check out my chewy brown butter chocolate chip cookies with sea salt or this easy skillet peach crisp with oat streusel for more no-fuss dessert ideas.
Happy fall baking — or should I say, happy fall no-baking!
Frequently Asked Questions
Can I use pumpkin pie filling instead of pumpkin puree?
No, I wouldn’t recommend it. Pumpkin pie filling already contains sugar and spices, which would throw off the sweetness and seasoning in this recipe. Stick with 100% pure pumpkin puree for the best results. If you only have pumpkin pie filling on hand, reduce the sugar by half and skip the pumpkin pie spice, though the texture may still be slightly different.
How long does this no-bake pumpkin pie need to set?
At least 6 hours in the refrigerator, but overnight is ideal. The filling needs time to firm up completely so you can slice it cleanly. If you’re in a hurry, 4 hours is the absolute minimum, but the texture will be softer and more like a mousse than a sliceable pie. Plan ahead for the best results.
Can I make this pie ahead of time?
Absolutely! This pie is perfect for making ahead. Prepare it up to 2 days in advance and keep it covered in the refrigerator. The flavors actually meld together and improve over time. You can also freeze the fully assembled pie for up to 3 months — just thaw overnight in the refrigerator before serving.
Why did my crust turn out soggy?
A soggy crust usually happens when the crust isn’t chilled long enough before adding the filling, or if the crust wasn’t pressed firmly enough into the pie dish. Make sure to chill the crust for at least 15 minutes before adding the filling, and press the crumbs down really firmly. Using melted butter that’s not too hot also helps prevent sogginess.
Can I use a store-bought graham cracker crust?
Yes, you can use a store-bought crust to save even more time. Look for a 9-inch graham cracker crust in the baking aisle. The filling recipe makes enough for a standard deep-dish crust. The texture won’t be quite as good as homemade, but it’s a perfectly acceptable shortcut when you’re really short on time.
Pin This Recipe!
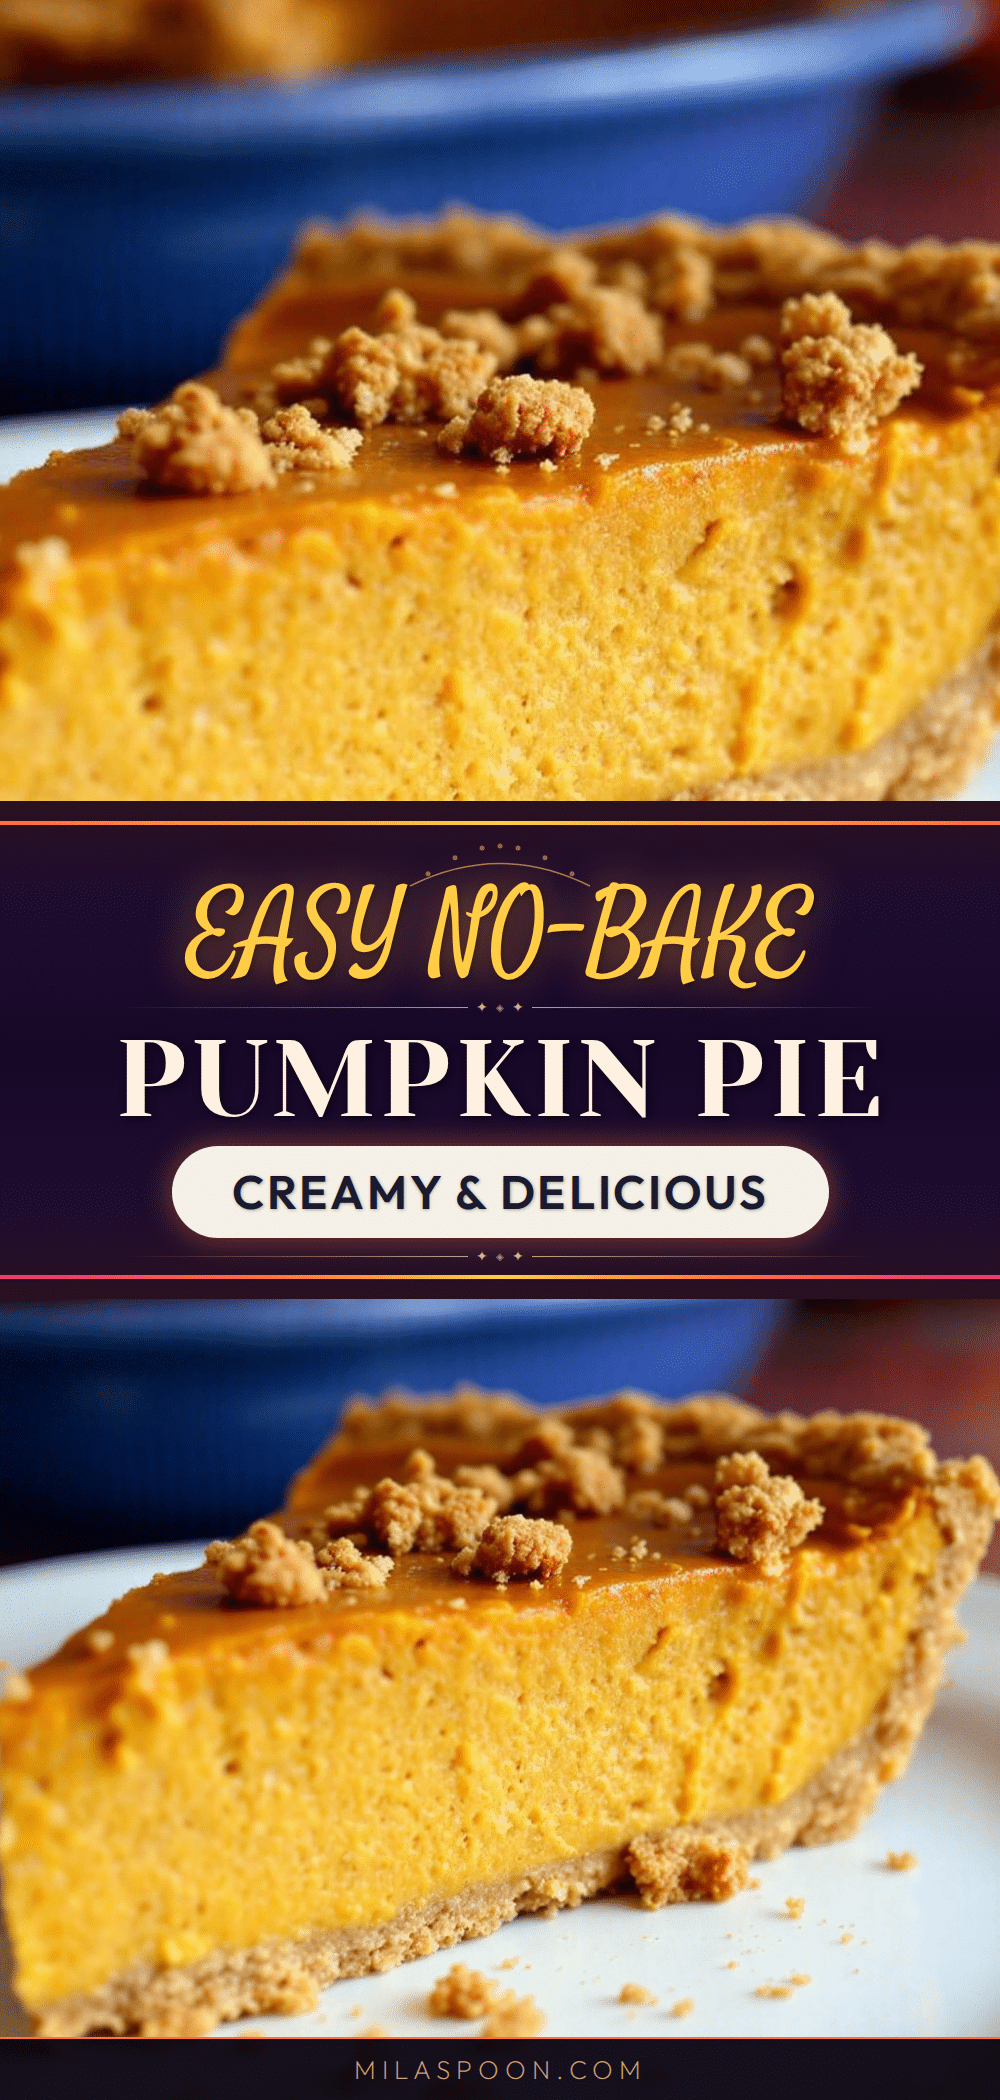
Easy No-Bake Pumpkin Pie with Graham Cracker Crust
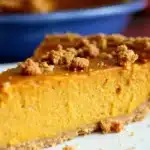
This easy no-bake pumpkin pie with graham cracker crust delivers all the cozy pumpkin spice flavor you crave without turning on the oven. The creamy filling sets up beautifully in the fridge, the crust stays perfectly crunchy, and it’s a crowd-pleaser at any fall gathering.
- Prep Time: 20 minutes
- Cook Time: 0 minutes
- Total Time: 6 hours 20 minutes (includes chilling)
- Yield: 8 servings 1x
- Category: Dessert
- Cuisine: American
Ingredients
- 2 cups graham cracker crumbs (about 14–16 full sheets)
- 1/3 cup granulated sugar
- 1/2 cup unsalted butter, melted
- 1/4 teaspoon salt
- 8 ounces cream cheese, softened to room temperature
- 1 cup pumpkin puree
- 1/2 cup granulated sugar
- 1/4 cup packed light brown sugar
- 2 teaspoons pumpkin pie spice
- 1 teaspoon vanilla extract
- 1 1/2 cups cold heavy cream
- 2 tablespoons powdered sugar
- Whipped cream for garnish (optional)
- Ground cinnamon or pumpkin pie spice for garnish (optional)
- Caramel sauce for garnish (optional)
Instructions
- Make the graham cracker crust: Crush graham crackers into fine crumbs. In a medium bowl, combine crumbs, 1/3 cup granulated sugar, and salt. Pour in melted butter and mix until every crumb is moistened. Press mixture firmly into a 9-inch pie dish. Refrigerate for at least 15 minutes.
- Whip the heavy cream: In a large bowl, combine cold heavy cream and powdered sugar. Beat on medium-high speed until stiff peaks form, about 3-4 minutes. Set aside in the refrigerator.
- Make the pumpkin cream cheese base: In another large bowl, beat softened cream cheese until smooth. Add pumpkin puree, 1/2 cup granulated sugar, brown sugar, pumpkin pie spice, and vanilla extract. Beat until well combined and smooth.
- Fold everything together: Gently fold about one-third of the whipped cream into the pumpkin mixture to lighten it. Add remaining whipped cream and fold gently until no white streaks remain.
- Assemble the pie: Remove chilled crust from refrigerator. Spoon filling into crust and spread evenly. Tap pie dish gently to release air bubbles. Cover loosely with plastic wrap.
- Chill and set: Refrigerate for at least 6 hours, preferably overnight, until filling is firm.
- Garnish and serve: Once set, garnish with whipped cream, cinnamon or pumpkin pie spice, and caramel sauce if desired. Slice with a sharp knife and serve cold.
Notes
For best results, chill the crust before adding filling to prevent sogginess. Use room temperature cream cheese for a smooth filling. The pie can be made up to 2 days ahead and stored covered in the refrigerator. It also freezes well for up to 3 months.
Nutrition
- Serving Size: 1 slice (1/8 of pie)
- Calories: 380
- Sugar: 22
- Sodium: 280
- Fat: 26
- Saturated Fat: 15
- Carbohydrates: 34
- Fiber: 2
- Protein: 5
Keywords: no-bake pumpkin pie, easy pumpkin pie, graham cracker crust, Thanksgiving dessert, fall dessert, no oven pumpkin pie