Love this? Save it for later!
Share the inspiration with your friends
The last straw disappeared from the platter before I’d even finished arranging the rosemary sprigs. My friend’s kid, the one who refuses to eat anything beige, had grabbed two and was nibbling the “fingertip” off with a grin that was honestly a little unsettling. I’d made these for a Halloween party, mostly as a joke, but the way people kept circling back to that tray told me something had clicked. These crispy severed-finger cheese straws with almond nails weren’t just a novelty—they were genuinely good.
I’d spent the week testing batch after batch of regular cheese straws, trying to get the texture just right. But it was a bag of slivered almonds in my pantry and a late-night thought about those old horror movie marathons that finally got me there. I wanted something that would make people laugh, sure, but I also wanted them to reach for a second one because it tasted incredible, not just because it looked weird. The first time I shaped the dough into those knobby little fingers and pressed an almond “nail” into the tip, I knew I was onto something. It was ridiculous, and it was perfect.
These cheese straws are flaky, buttery, and packed with sharp cheddar and a hint of cayenne. They’re the kind of snack that disappears at parties, and honestly, I think they’re even better the next day—if they last that long. They’re proof that a little bit of playful creepiness can make a simple recipe unforgettable.
Why You’ll Love This Recipe
Let’s be honest—most Halloween snacks are either overly sweet or visually impressive but totally bland. These crispy severed-finger cheese straws with almond nails break that mold. They deliver on both flavor and fun, and they’re way easier to make than they look. Here’s why they’ll become your go-to for spooky season:
- Quick & Easy: The dough comes together in about 15 minutes, and you only need 12-14 minutes in the oven. They’re perfect for last-minute party prep.
- Simple Ingredients: You probably already have everything in your kitchen. No weird gelatin molds or specialty food coloring required.
- Perfect for Halloween: Whether it’s a costume party, a spooky movie night, or a school classroom treat, these are guaranteed to get a reaction.
- Crowd-Pleaser: I’ve seen adults giggle and kids beg for more. The savory, cheesy flavor appeals to everyone, even picky eaters.
- Unbelievably Delicious: Forget the gimmick for a second. These are genuinely the best cheese straws I’ve ever made—flaky, salty, with a little kick of heat.
What makes this recipe different is the texture. I use a combination of cold butter and cream cheese in the dough, which gives the straws an almost puff-pastry-like flakiness without all the work. The almond “nails” toast in the oven and add a wonderful crunch that contrasts with the tender, buttery pastry. It’s not just another Halloween treat—it’s the one everyone will ask you to bring every year.
And honestly? There’s something deeply satisfying about watching someone’s face go from “ew, gross” to “wait, can I have another one?” in the span of about three seconds. That’s the magic of this recipe.
What Ingredients You Will Need
This recipe relies on a short list of pantry-friendly ingredients to create maximum flavor and that signature flaky texture. Each component plays a specific role, so here’s what you need and why it matters.
For the Dough
- All-purpose flour (1 ½ cups, 190g): The backbone of the dough. No need for bread flour or pastry flour here—standard all-purpose gives the perfect tender crumb.
- Sharp cheddar cheese (8 oz, 225g), finely grated: Use a block of cheese and grate it yourself. Pre-shredded cheese is coated in anti-caking agents that prevent it from melting smoothly, and you want that cheese to melt into every layer. I prefer an extra-sharp cheddar for the most flavor.
- Unsalted butter (½ cup, 113g), very cold and cubed: Cold butter is non-negotiable for flaky pastry. It creates steam pockets as it melts in the oven, giving you those delicate layers.
- Cream cheese (2 oz, 56g), cold: This is my secret ingredient. It adds a subtle tang and makes the dough incredibly tender without making it greasy. I’ve tried this recipe with just butter, and it’s not the same.
- Salt (½ teaspoon): Enhances the cheese flavor. If you use salted butter, reduce this to ¼ teaspoon.
- Cayenne pepper (¼ teaspoon): For a subtle warmth that builds slowly. It doesn’t make the straws spicy; it just makes the cheese taste cheesier. You can omit it if you’re sensitive to heat, but I really think it’s essential.
- Garlic powder (¼ teaspoon): Adds savory depth. Don’t use garlic salt unless you adjust the salt accordingly.
- Ice water (2-3 tablespoons, 30-45ml): Just enough to bring the dough together. The amount varies based on humidity and your flour, so add it one tablespoon at a time.
For the “Nails” and Finish
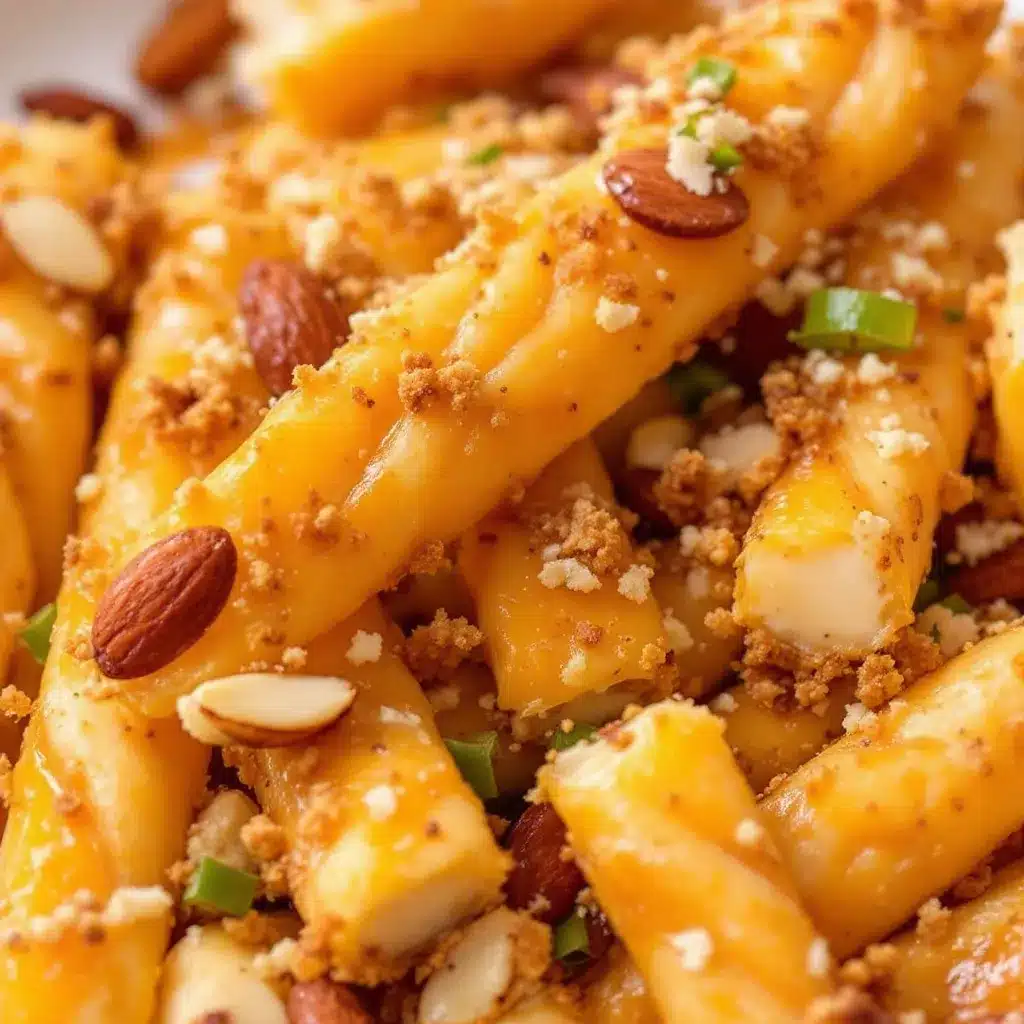
- Slivered almonds (24-30 pieces): These become the fingernails. I recommend using whole slivered almonds rather than sliced almonds—they’re thicker and look more like actual nails. If you want a more realistic look, you can lightly toast them first, but they’ll toast in the oven anyway.
- Egg wash (1 large egg beaten with 1 tablespoon water): Gives the straws a beautiful golden-brown finish. You can skip this if you prefer a matte look, but the color really sells the “finger” effect.
- Paprika (optional, for dusting): A light sprinkle after baking adds a “dirty” or “bloodied” look if you’re going for maximum gross-out factor.
- Rosemary sprigs or parsley (for serving): Not edible in this context, but arranged on a platter, they look like the “fingers” are reaching out of a garden bed. It’s a small touch that makes a big visual impact.
I’ve made these with different cheeses—gruyère, gouda, even a spicy pepper jack—but sharp cheddar is the winner. It has the perfect balance of flavor and meltability. If you want to go gluten-free, a good 1-to-1 gluten-free flour blend works, but the texture will be slightly more crumbly. I tested this with Bob’s Red Mill 1-to-1, and while they were still delicious, they didn’t hold the “finger” shape quite as well.
Equipment Needed
You don’t need much fancy equipment for these cheese straws, which is part of their charm. Here’s what you’ll need:
- Food processor (optional but highly recommended): A food processor makes cutting the cold butter into the flour incredibly fast and easy. If you don’t have one, a pastry cutter or even two forks will work—it just takes a bit more elbow grease.
- Box grater or microplane: For grating your block of cheddar. A microplane gives you the finest, fluffiest shreds, which melt most evenly.
- Baking sheet (2): Standard half-sheet pans are perfect. Line them with parchment paper for easy cleanup.
- Parchment paper: Non-negotiable for preventing sticking and making sure your “fingers” don’t lose their shape when you transfer them.
- Sharp knife or bench scraper: For cutting the dough into finger-length strips.
- Small offset spatula: Helpful for transferring the delicate dough strips to the baking sheet without distorting them.
- Pastry brush: For applying the egg wash. A silicone brush is easiest to clean.
- Ruler (optional): I use one to make sure my fingers are all roughly the same length, but you can eyeball it.
Preparation Method
Making these crispy severed-finger cheese straws with almond nails is a straightforward process, but a few details make all the difference. Follow these steps, and you’ll have a platter of creepy, delicious fingers in under an hour.
- Preheat your oven to 375°F (190°C). Line two baking sheets with parchment paper. Starting with a hot oven ensures the butter melts quickly, creating steam and flaky layers.
- Grate your cheese. Grate 8 ounces (225g) of sharp cheddar on the fine side of a box grater. Set it aside at room temperature while you prepare the dough. Letting the cheese warm up slightly helps it incorporate more evenly.
- Make the dough. In a food processor, combine 1 ½ cups (190g) all-purpose flour, ½ teaspoon salt, ¼ teaspoon cayenne, and ¼ teaspoon garlic powder. Pulse a few times to combine. Add the ½ cup (113g) of very cold, cubed butter and 2 ounces (56g) of cold cream cheese. Pulse about 10-12 times, until the butter is broken down into pea-sized pieces. You should still see visible chunks of butter—this is what creates flakiness.
- Add the cheese. Add the grated cheddar to the food processor and pulse 4-5 more times, just until the cheese is distributed. Don’t over-process, or the dough will become tough.
- Add the water. Sprinkle 2 tablespoons (30ml) of ice water over the mixture and pulse 2-3 times. Squeeze a small piece of dough between your fingers. If it holds together without crumbling, it’s ready. If it’s dry, add the remaining 1 tablespoon (15ml) of water and pulse again. The dough should look shaggy and not completely smooth.
- Chill the dough. Turn the dough out onto a lightly floured surface and bring it together into a disc. Wrap it in plastic wrap and refrigerate for at least 30 minutes. This step is crucial—it relaxes the gluten and firms up the butter, which prevents the straws from spreading too much in the oven. I’ve skipped this step before, and the “fingers” turned into sad, blobby puddles.
- Shape the fingers. On a lightly floured surface, roll the chilled dough out to about ¼-inch (6mm) thickness. Use a sharp knife or bench scraper to cut strips that are roughly 4 inches (10cm) long and ½ inch (1.25cm) wide. You should get about 24-30 strips.
- Form the knuckles. Gently round the top end of each strip to create the “fingertip.” Use the back of a knife to press two or three shallow lines across the strip to create “knuckle” creases. Don’t press all the way through—you just want an impression.
- Attach the nails. Press a slivered almond firmly into the rounded tip of each finger, angled slightly upward as if it’s growing out of the skin. The almond should be about ⅓ of the way embedded in the dough. This is the most fun part, honestly.
- Chill again. Place the shaped fingers on the prepared baking sheets, spacing them about 1 inch (2.5cm) apart. Refrigerate them for another 15 minutes. This second chill is what guarantees they’ll hold their shape.
- Apply egg wash. Brush each finger lightly with the egg wash. Be careful not to brush the almonds—it can make them slide off. If you want a “bloody” look, you can skip the egg wash and just brush a little ketchup or beet juice around the “wound” area after baking.
- Bake. Bake for 12-14 minutes, rotating the pans halfway through. The straws should be golden brown and puffed. The almonds should be lightly toasted. Let them cool on the baking sheet for 5 minutes, then transfer to a wire rack.
- Dust and arrange. If using, lightly dust the warm straws with paprika for a grisly effect. Arrange them on a platter with rosemary sprigs or parsley to look like fingers pushing up through the dirt. Serve warm or at room temperature.
Cooking Tips & Techniques
I’ve made these crispy severed-finger cheese straws with almond nails at least a dozen times, and I’ve learned a few things the hard way. Here are my best tips to ensure your fingers look gruesome and taste amazing.
Keep everything cold. This is the number one rule for flaky pastry. If your butter starts to soften while you’re working, pop the dough back in the fridge for 10 minutes. I once tried to rush the process on a hot summer day, and my “fingers” spread into flat, unrecognizable blobs. They still tasted good, but the visual effect was completely ruined.
Don’t skip the chilling steps. I know it’s tempting to skip straight to the oven, but the two chilling periods serve different purposes. The first chill relaxes the gluten and firms the butter. The second chill, after shaping, sets the shape so the straws don’t spread. If you’re short on time, you can freeze the shaped fingers for 10 minutes instead of refrigerating for 15.
Use a light touch with the knuckle impressions. You want them to look like creases, not deep gashes. If you press too hard, the straws can break apart at those lines during baking. I use the back of a butter knife and just barely graze the surface.
Toast the almonds slightly beforehand. This is optional, but I’ve found that lightly toasting the slivered almonds in a dry pan for 1-2 minutes before pressing them into the dough gives them a more realistic, yellowish “nail” color. Raw almonds can look a bit too pale. Just let them cool completely before using them.
Work in batches. If your kitchen is warm, only take out a few strips of dough at a time to shape, keeping the rest refrigerated. This prevents the dough from becoming too soft to handle.
Variations & Adaptations
Once you’ve mastered the basic crispy severed-finger cheese straws with almond nails, there’s plenty of room to get creative. Here are some variations I’ve tried and loved.
Spicy Bloody Fingers: Add 1 teaspoon of red pepper flakes or a finely chopped chipotle pepper in adobo sauce to the dough. After baking, drizzle a little sriracha or hot honey over the “wound” area where the almond meets the dough. It looks disturbingly like blood and adds a fantastic sweet-heat kick.
Herb-Infused Zombie Fingers: Mix 1 tablespoon of finely chopped fresh rosemary or thyme into the dough. The green flecks look like dirt or decay, which is perfect for a zombie-themed party. I made these for a Walking Dead watch party, and they were a hit.
Gluten-Free Version: As I mentioned earlier, a 1-to-1 gluten-free flour blend works. I’ve had the best luck with King Arthur Measure for Measure. The dough will be a bit more fragile, so handle it gently. You might need to add an extra tablespoon of cream cheese to help it bind.
Vegan Option: Use vegan butter and vegan cream cheese (I like Miyoko’s for both). For the cheese, use a high-quality vegan cheddar shred that melts well. The flavor won’t be exactly the same, but the texture is surprisingly close. You’ll need to skip the egg wash and brush with a little plant-based milk instead.
Different “Nail” Colors: Instead of almonds, try using pumpkin seeds (greenish nails for a swamp monster look) or blanched pistachios (green nails for a more elegant, witchy vibe). For a truly gruesome effect, dye the almonds with a little red food coloring before pressing them in.
Serving & Storage Suggestions
These cheese straws are best served at a Halloween party, obviously, but they’re also fantastic for any gathering where you want to make people laugh. Here’s how to serve and store them.
Serving Temperature: Serve them warm or at room temperature. They’re at their crispiest and most flaky within an hour of coming out of the oven. If you’re making them ahead, reheat them in a 300°F (150°C) oven for 5 minutes to restore the crunch.
Presentation Ideas: Arrange the “fingers” on a large platter, sticking up out of a bed of fresh rosemary or parsley to look like they’re growing out of the ground. You can also place them in a “dirt” of crushed chocolate cookies or black sesame seeds. For a really gruesome touch, serve them with a small bowl of marinara sauce or sriracha ketchup as “blood” for dipping.
Complementary Dishes: These pair beautifully with a cozy roasted tomato basil soup for a complete meal, or alongside a platter of crispy parmesan zucchini fritters with garlic herb dip for a savory snack spread. For a sweet counterpoint, the brown butter maple snickerdoodles would be a fun and unexpected follow-up.
Storage: Store leftover cheese straws in an airtight container at room temperature for up to 3 days. Do not refrigerate them—the moisture in the fridge will make them soggy. If you need to store them longer, freeze them in a single layer on a baking sheet, then transfer to a freezer bag. They’ll keep for up to 2 months. Reheat directly from frozen in a 300°F (150°C) oven for 8-10 minutes.
Flavor Development: Honestly, these are even better the next day. The flavors meld and deepen overnight, and the texture stays remarkably crisp if stored properly. I’ve been known to make a double batch just so I have leftovers for lunch the next day.
Nutritional Information & Benefits
Let’s be real—these are a treat, not a health food. But they’re made with real, whole ingredients, and there are a few surprising nutritional upsides.
Estimated Nutritional Values (per cheese straw):
| Nutrient | Amount |
|---|---|
| Calories | 110-130 |
| Total Fat | 8-10g |
| Saturated Fat | 5-6g |
| Cholesterol | 25-30mg |
| Sodium | 150-180mg |
| Carbohydrates | 6-8g |
| Protein | 4-5g |
Health Benefits: Cheese is a good source of calcium and protein, and the almonds provide healthy fats and vitamin E. The cayenne pepper can boost metabolism slightly. If you use whole wheat pastry flour instead of all-purpose, you’ll add a little fiber. But honestly, this is a recipe for fun and flavor, not for daily nutrition.
Dietary Considerations: This recipe is vegetarian. It contains gluten and dairy. To make it gluten-free, use a 1-to-1 flour blend. To make it dairy-free, use vegan alternatives as noted in the variations section.
Potential Allergens: This recipe contains wheat (gluten), dairy (butter, cream cheese, cheddar), and tree nuts (almonds).
Conclusion
These crispy severed-finger cheese straws with almond nails are the kind of recipe that makes people stop and stare—and then grab three more. They’re fun, they’re flaky, and they’re genuinely delicious. Whether you’re hosting a Halloween party, surprising your kids’ classmates, or just want to make your Tuesday night a little more ridiculous, these fingers deliver.
Don’t be afraid to get creative with the variations. Make them spicy, make them herby, make them as gruesome as you want. The best part is seeing people’s faces when they realize something that looks so creepy can taste so good. I’d love to hear how yours turn out. Drop a comment below and let me know what your guests thought—or better yet, share a photo of your most terrifying platter. Happy haunting, and happy snacking.
Frequently Asked Questions
Can I make the dough ahead of time?
Absolutely. You can prepare the dough up to 3 days in advance and keep it wrapped tightly in the refrigerator. You can also freeze the unbaked, shaped fingers on a baking sheet, then transfer them to a freezer bag. Bake them directly from frozen, adding 2-3 minutes to the baking time.
Why did my cheese straws spread and lose their shape?
This usually happens when the dough isn’t cold enough when it goes into the oven. Make sure you complete both chilling steps. If your kitchen is warm, you might need to chill the shaped fingers for 20 minutes instead of 15. Using a higher-protein flour can also help them hold their shape better.
Can I use a different type of nut for the nails?
Yes! Slivered almonds are the most realistic, but you can use pumpkin seeds for green “nails,” pistachios for a witchy vibe, or even small pieces of macadamia nuts for a more rounded nail shape. Just make sure whatever you use is raw or lightly toasted, not salted.
How do I make these look more realistic?
Focus on the details. Use a ruler to make the fingers uniform in length. Create the knuckle creases with a light hand. Angle the almond slightly upward, like a real nail. A light dusting of paprika after baking adds a dirty, grisly look. Serving them on a bed of rosemary or parsley really sells the “growing out of the ground” effect.
Can I make these without a food processor?
Definitely. Use a pastry cutter or two forks to cut the cold butter into the flour mixture. It takes a little more time and effort, but the results are the same. Just make sure your butter stays very cold, and work quickly to prevent it from warming up.
Pin This Recipe!
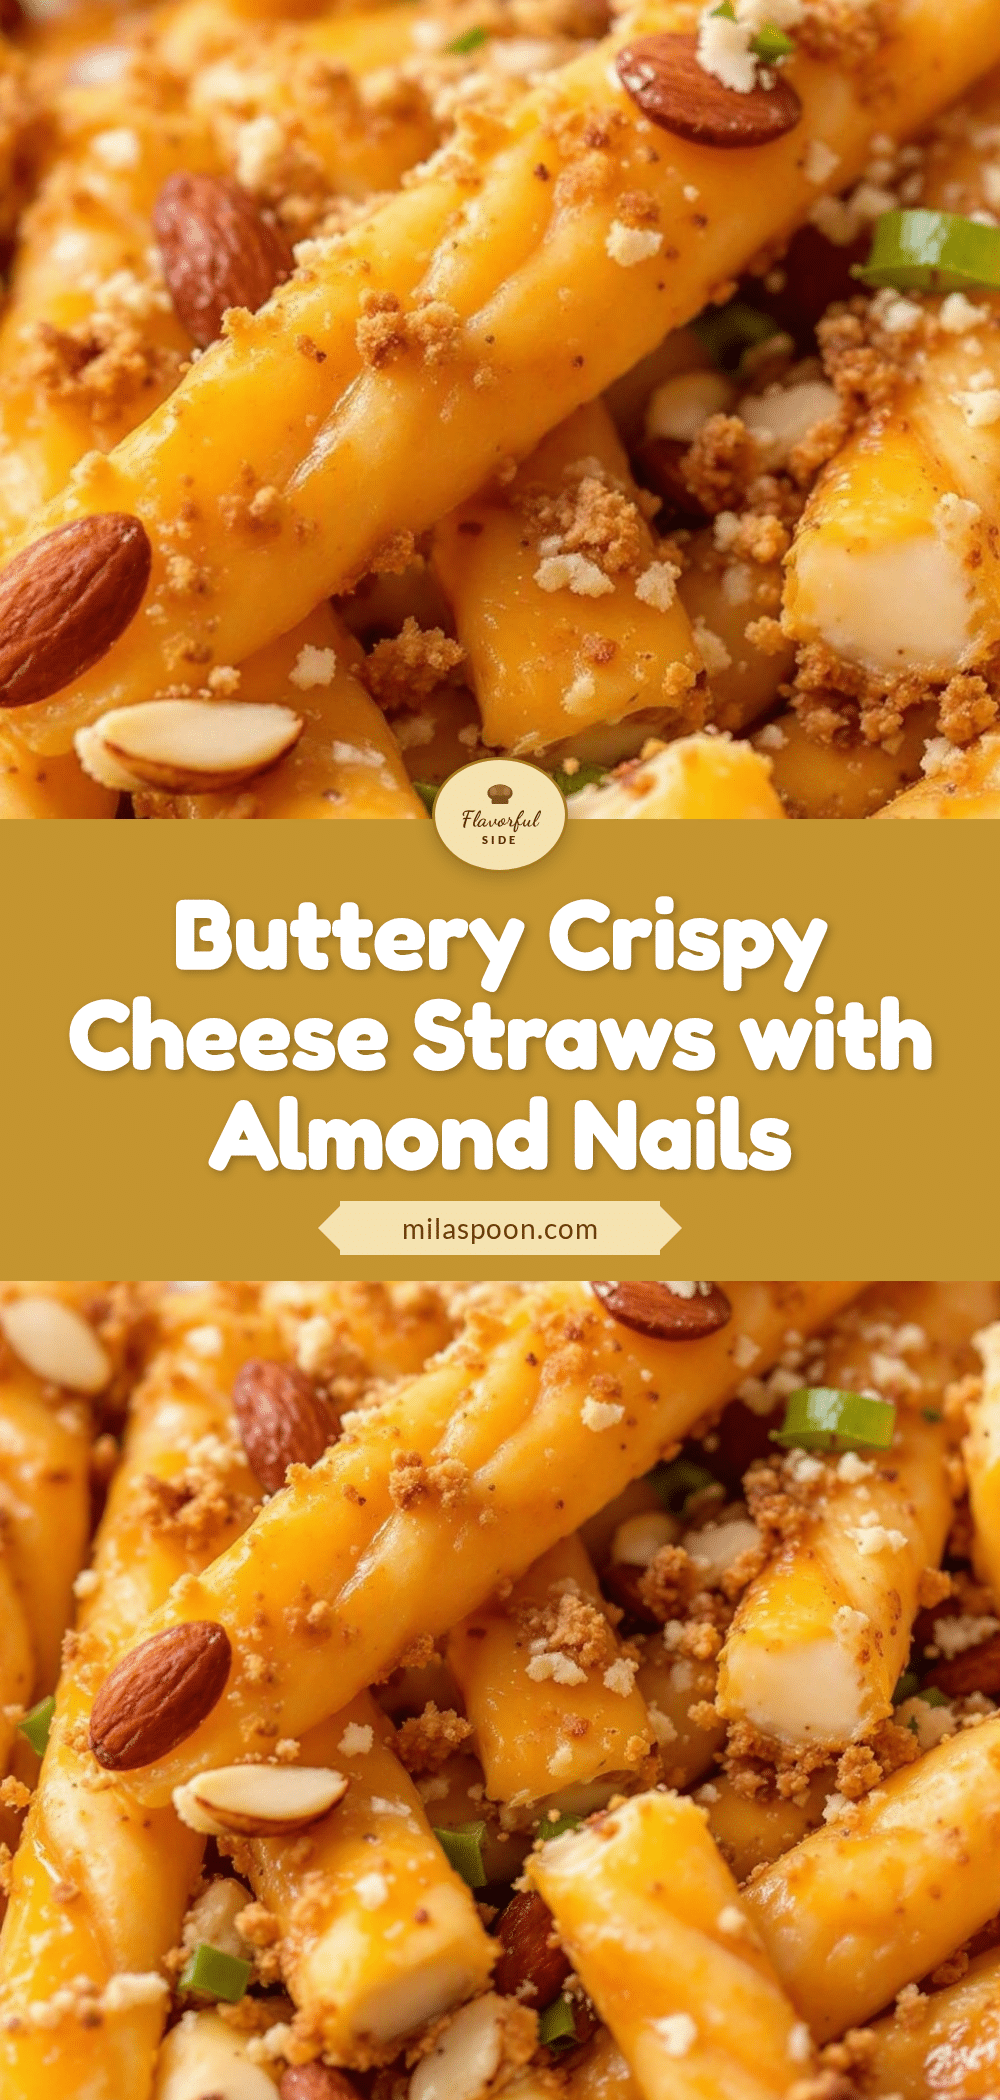
Crispy Severed-Finger Cheese Straws with Almond Nails
These crispy severed-finger cheese straws with almond nails are a fun, flaky, and delicious Halloween snack that combines sharp cheddar, a hint of cayenne, and a playful creepy presentation. They’re easy to make and guaranteed to be a crowd-pleaser at any spooky gathering.
- Prep Time: 15 minutes
- Cook Time: 12-14 minutes
- Total Time: 1 hour 15 minutes (including chilling)
- Yield: 24-30 cheese straws 1x
- Category: Appetizer
- Cuisine: American
Ingredients
- 1 ½ cups (190g) all-purpose flour
- 8 oz (225g) sharp cheddar cheese, finely grated
- ½ cup (113g) unsalted butter, very cold and cubed
- 2 oz (56g) cream cheese, cold
- ½ teaspoon salt
- ¼ teaspoon cayenne pepper
- ¼ teaspoon garlic powder
- 2–3 tablespoons (30-45ml) ice water
- 24–30 slivered almonds
- 1 large egg, beaten with 1 tablespoon water (for egg wash)
- Paprika (optional, for dusting)
- Rosemary sprigs or parsley (for serving)
Instructions
- Preheat your oven to 375°F (190°C). Line two baking sheets with parchment paper.
- Grate 8 ounces (225g) of sharp cheddar on the fine side of a box grater. Set aside at room temperature.
- In a food processor, combine 1 ½ cups (190g) all-purpose flour, ½ teaspoon salt, ¼ teaspoon cayenne, and ¼ teaspoon garlic powder. Pulse to combine.
- Add the ½ cup (113g) of very cold, cubed butter and 2 ounces (56g) of cold cream cheese. Pulse 10-12 times until the butter is broken down into pea-sized pieces.
- Add the grated cheddar and pulse 4-5 more times until just distributed.
- Sprinkle 2 tablespoons (30ml) of ice water over the mixture and pulse 2-3 times. Squeeze a small piece of dough; if it holds together, it’s ready. If dry, add the remaining 1 tablespoon (15ml) of water and pulse again.
- Turn the dough out onto a lightly floured surface and bring it together into a disc. Wrap in plastic wrap and refrigerate for at least 30 minutes.
- On a lightly floured surface, roll the chilled dough out to about ¼-inch (6mm) thickness. Cut strips roughly 4 inches (10cm) long and ½ inch (1.25cm) wide. You should get about 24-30 strips.
- Gently round the top end of each strip to create the ‘fingertip.’ Use the back of a knife to press two or three shallow lines across the strip to create ‘knuckle’ creases.
- Press a slivered almond firmly into the rounded tip of each finger, angled slightly upward.
- Place the shaped fingers on the prepared baking sheets, spacing them about 1 inch (2.5cm) apart. Refrigerate for another 15 minutes.
- Brush each finger lightly with the egg wash, being careful not to brush the almonds.
- Bake for 12-14 minutes, rotating the pans halfway through, until golden brown and puffed. Let cool on the baking sheet for 5 minutes, then transfer to a wire rack.
- If using, lightly dust the warm straws with paprika. Arrange on a platter with rosemary sprigs or parsley. Serve warm or at room temperature.
Notes
Keep all ingredients cold for flaky pastry. Don’t skip the chilling steps to prevent spreading. Use a light touch with knuckle impressions to avoid breaking. Toast almonds slightly beforehand for a more realistic nail color. Work in batches if kitchen is warm.
Nutrition
- Serving Size: 1 cheese straw
- Calories: 110130
- Sodium: 150180
- Fat: 810
- Saturated Fat: 56
- Carbohydrates: 68
- Protein: 45
Keywords: Halloween, cheese straws, severed fingers, almond nails, spooky snack, party appetizer, cheddar, flaky pastry


