Love this? Save it for later!
Share the inspiration with your friends
I burned the rice in this skillet dinner three times before I figured out what I was doing wrong. The first time, I walked away to fold laundry and came back to a smoky kitchen and a pan that looked like a science experiment gone wrong. The second time, I used the wrong pot—too thin, too eager, too much heat. The third time, I got distracted by a phone call and the bottom layer turned into what I can only describe as edible charcoal.
Here’s the thing, though: even those burnt versions got eaten. My family picked around the crispy bits and asked for more. That’s when I knew this recipe had something special. It wasn’t just another ground beef and rice situation—it was the kind of dinner that survives your worst mistakes and still tastes like comfort. I kept tweaking it until I got it right, and now I can make it without thinking. That’s the version I’m sharing today.
This Easy Cheesy Ground Beef and Rice Skillet is the dinner I make when I have nothing left to give. It’s the meal that saves my Tuesday nights, the one that uses pantry staples I almost always have, and the one that makes my kids actually clean their plates without negotiation. I’ve made it for sick friends, for busy weeknights, and for those evenings when cooking feels like the last thing I want to do. It never lets me down.
Why You’ll Love This Recipe
Let me tell you why this skillet dinner has become my most-requested recipe among friends and family. It’s not fancy, but it’s honest food that delivers every single time.
- 30-Minute One-Pan Meal: From start to finish, this dinner comes together in about half an hour. The rice cooks right in the skillet with the beef and aromatics, so you’re not waiting for a separate pot to boil. One pan to cook, one pan to clean. That’s my kind of math.
- Simple Pantry Ingredients: Ground beef, rice, cheese, broth, and a few seasonings. No trips to a specialty store, no obscure ingredients you’ll use once and forget about. This is the recipe you can make on a Sunday night when the grocery stores are closed and you’re staring at an almost-empty fridge.
- Budget-Friendly Comfort: Ground beef and rice are about as economical as dinner gets. A pound of meat, a cup of rice, and some cheese stretch into a hearty meal that feeds a family without breaking the bank. I’ve stretched this recipe through lean weeks more times than I can count.
- Kid-Approved and Crowd-Pleasing: My kids have never once complained about this dinner. Not once. The cheese pulls them in, the familiar flavors keep them happy, and the texture is soft enough for little eaters but satisfying enough for adults. It’s the kind of meal that works for picky eaters and food lovers alike.
- Foolproof Once You Know the Tricks: After those early failures, I figured out exactly how to get tender, fluffy rice with perfectly seasoned beef every time. I’ll share those tricks with you so you don’t have to learn the hard way.
This isn’t just another ground beef recipe. It’s the one I turn to when I need a guaranteed win—a dinner that fills bellies, warms hearts, and leaves everyone at the table happy. It’s comfort food that doesn’t require a complicated ingredient list or hours of prep. Honestly, it’s the kind of meal that makes you remember why home cooking is worth the effort.
What Ingredients You Will Need
This recipe uses simple, everyday ingredients to create something genuinely delicious. Most of these are probably in your kitchen right now, which is exactly the point.
- Ground beef (1 pound, 80/20 blend preferred): The fat content matters here. 80/20 gives you enough richness to flavor the rice without making the dish greasy. If you use leaner beef like 93/7, you’ll want to add a tablespoon of olive oil to compensate for the missing fat. I’ve tested both, and the 80/20 version is noticeably more flavorful.
- Long-grain white rice (1 cup, uncooked): I recommend long-grain rice like jasmine or basmati for the best texture. These varieties stay separate and fluffy rather than turning into a sticky mess. I’ve tried this with medium-grain rice and it works, but the texture is denser. Brown rice takes much longer to cook and requires more liquid, so stick with white rice for the 30-minute promise.
- Beef broth (2 cups, low-sodium): The broth replaces water and adds a savory depth that plain water just can’t match. Low-sodium is important here because the cheese and seasonings add plenty of salt. If you only have regular broth, reduce the added salt in the recipe. I prefer Kitchen Basics or Swanson brands for consistent flavor.
- Sharp cheddar cheese (1½ cups, freshly shredded): Pre-shredded cheese is coated with anti-caking agents that prevent smooth melting. Take the extra two minutes to shred your own cheddar—it melts into a silky, cohesive layer that makes the dish truly cheesy. Sharp cheddar gives you more flavor per bite than mild. You can use a mix of cheddar and Monterey Jack for extra creaminess.
- Yellow onion (1 medium, diced): Onion forms the aromatic base of this dish. Dice it finely so it cooks down into the beef and rice rather than leaving chunky bits. I’ve used sweet onions and red onions in a pinch—both work, but yellow onion gives the most balanced flavor.
- Garlic (3 cloves, minced): Fresh garlic makes a noticeable difference here. The jarred stuff works in a pinch, but fresh garlic releases more flavor as it cooks into the beef and rice. I mince mine fine so it distributes evenly throughout the dish.
- Tomato paste (2 tablespoons): This adds a subtle tanginess and deepens the savory flavor without making the dish taste like tomatoes. It’s a secret weapon for adding complexity to simple skillet meals. I buy the tubes of tomato paste so I can use just what I need without wasting a can.
- Paprika (1 teaspoon, smoked preferred): Smoked paprika adds a subtle warmth that regular paprika doesn’t. It’s not spicy, just deeply flavorful. If you only have sweet paprika, it’ll still be good—just a little less complex.
- Dried oregano (½ teaspoon): Oregano adds an herbal note that balances the richness of the beef and cheese. It’s subtle enough that picky eaters won’t notice, but the dish would feel flat without it.
- Salt and black pepper (to taste): Season as you go, not just at the end. I add a pinch of salt when cooking the beef, another when adding the broth, and adjust at the end. This layering builds flavor throughout the dish.
- Butter (1 tablespoon): A little butter stirred in at the end adds richness and helps the cheese melt more smoothly. It’s optional but worth it.
- Fresh parsley (for garnish, optional): A sprinkle of fresh parsley adds color and freshness. It’s not essential, but it makes the dish look finished and restaurant-worthy.
That’s it. Ten main ingredients, most of which you probably have in your pantry and fridge right now. No cream soups, no processed cheese products, no complicated sauces. Just honest ingredients that come together into something greater than the sum of their parts.
Equipment Needed
You don’t need a fancy kitchen to make this recipe work. Here’s what you’ll actually use:
- Large skillet with a tight-fitting lid (12-inch recommended): A 12-inch skillet gives you enough surface area to brown the beef properly without overcrowding. The lid is crucial—it traps steam so the rice cooks evenly. I use my trusty cast iron skillet for this recipe, but a stainless steel or non-stick skillet works perfectly too. If you don’t have a lid that fits, aluminum foil works as a temporary cover.
- Wooden spoon or spatula: For breaking up the ground beef as it cooks. A wooden spoon won’t scratch your pan and gives you good leverage for scraping up any browned bits from the bottom.
- Cheese grater: For shredding your own cheese. I use a box grater, but a microplane or food processor with a grating disc works too. Skip this step at your own risk—pre-shredded cheese simply doesn’t melt the same way.
- Sharp knife and cutting board: For dicing the onion and mincing the garlic. A sharp knife makes this task faster and safer than a dull one.
- Measuring cups and spoons: For accurate measurements. Rice is one of those ingredients where eyeballing it can lead to trouble—too much liquid and you get mush, too little and you get crunchy rice.
- Liquid measuring cup: For measuring the broth. A clear measuring cup with markings makes it easy to get the exact amount.
That’s genuinely all you need. No food processor, no stand mixer, no specialty gadgets. This is a recipe designed for real kitchens with real cooks who don’t have time for fussy equipment.
Preparation Method

Let me walk you through this step by step. I’ve included all the little details that make the difference between a good skillet dinner and a great one.
- Prep your ingredients first (5 minutes): Dice the onion, mince the garlic, shred the cheese, and measure out your rice and broth. Having everything ready before you start cooking makes the process smooth and prevents that frantic scramble when something starts to burn. I learned this the hard way—more than once.
- Brown the ground beef (6-8 minutes): Heat your skillet over medium-high heat. Add the ground beef and break it apart with your wooden spoon. Let it cook undisturbed for about 2 minutes to develop a nice brown crust, then start stirring and breaking it into smaller pieces. Cook until no pink remains, about 5-6 minutes total. Drain off excess fat if there’s more than about a tablespoon. You want some fat left for flavor, but not a pool of it.
- Cook the aromatics (3 minutes): Reduce the heat to medium. Add the diced onion to the skillet with the beef and cook for 2 minutes, stirring occasionally, until the onion softens and becomes translucent. Add the minced garlic and cook for another minute until fragrant. The garlic should smell amazing, not burnt—if it starts to brown too quickly, reduce the heat.
- Add the tomato paste and seasonings (2 minutes): Stir in the tomato paste, smoked paprika, dried oregano, and a pinch of salt and pepper. Cook for about 2 minutes, stirring constantly. This step blooms the spices and caramelizes the tomato paste slightly, deepening the overall flavor. You’ll see the paste darken and smell the spices becoming more aromatic.
- Add the rice and broth (1 minute): Pour in the uncooked rice and stir to coat it with the beef mixture. Let it toast for about 30 seconds—this helps the rice stay separate as it cooks. Then pour in the beef broth and stir everything together, scraping up any browned bits from the bottom of the pan. Those bits are pure flavor.
- Bring to a boil, then simmer (18-20 minutes): Increase the heat to high and bring the liquid to a boil. Once it’s boiling, reduce the heat to low, cover the skillet with your tight-fitting lid, and let it simmer gently. Don’t lift the lid during cooking—the steam is what cooks the rice evenly. Set a timer for 18 minutes and walk away. This is the part where I usually start cleaning up the kitchen or pour myself a glass of water.
- Check the rice (2 minutes): After 18 minutes, remove the lid carefully (steam is hot!). Check the rice—it should be tender and have absorbed most of the liquid. If the rice is still firm or there’s too much liquid left, cover and cook for another 2-3 minutes. If the rice is done but there’s a little liquid remaining, that’s fine—it will absorb as it rests.
- Add the butter and cheese (2 minutes): Remove the skillet from the heat. Stir in the tablespoon of butter until it melts, then sprinkle the shredded cheddar cheese evenly over the top. Cover the skillet again and let it sit for 2 minutes. The residual heat will melt the cheese into a beautiful, gooey layer. This resting time also allows the rice to finish absorbing any remaining liquid.
- Fluff and serve (1 minute): Remove the lid and fluff the rice gently with a fork. The cheese should be melted and stretchy. Give everything a gentle stir to incorporate the cheese throughout, or leave it as a cheesy top layer—both ways are delicious. Garnish with fresh parsley if you’re feeling fancy, and serve immediately.
A few sensory cues to watch for: The beef should smell deeply savory when it’s properly browned. The rice should look fluffy and separate, not clumpy or mushy. The cheese should be completely melted and stretchy when you lift a spoonful. If the rice looks wet or gummy, you probably had the heat too high or lifted the lid too often during cooking.
Cooking Tips & Techniques
I’ve made this recipe dozens of times, and I’ve collected a few tricks that make it consistently perfect. Here’s what I’ve learned through trial and error—mostly error.
Don’t lift the lid. I cannot stress this enough. Every time you lift that lid, steam escapes, and the rice cooking process gets interrupted. The rice needs that trapped steam to cook evenly and absorb the liquid properly. I know it’s tempting to peek, but resist. Set a timer and trust the process. The first time I actually followed this rule, I got perfect rice and wondered why I’d been struggling for years.
Toast the rice briefly. That 30-second toast before adding the broth isn’t just for show. Toasting the rice grains in the fat and seasonings helps them stay separate during cooking. It’s the same principle as toasting rice for pilaf—the heat seals the outer layer of the grain slightly, preventing it from turning into mush. It takes almost no time and makes a noticeable difference.
Use the right heat level. Medium-high for browning the beef, medium for cooking the aromatics, and low for simmering the rice. Getting the heat right at each stage prevents burning and ensures even cooking. If your rice is burning on the bottom but still hard on top, your heat was too high during the simmering phase. If the rice is mushy, the heat was too low and it basically steamed itself to death.
Let it rest before serving. Those two minutes after adding the cheese aren’t just for melting—they’re for the rice to finish absorbing liquid and for the flavors to meld. I’ve tested this recipe side by side, and the version that rests for 2 minutes is noticeably better than the version served immediately. The texture is more consistent, the cheese is more evenly melted, and the flavors taste more cohesive.
Season in layers. Add salt at multiple stages rather than all at once. A pinch when browning the beef, a little when adding the broth, and a final adjustment at the end. This builds flavor throughout the dish rather than leaving you with a flat-tasting meal that needs salt at the table. I learned this from watching professional cooks and it’s one of the most impactful techniques for home cooking.
Variations & Adaptations
One of the best things about this recipe is how adaptable it is. Here are some variations I’ve tested and loved.
Mexican-inspired version: Swap the oregano for cumin and chili powder. Add a can of drained black beans and a can of diced tomatoes with green chiles when you add the broth. Top with pepper jack cheese instead of cheddar, and serve with a dollop of sour cream and fresh cilantro. This version is a crowd favorite in my house and pairs perfectly with a side of crispy hatch chili cheddar cornbread skillet for a complete meal.
Vegetable-loaded version: Add a diced bell pepper (any color) along with the onion. Stir in a cup of frozen peas and carrots during the last 5 minutes of cooking. You can also add a handful of fresh spinach right before adding the cheese—it wilts down into the rice beautifully. This is my go-to when I’m trying to sneak extra vegetables into my kids’ dinner.
Spicy version: Add a diced jalapeño or serrano pepper along with the onion. Stir in a teaspoon of cayenne pepper or red pepper flakes with the other seasonings. Use pepper jack cheese for extra heat. My husband loves this version, though I personally stick with the mild original. If you’re a heat seeker, this one’s for you.
Turkey or chicken version: Substitute ground turkey or chicken for the beef. Since poultry is leaner, add a tablespoon of olive oil when browning to prevent dryness. The flavor will be milder but still delicious. This is a good option if you’re watching red meat intake or just want a lighter dinner.
Rice alternatives: If you’re avoiding white rice, try cauliflower rice for a low-carb version. Add it during the last 5 minutes of cooking since it doesn’t need as long to soften. For a whole-grain option, use brown rice but increase the cooking time to about 40 minutes and add an extra ½ cup of broth. The recipe won’t be a 30-minute meal anymore, but it’ll still be delicious.
Cheese variations: I’ve made this with Monterey Jack, Colby, Gouda, and even a spicy habanero cheddar. Each gives a slightly different character to the dish. A mix of cheddar and Monterey Jack is my second favorite after straight sharp cheddar. Feel free to experiment with whatever cheese you have on hand.
Serving & Storage Suggestions
This skillet dinner is versatile enough for busy weeknights, meal prep, or even casual entertaining. Here’s how to serve and store it.
Serving temperature and presentation: Serve this dish hot, straight from the skillet. The cheese should be melted and stretchy, and the rice should be steaming. I like to bring the skillet right to the table and let everyone serve themselves—it feels cozy and communal. Garnish with fresh parsley or chopped green onions for a pop of color. A side of steamed vegetables or a simple green salad rounds out the meal nicely.
Complementary dishes: This skillet pairs beautifully with a creamy cucumber dill salad for a refreshing contrast to the rich, cheesy rice. The cool, tangy dressing cuts through the richness perfectly. For a heartier meal, serve it alongside roasted vegetables or a simple tomato salad. Cornbread or crusty bread is also excellent for sopping up any extra cheesy bits.
Beverage pairings: A cold beer like a lager or pale ale complements the savory flavors nicely. For wine drinkers, a medium-bodied red like Merlot or Zinfandel works well. If you’re keeping it non-alcoholic, iced tea or sparkling water with lemon is perfect.
Storage instructions: Store leftovers in an airtight container in the refrigerator for up to 4 days. The rice will absorb more liquid as it sits, so the texture will be slightly softer on reheating—but still delicious. I actually love the leftovers because the flavors have time to meld together overnight.
Freezing instructions: This recipe freezes well for up to 3 months. Let it cool completely, then transfer to a freezer-safe container. To reheat, thaw overnight in the refrigerator, then reheat in a skillet over medium-low heat with a splash of broth or water to loosen it up. You can also microwave individual portions, though the stovetop method gives better texture.
Reheating tips: The best way to reheat this dish is in a skillet over medium-low heat. Add a tablespoon of broth or water, cover, and heat for 5-7 minutes, stirring occasionally. The moisture helps the rice rehydrate without drying out. If you’re in a hurry, microwave individual portions for 60-90 seconds, stirring halfway through. Add a splash of water before microwaving to prevent the rice from becoming dry.
Flavor development: Like many one-pot meals, this dish actually tastes better the next day. The flavors have time to meld and deepen overnight. If you’re meal prepping, make this on Sunday and enjoy it for lunch throughout the week. The cheese flavor becomes more pronounced and the seasonings distribute more evenly.
Nutritional Information & Benefits
Here’s a rough nutritional breakdown per serving (based on 6 servings):
| Nutrient | Amount per Serving |
|---|---|
| Calories | 420-450 |
| Protein | 28-30g |
| Carbohydrates | 35-38g |
| Fat | 18-20g |
| Fiber | 1-2g |
| Calcium | 15-20% DV |
| Iron | 15-20% DV |
These values will vary based on the specific ingredients you use. The recipe provides a solid amount of protein from the beef and cheese, which helps keep you full and satisfied. The rice provides energy in the form of complex carbohydrates, while the beef contributes iron and B vitamins. The cheese adds calcium for bone health.
Dietary considerations: This recipe is naturally gluten-free as written (check your broth label to be sure). For a lower-carb option, substitute cauliflower rice. For a lower-fat version, use lean ground beef and reduce the cheese by half. The recipe is not suitable for dairy-free or vegan diets without significant modifications.
Potential allergens: This recipe contains dairy (cheese, butter). If you’re lactose intolerant, try using lactose-free cheese or a dairy-free alternative. The recipe does not contain nuts, eggs, or soy, but always check your ingredient labels for potential cross-contamination.
I personally appreciate that this recipe provides a balanced meal with protein, carbs, and fat in one pan. It’s not a health food, but it’s real food made with real ingredients—and that counts for something in my book.
Conclusion
This Easy Cheesy Ground Beef and Rice Skillet has become a staple in my kitchen for good reason. It’s the dinner I make when I’m tired, when I’m busy, when I’m not sure what else to cook. It’s reliable, it’s delicious, and it makes everyone at my table happy. That’s a rare combination in the world of weeknight cooking.
I hope you’ll try this recipe and make it your own. Add your favorite vegetables, swap in different cheeses, adjust the seasonings to your taste. That’s the beauty of a simple skillet dinner—it’s a canvas for your own preferences and creativity. The first time you make it, follow the recipe exactly. After that, feel free to experiment. You might discover a variation that becomes your family’s favorite.
If you make this recipe, I’d love to hear about it. Leave a comment below and let me know how it turned out—did you add any twists? Did your kids clean their plates? Did it save your Tuesday night the way it saves mine? Your feedback helps other readers decide whether to try it, and your variations might inspire someone else’s dinner.
And if you’re looking for another one-pan wonder to add to your rotation, try this creamy one-pan Tuscan chicken—it’s another weeknight hero that delivers big flavor with minimal cleanup. Happy cooking, friends. I hope this recipe brings a little comfort to your table.
Frequently Asked Questions
Can I use brown rice instead of white rice?
Yes, but you’ll need to adjust the cooking time and liquid. Brown rice takes about 40 minutes to cook and needs an extra ½ cup of broth. The recipe won’t be a 30-minute meal anymore, but it will still be delicious. Just be patient and don’t lift the lid during cooking.
Can I make this recipe ahead of time?
Absolutely. This recipe is great for meal prep. Make it as directed, let it cool completely, and store it in an airtight container in the refrigerator for up to 4 days. The flavors actually meld and deepen overnight. Reheat in a skillet with a splash of broth to rehydrate the rice.
Can I freeze this dish?
Yes, this freezes well for up to 3 months. Let it cool completely, transfer to a freezer-safe container, and freeze. To reheat, thaw overnight in the refrigerator, then reheat in a skillet over medium-low heat with a splash of broth. The texture will be slightly softer than fresh, but still very good.
How do I prevent the rice from getting mushy?
Don’t lift the lid during cooking, use the correct heat level (low for simmering), and let the rice rest for 2 minutes after cooking. Also, make sure you’re using long-grain rice rather than short-grain, which tends to be starchier and more prone to mushiness.
Can I add vegetables to this recipe?
Definitely. Diced bell peppers, frozen peas and carrots, or fresh spinach all work well. Add heartier vegetables like bell peppers with the onion, and add more delicate vegetables like peas and spinach during the last 5 minutes of cooking. This is a great way to boost the nutritional content and add variety.
Pin This Recipe!
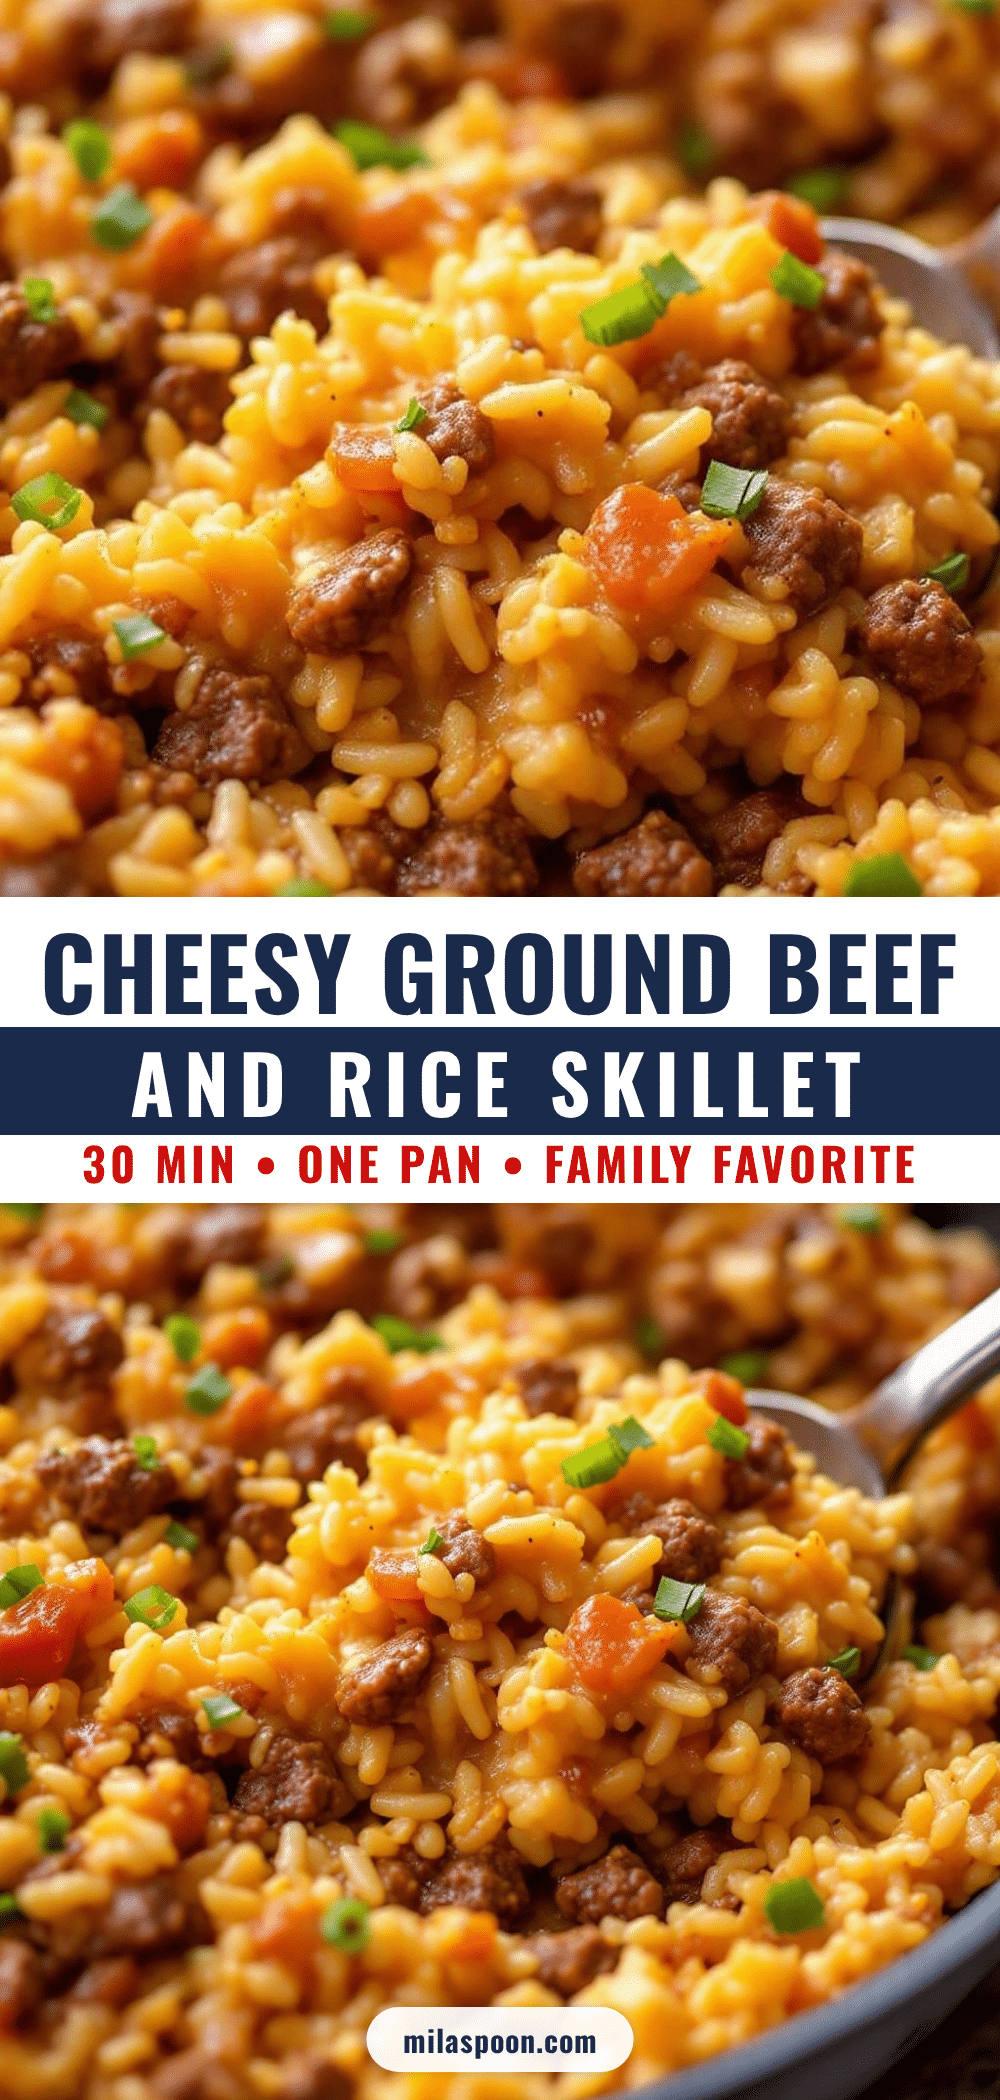
Easy Cheesy Ground Beef and Rice Skillet: 30-Minute One-Pan Dinner

This Easy Cheesy Ground Beef and Rice Skillet is the dinner I make when I have nothing left to give. It’s a 30-minute one-pan meal using simple pantry ingredients that’s budget-friendly, kid-approved, and foolproof once you know the tricks.
- Prep Time: 5 minutes
- Cook Time: 25 minutes
- Total Time: 30 minutes
- Yield: 6 servings 1x
- Category: Main Course
- Cuisine: American
Ingredients
- 1 pound ground beef (80/20 blend preferred)
- 1 cup long-grain white rice (uncooked)
- 2 cups low-sodium beef broth
- 1½ cups sharp cheddar cheese (freshly shredded)
- 1 medium yellow onion (diced)
- 3 cloves garlic (minced)
- 2 tablespoons tomato paste
- 1 teaspoon smoked paprika
- ½ teaspoon dried oregano
- Salt and black pepper (to taste)
- 1 tablespoon butter
- Fresh parsley (for garnish, optional)
Instructions
- Prep your ingredients first: Dice the onion, mince the garlic, shred the cheese, and measure out your rice and broth.
- Brown the ground beef: Heat your skillet over medium-high heat. Add the ground beef and break it apart. Let it cook undisturbed for about 2 minutes, then stir and break into smaller pieces. Cook until no pink remains, about 5-6 minutes total. Drain off excess fat if needed.
- Cook the aromatics: Reduce heat to medium. Add diced onion and cook for 2 minutes until softened. Add minced garlic and cook for another minute until fragrant.
- Add the tomato paste and seasonings: Stir in tomato paste, smoked paprika, dried oregano, and a pinch of salt and pepper. Cook for about 2 minutes, stirring constantly.
- Add the rice and broth: Pour in uncooked rice and stir to coat. Let it toast for about 30 seconds. Then pour in beef broth and stir, scraping up browned bits from the bottom.
- Bring to a boil, then simmer: Increase heat to high and bring to a boil. Reduce heat to low, cover with a tight-fitting lid, and simmer for 18-20 minutes. Do not lift the lid.
- Check the rice: After 18 minutes, remove lid carefully. Rice should be tender and have absorbed most liquid. If needed, cover and cook 2-3 more minutes.
- Add the butter and cheese: Remove from heat. Stir in butter until melted, then sprinkle shredded cheddar evenly over the top. Cover and let sit for 2 minutes.
- Fluff and serve: Remove lid, fluff rice gently with a fork. Stir to incorporate cheese or leave as a top layer. Garnish with fresh parsley if desired and serve immediately.
Notes
Don’t lift the lid during cooking – the steam is essential for even rice cooking. Toast the rice briefly before adding broth to help grains stay separate. Use the right heat level at each stage: medium-high for browning beef, medium for aromatics, low for simmering rice. Let the dish rest for 2 minutes after adding cheese for best texture and flavor. Season in layers by adding salt at multiple stages.
Nutrition
- Serving Size: 1 serving (about 1.5
- Calories: 420450
- Sugar: 23
- Sodium: 600700
- Fat: 1820
- Saturated Fat: 810
- Carbohydrates: 3538
- Fiber: 12
- Protein: 2830
Keywords: ground beef and rice skillet, one-pan dinner, 30-minute meal, cheesy rice, easy weeknight dinner, budget-friendly dinner, kid-friendly dinner


