Love this? Save it for later!
Share the inspiration with your friends
“These are the best cookies I’ve ever eaten.” My brother-in-law said it with his mouth half full, which honestly made the compliment hit harder. He’d just pulled a warm cookie off the cooling rack, burned his tongue slightly, and didn’t even care. I’d been testing brown butter chocolate chip cookie recipes for weeks at that point, and my kitchen counter looked like a flour explosion had occurred. But this batch? This was the one.
I’d been chasing a specific texture for months. You know that cookie that’s thick in the middle, slightly crisp at the edges, and somehow stays soft for days? The kind that makes you close your eyes after the first bite? That was the goal. My first few attempts were flat, greasy disasters. One batch spread so thin it basically became a giant chocolate chip cracker. Not my finest moment, honestly.
The secret turned out to be brown butter and a little patience. Browning the butter adds this nutty, almost toffee-like depth that regular butter just can’t touch. And letting the dough rest in the fridge? That’s the real game-changer. It sounds like an extra step you don’t need, but trust me on this one. The flavors meld, the texture transforms, and you end up with cookies that have that bakery-style thickness without any weird ingredients.
These cookies have become my go-to for everything. Potlucks, birthday gifts, rainy Tuesday afternoons when you just need something good. They’re the kind of recipe that makes people ask for the link before they’ve even finished eating.
Why You’ll Love This Recipe
Let me tell you why these cookies are different from every other chocolate chip cookie recipe you’ve tried. Because honestly, there are a lot of cookie recipes out there, and not all of them deliver on their promises.
- Thick and Chewy Texture : These cookies hold their shape beautifully. No flat, sad pancakes here. The centers stay soft and almost doughy while the edges get that perfect golden crunch.
- Brown Butter Magic : That nutty, caramelized flavor takes these cookies from good to absolutely unforgettable. You’ll never go back to regular butter after trying these.
- Simple Ingredients : No fancy extracts, no specialty flours, no weird stabilizers. Everything you need is probably already in your pantry or fridge.
- Make-Ahead Friendly : The dough keeps in the fridge for up to three days, and you can freeze it for months. Fresh cookies whenever you want them.
- Crowd-Pleaser : I’ve made these for picky kids, serious foodie friends, and everyone in between. They disappear every single time.
What makes this recipe different from the rest? It’s the combination of browned butter, the perfect flour-to-fat ratio, and that crucial chilling step. I tested six different versions before landing on this one. Six. My neighbors were very happy about that experiment, by the way. These cookies have that bakery-style thickness without any of the artificial ingredients or mysterious dough conditioners. Just real food that tastes incredible.
And honestly? The first bite of one of these cookies, still slightly warm, with a little sprinkle of flaky sea salt on top? That’s the kind of moment that makes all the testing worth it.
What Ingredients You Will Need
This recipe uses simple, everyday ingredients to create something genuinely special. The magic happens through technique, not a long list of obscure items. Here’s what you’ll need and why each ingredient matters.
For the Cookies
- 1 cup (226g) unsalted butter : You’ll brown this, so don’t use salted butter here. The browning process concentrates the flavor, and you want full control over the salt level. I use Land O’Lakes or Kerrygold depending on what’s on sale.
- 2 ¼ cups (280g) all-purpose flour : Spoon and level your flour. Scooping directly from the bag packs it down and gives you too much flour, which makes dry cookies. Use a spoon to fluff, then spoon into your measuring cup and level off.
- 1 teaspoon baking soda : This helps the cookies spread just enough and gives them that chewy texture. Make sure it’s fresh — test it by dropping a little in vinegar; it should fizz.
- ½ teaspoon salt : Regular fine sea salt or table salt. The brown butter adds some salty notes, so don’t overdo it here. We’ll add more salt on top later.
- 1 cup (200g) packed light brown sugar : Brown sugar is key for chewiness. The molasses in it keeps the cookies soft and adds that deep, caramel-like sweetness that pairs perfectly with brown butter.
- ½ cup (100g) granulated sugar : White sugar helps the cookies spread and gives those crispy edges. The combination of both sugars is what gives you that perfect texture contrast.
- 2 large eggs, room temperature : Cold eggs will seize up your brown butter and ruin the emulsion. Leave them on the counter for 30 minutes, or float them in warm water for 5 minutes if you’re in a hurry.
- 2 teaspoons vanilla extract : Pure vanilla extract, not imitation. I know it’s more expensive, but the flavor difference is noticeable. Nielsen-Massey is my go-to brand.
- 2 cups (340g) semi-sweet chocolate chips or chopped chocolate : I actually prefer using a mix of chocolate chips and chopped chocolate bars. The chips hold their shape while the chopped chocolate creates those melty puddles. Ghirardelli chips and a chopped Lindt bar are my current favorite combo.
- Flaky sea salt for finishing (optional but highly recommended) : Maldon or any flaky sea salt. This is not the same as table salt. The big flakes add little bursts of saltiness that make the chocolate taste even richer.
Ingredient Tips
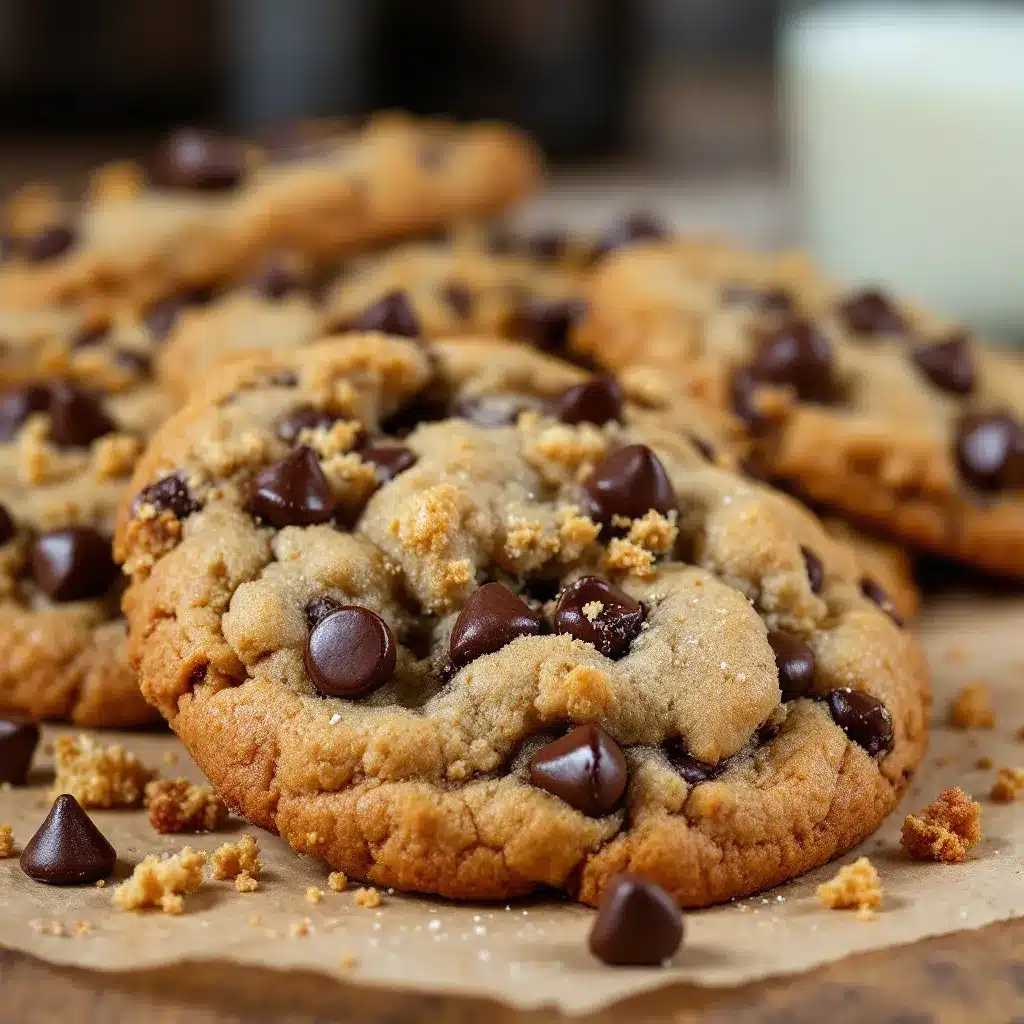
For the best results, use room temperature eggs and make sure your brown sugar is fresh and soft, not hard and clumpy. If your brown sugar has turned into a brick, microwave it with a damp paper towel for 20 seconds to soften it up. I learned that trick after trying to break apart a sugar rock with a knife — not recommended.
You can substitute dark chocolate chips if you prefer a less sweet cookie. Milk chocolate works too, but the cookies will be significantly sweeter. For a gluten-free version, use a 1:1 gluten-free baking flour blend. I’ve tested this with King Arthur Measure for Measure and it works beautifully.
Equipment Needed
You don’t need a professional bakery setup for these cookies. Here’s what you’ll actually use:
- Medium saucepan : For browning the butter. A light-colored pan helps you see the color change, but any saucepan works.
- Large mixing bowl : You’ll mix the wet and dry ingredients here. Glass or stainless steel is fine.
- Whisk : For combining the dry ingredients and mixing the wet ingredients.
- Rubber spatula : For folding in the chocolate chips and scraping every last bit of brown butter from the pan.
- Baking sheets : Rimmed baking sheets work best. I use Nordic Ware aluminum sheets because they heat evenly and don’t warp.
- Parchment paper or silicone baking mats : Parchment paper is cheaper and gives slightly crisper bottoms. Silicone mats are reusable and work great too.
- Cookie scoop (2-tablespoon size) : This gives you uniform cookies that bake evenly. A 1.5-tablespoon scoop works too for smaller cookies.
- Cooling rack : Letting cookies cool on the pan for a few minutes before transferring to a rack prevents them from breaking.
- Plastic wrap or reusable bowl cover : For covering the dough while it chills.
If you don’t have a cookie scoop, use two spoons or just roll the dough into balls with your hands. The cookies won’t be perfectly uniform, but they’ll taste just as good. I actually kind of love the rustic look of hand-rolled cookies.
Preparation Method
Let me walk you through this step by step. I’ve included all the little details I wish someone had told me when I first started making these.
Step 1: Brown the Butter
Cut the butter into pieces and place it in a medium saucepan over medium heat. Stir frequently as it melts. The butter will foam up, then the foam will subside, and you’ll see brown specks forming at the bottom of the pan. This whole process takes about 5-7 minutes. Keep stirring — don’t walk away. Burnt butter happens fast and there’s no saving it.
When the butter smells nutty and the specks are a warm amber color, remove it from the heat immediately. Pour it into a heat-safe bowl (including all those brown bits — that’s where the flavor lives) and let it cool for about 10-15 minutes. You want it warm but not hot when you add it to the sugars.
Step 2: Mix the Dry Ingredients
In a medium bowl, whisk together the flour, baking soda, and salt. Set this aside. Make sure there are no clumps — baking soda loves to hide in little pockets and then you get one cookie that tastes metallic.
Step 3: Combine Brown Butter and Sugars
In a large mixing bowl, combine the warm brown butter with the brown sugar and granulated sugar. Whisk vigorously for about 2 minutes until the mixture looks like wet sand and starts to pull away from the sides of the bowl. This step is important — you’re dissolving some of the sugar into the butter, which helps create that chewy texture.
Step 4: Add Eggs and Vanilla
Add the eggs one at a time, whisking well after each addition. The mixture should look smooth, glossy, and slightly thickened. Add the vanilla and whisk again. If the mixture looks separated or greasy, your butter was too hot. Don’t panic — just keep whisking and it will come together.
Step 5: Combine Wet and Dry Ingredients
Pour the dry ingredients into the wet ingredients. Use a rubber spatula to fold everything together gently. Stop mixing as soon as you no longer see streaks of flour. Overmixing at this stage develops gluten and makes tough cookies. A few flour streaks are better than overmixed dough.
Step 6: Add the Chocolate
Fold in the chocolate chips and chopped chocolate until evenly distributed. The dough will be thick and slightly sticky. If you’re using chopped chocolate, you’ll get some chocolate dust throughout the dough, which is beautiful.
Step 7: Chill the Dough
This step is non-negotiable. Cover the bowl with plastic wrap and refrigerate for at least 2 hours, or up to 3 days. The dough needs to firm up so the cookies don’t spread into flat discs. Chilling also allows the flavors to develop and meld together. I know it’s hard to wait, but trust me on this one.
Step 8: Preheat and Prepare
When you’re ready to bake, preheat your oven to 350°F (175°C). Line your baking sheets with parchment paper or silicone mats. Let the dough sit at room temperature for about 10 minutes if it’s been chilling for more than a few hours — it makes scooping easier.
Step 9: Scoop and Bake
Scoop rounded tablespoons of dough (about 2 tablespoons each) and place them 2 inches apart on the prepared baking sheets. Don’t flatten them — they’ll spread on their own. Bake for 10-12 minutes, or until the edges are golden brown and the centers look slightly underdone and puffy. The cookies will continue to bake on the hot pan after you remove them from the oven.
Step 10: Finish and Cool
Immediately after removing from the oven, sprinkle each cookie with a pinch of flaky sea salt. Let the cookies cool on the baking sheet for 5 minutes, then transfer them to a wire rack to cool completely. Or eat them warm. I won’t judge.
Cooking Tips & Techniques
After making about a million batches of these cookies (okay, maybe not a million, but it feels like it), I’ve learned a few things the hard way. Here are my best tips.
Don’t skip the browning step. I know it adds an extra 5 minutes and another dirty dish, but the flavor difference is massive. Brown butter adds a nutty, toasty depth that regular butter simply can’t replicate. If you’ve never browned butter before, it’s easier than it sounds. Just watch it carefully and trust your nose — when it smells like toasted hazelnuts, you’re done.
Measure your flour correctly. This is the most common mistake I see. Scooping flour directly from the bag packs it down and can add up to 25% more flour than the recipe calls for. Use the spoon-and-level method: fluff the flour with a spoon, spoon it into your measuring cup, and level it off with a knife. Your cookies will thank you.
Chill the dough, seriously. I tried baking these without chilling once because I was impatient and out of time. The cookies spread into thin, greasy messes. They still tasted okay, but they weren’t thick and chewy. The chilling step solidifies the butter, which means the cookies spread slower in the oven and hold their shape better.
Use a cookie scoop for uniform cookies. Uniform size means uniform baking. Some cookies will be underdone while others are overdone if you’re eyeballing it. A 2-tablespoon scoop is perfect for these cookies.
Underbake slightly. The cookies should look puffy and slightly underdone in the center when you pull them out. They’ll continue to bake on the hot pan as they cool. If you wait until the centers look fully set, you’ll end up with dry, cakey cookies.
One mistake I made early on was using a dark baking sheet. Dark pans absorb more heat and can cause the bottoms of your cookies to burn before the centers are done. Stick with light-colored, aluminum baking sheets for the best results.
Variations & Adaptations
These cookies are incredibly versatile. Here are some variations I’ve tried and loved.
Double Chocolate Chip Cookies
Replace ¼ cup of the all-purpose flour with ¼ cup of unsweetened cocoa powder. Use white chocolate chips or dark chocolate chips. The brown butter adds a surprising depth to the chocolate flavor that’s absolutely divine.
Brown Butter Pecan Chocolate Chip Cookies
Toast 1 cup of chopped pecans in a dry skillet over medium heat for 3-4 minutes until fragrant. Let them cool, then fold them into the dough along with the chocolate chips. The crunch of the pecans against the soft cookie texture is fantastic.
Gluten-Free Version
Substitute the all-purpose flour with a 1:1 gluten-free baking flour blend that contains xanthan gum. I’ve had great results with King Arthur Measure for Measure. The cookies will be slightly more delicate but still thick and chewy.
Vegan Adaptation
Use vegan butter (I like Miyoko’s) and a flax egg (1 tablespoon ground flaxseed mixed with 3 tablespoons water, let sit for 5 minutes). The texture won’t be exactly the same — vegan cookies tend to be a bit more cakey — but they’re still delicious.
Brown Butter Toffee Chocolate Chip Cookies
Reduce the chocolate chips to 1 ½ cups and add ½ cup of chopped toffee bits (like Heath Bar pieces). The toffee adds a buttery crunch that complements the brown butter beautifully.
I personally love the pecan version. There’s something about the combination of brown butter, toasted nuts, and dark chocolate that feels extra special. It’s the version I make for holiday cookie boxes and hostess gifts.
Serving & Storage Suggestions
These cookies are best served slightly warm, when the chocolate is still melty and the edges are perfectly crisp. Let them cool on the baking sheet for 5 minutes, then transfer to a wire rack. If you can wait that long, that is.
For the ultimate cookie experience, serve them with a cold glass of milk. The contrast between the warm, chewy cookie and the cold milk is unbeatable. They’re also fantastic with a cup of coffee or a scoop of vanilla ice cream sandwiched between two cookies.
Storage: Store baked cookies in an airtight container at room temperature for up to 5 days. Place a slice of bread in the container to keep them soft — the cookies will absorb moisture from the bread. Replace the bread slice every couple of days if needed.
Freezing baked cookies: Place cooled cookies in a single layer in a freezer-safe container or bag, with parchment paper between layers. They’ll keep for up to 3 months. Thaw at room temperature or warm in a 300°F oven for 5 minutes.
Freezing cookie dough: Scoop the dough into balls and place them on a parchment-lined baking sheet. Freeze until solid, then transfer to a freezer bag. You can bake them directly from frozen — just add 2-3 minutes to the baking time. This is my favorite way to have fresh cookies on demand without making a whole batch.
The flavors actually improve after a day or two. The brown butter flavor deepens, and the cookies become even chewier. If you can resist eating them all on day one, you’ll be rewarded on day two.
Nutritional Information & Benefits
Let’s be real — these are cookies, not health food. But knowing what’s in them helps with mindful indulgence. Here’s the estimated nutrition per cookie (based on 24 cookies):
| Nutrient | Amount per Cookie |
|---|---|
| Calories | 245 |
| Total Fat | 14g |
| Saturated Fat | 8g |
| Cholesterol | 35mg |
| Sodium | 135mg |
| Total Carbohydrates | 30g |
| Dietary Fiber | 1g |
| Sugars | 20g |
| Protein | 3g |
Dark chocolate contains antioxidants called flavonoids, which have been linked to heart health benefits. The brown butter provides vitamin A and healthy fats. And honestly? Sometimes the mental health benefit of eating a really good cookie is worth more than any nutritional calculation.
These cookies are vegetarian-friendly. For dairy-free or vegan options, check the variations section above. They contain gluten, dairy, and eggs, so they’re not suitable for those with allergies to those ingredients.
Frequently Asked Questions
Why did my cookies spread too much?
This usually happens for one of three reasons: your butter was too warm when you mixed the dough, you didn’t chill the dough long enough, or you used too much sugar. Make sure your brown butter is warm but not hot, and chill the dough for at least 2 hours. If your kitchen is warm, chill for 3-4 hours.
Can I use salted butter instead of unsalted?
You can, but reduce the added salt in the recipe to ¼ teaspoon. The salt content in salted butter varies by brand, so it’s harder to control. I prefer unsalted butter for browning because it lets me control the salt level precisely.
How do I know when the butter is properly browned?
Look for three signs: the butter will smell nutty and toasty, it will have turned a warm amber color, and you’ll see brown specks (milk solids) at the bottom of the pan. The whole process takes about 5-7 minutes over medium heat. Keep stirring the whole time.
Can I make these cookies without chilling the dough?
Technically yes, but they won’t turn out thick and chewy. Without chilling, the cookies will spread into thin, flat discs. The chilling step is what gives these cookies their signature thickness. If you’re in a rush, chill for at least 30 minutes — it’s better than nothing.
How do I get bakery-style cookies at home?
The secrets are brown butter, proper chilling, and not overbaking. Use a cookie scoop for uniform size, bake on light-colored pans, and pull the cookies when the centers still look slightly underdone. That final sprinkle of flaky sea salt makes a huge difference too.
Final Thoughts
These thick and chewy brown butter chocolate chip cookies have become my signature recipe for a reason. They’re the cookies I bring to every gathering, the ones my family requests for birthdays, and the ones I make when I need a little comfort in my day. The combination of nutty brown butter, pools of melted chocolate, and that perfect chewy texture is something special.
I love that this recipe feels both indulgent and approachable. You don’t need any special skills or hard-to-find ingredients. Just a little patience for the browning and chilling steps, and you’re rewarded with cookies that taste like they came from a fancy bakery. If you’re looking for another brown butter treat, you should definitely check out these brown butter maple snickerdoodles — they’re equally amazing.
I’d love to hear how these cookies turn out for you. Did you try any of the variations? Did you manage to resist eating the whole batch in one sitting? (No judgment if you didn’t.) Leave a comment below and let me know. And if you’re in the mood for more sweet treats, these chewy brown butter chocolate chip cookies with sea salt are another favorite from my kitchen.
Happy baking, friends. May your butter be perfectly browned and your cookies always chewy.
Pin This Recipe!
Best Thick & Chewy Brown Butter Chocolate Chip Cookies

These thick and chewy brown butter chocolate chip cookies have a nutty, toffee-like depth from browned butter and a perfect texture that stays soft for days. The secret is browning the butter and chilling the dough for bakery-style results without any weird ingredients.
- Prep Time: 15 minutes
- Cook Time: 12 minutes
- Total Time: 2 hours 27 minutes (includes chilling)
- Yield: 24 cookies 1x
- Category: Dessert
- Cuisine: American
Ingredients
- 1 cup (226g) unsalted butter
- 2 ¼ cups (280g) all-purpose flour
- 1 teaspoon baking soda
- ½ teaspoon salt
- 1 cup (200g) packed light brown sugar
- ½ cup (100g) granulated sugar
- 2 large eggs, room temperature
- 2 teaspoons vanilla extract
- 2 cups (340g) semi-sweet chocolate chips or chopped chocolate
- Flaky sea salt for finishing (optional but highly recommended)
Instructions
- Brown the butter: Cut the butter into pieces and place in a medium saucepan over medium heat. Stir frequently as it melts. The butter will foam, then the foam will subside, and brown specks will form at the bottom. When it smells nutty and the specks are warm amber (about 5-7 minutes), remove from heat immediately. Pour into a heat-safe bowl and let cool for 10-15 minutes.
- Mix dry ingredients: In a medium bowl, whisk together the flour, baking soda, and salt. Set aside.
- Combine brown butter and sugars: In a large mixing bowl, combine the warm brown butter with brown sugar and granulated sugar. Whisk vigorously for about 2 minutes until the mixture looks like wet sand and pulls away from the sides.
- Add eggs and vanilla: Add the eggs one at a time, whisking well after each addition. The mixture should be smooth, glossy, and slightly thickened. Add vanilla and whisk again.
- Combine wet and dry ingredients: Pour dry ingredients into wet ingredients. Use a rubber spatula to fold gently until just combined. Stop when no streaks of flour remain.
- Add chocolate: Fold in chocolate chips and chopped chocolate until evenly distributed.
- Chill the dough: Cover the bowl with plastic wrap and refrigerate for at least 2 hours, or up to 3 days.
- Preheat and prepare: When ready to bake, preheat oven to 350°F (175°C). Line baking sheets with parchment paper or silicone mats. Let dough sit at room temperature for 10 minutes if chilled for more than a few hours.
- Scoop and bake: Scoop rounded tablespoons of dough (about 2 tablespoons each) and place 2 inches apart on prepared baking sheets. Do not flatten. Bake for 10-12 minutes, until edges are golden brown and centers look slightly underdone and puffy.
- Finish and cool: Immediately after removing from oven, sprinkle each cookie with a pinch of flaky sea salt. Let cool on baking sheet for 5 minutes, then transfer to a wire rack to cool completely.
Notes
Don’t skip the chilling step – it’s crucial for thick cookies. Use room temperature eggs. For best results, use a light-colored baking sheet. The cookies continue to bake on the hot pan after removal, so underbake slightly. Store in an airtight container for up to 5 days with a slice of bread to keep them soft. Dough can be frozen for up to 3 months.
Nutrition
- Serving Size: 1 cookie
- Calories: 245
- Sugar: 20
- Sodium: 135
- Fat: 14
- Saturated Fat: 8
- Carbohydrates: 30
- Fiber: 1
- Protein: 3
Keywords: brown butter chocolate chip cookies, thick chewy cookies, bakery style cookies, chocolate chip cookie recipe, homemade cookies


