Love this? Save it for later!
Share the inspiration with your friends
The clock struck seven and the doorbell rang. I was halfway through changing into my Halloween costume when I realized I had forgotten to buy dessert. My neighbor’s kids, dressed as vampires and witches, were already knocking. I had nothing but a sad carton of milk and three eggs. Then I remembered the half-empty box of chocolate pudding mix in the pantry and a bag of Oreos that had been sitting there since last week. Honestly, I almost told them no. But then I looked at the clock again and realized I had exactly twenty minutes to turn pantry scraps into something that wouldn’t make me look like a bad host.
I started dumping pudding into bowls. Then I crumbled cookies on top. It was chaotic, messy, and completely unplanned. The kids didn’t care about the presentation; they just wanted the chocolate. I threw in some gummy worms for fun and called it a graveyard. They ate every single bite. That night, I learned that you don’t need a fancy recipe to make magic. You just need what’s on hand and a little bit of creativity.
Now, every year around this time, I make these cups before anyone even asks. They are quick, spooky, and ridiculously easy. I keep the ingredients stocked specifically for these moments. It’s become my go-to trick when life gets busy or unexpected guests show up. There is something comforting about knowing you can pull a treat out of thin air. And let’s face it, kids love digging through “dirt” with a spoon. It’s messy, but that’s part of the fun.
I still remember the look on my neighbor’s youngest kid’s face when he pulled a gummy worm out of his cup. He laughed so hard he spilled some pudding. That moment stuck with me. It wasn’t about perfection; it was about joy. These cups have saved me more times than I can count. They are simple, reliable, and always a hit. I make them for Halloween, but honestly, they work for any casual gathering. You don’t need to be a chef to make them. You just need to be willing to get a little messy.
Why You’ll Love This Recipe
Quick & Easy
This recipe comes together in under fifteen minutes. You don’t need to turn on the oven or spend hours standing at the counter. It is perfect for busy weeknights or last-minute cravings when you need something sweet fast.
Simple Ingredients
No fancy grocery trips are needed. You likely already have everything in your kitchen right now. Chocolate pudding mix, milk, cookies, and a few candies are all you need. It is pantry-friendly and stress-free.
Perfect for Halloween Parties
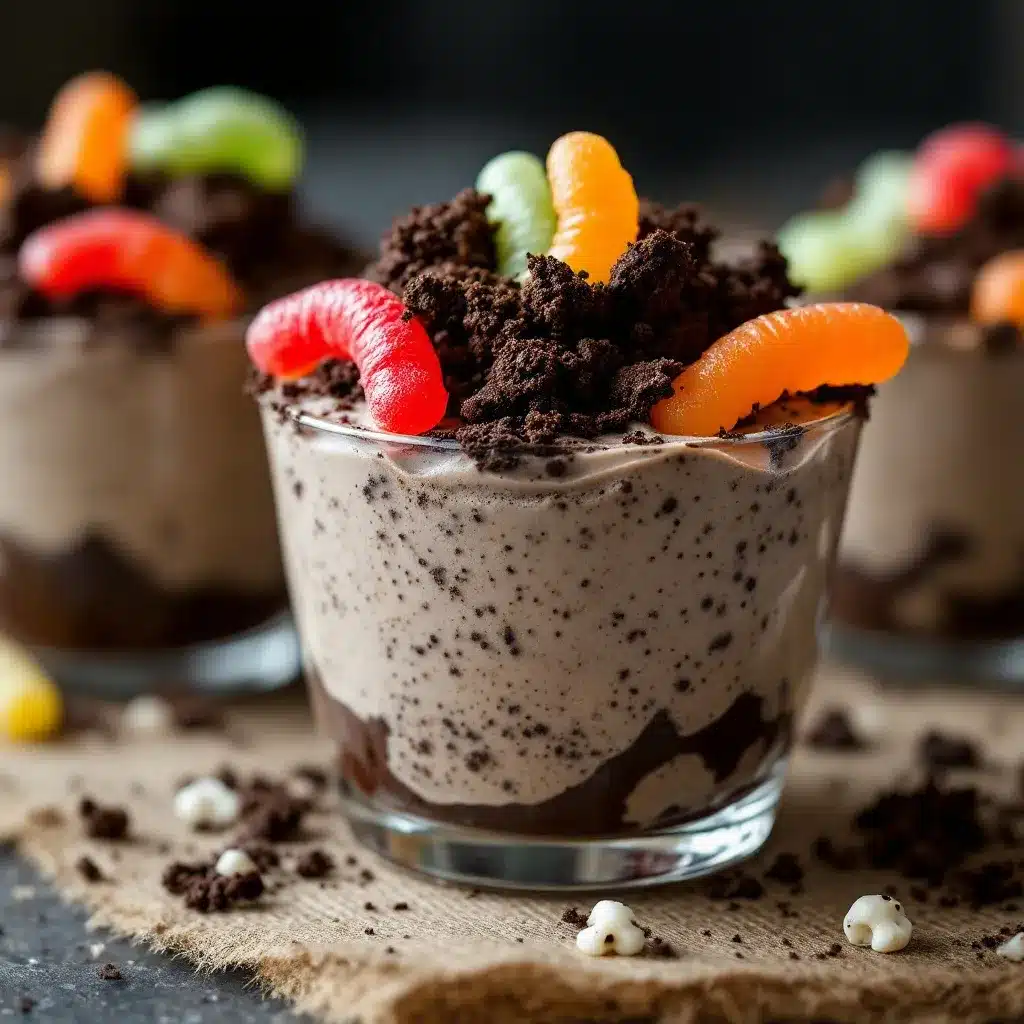
Great for trick-or-treaters, classroom parties, or spooky movie nights. These cups fit the theme perfectly without requiring any special skills. They are visually striking and fun to eat.
Crowd-Pleaser
Always gets rave reviews from kids and adults alike. The combination of creamy pudding and crunchy cookies is a classic texture mix that everyone enjoys. Even picky eaters usually love these.
Unbelievably Delicious
The texture and flavor combo is next-level comfort food. The contrast between the smooth pudding and the crumbled cookies creates a satisfying mouthfeel. It feels like a treat but is actually quite simple to make.
This recipe isn’t just good—it is the kind that makes you close your eyes after the first bite. It’s comfort food reimagined for a spooky season. It’s healthier, faster, but with the same soul-soothing satisfaction of a traditional dessert. Perfect for impressing guests without stress, or turning a simple meal into something memorable.
What Ingredients You Will Need
This recipe uses simple, wholesome ingredients to deliver bold flavor and satisfying texture without the fuss. The beauty of these cups lies in their accessibility. Most items are staples you probably have on hand.
- Instant Chocolate Pudding Mix: Use a standard box mix for the base. I recommend brands like Jell-O or French Vanilla for a consistent texture. The mix contains thickeners that set quickly, which is essential for this no-bake dessert.
- Milk: Whole milk is best for richness. If you need a lighter option, 2% works fine, but the fat content helps carry the chocolate flavor. Measure exactly one cup for the standard box size.
- Chocolate Sandwich Cookies: Classic Oreo-style cookies are the standard here. They provide the “dirt” texture when crushed. You can use the original or the mint version for a twist. Avoid thin cookies as they don’t crumble as well.
- Heavy Cream (Optional): For a richer pudding, you can fold in whipped heavy cream. This makes the texture fluffier and more mousse-like. It is a great addition if you want to elevate the dessert slightly.
- Gummy Worms: These are the fun factor. Use standard red gummy worms. They add a chewy contrast and look like they are wriggling out of the dirt. They are cheap and widely available.
- Mini Marshmallows: Add these for extra texture and visual interest. They look like little bones or skulls when scattered on top. White marshmallows work best for the spooky aesthetic.
- Cookie Crumbs: Reserve some whole cookies and crush them finely for the top layer. This adds a nice crunch on top of the soft pudding. Use a food processor or a rolling pin for this.
For the best results, look for fresh cookies. Stale cookies will turn into dust instead of crumbs. If you are making these ahead of time, keep the cookies separate until serving to maintain their crunch. You can substitute gluten-free cookies if needed, though the texture may vary slightly.
Equipment Needed
You don’t need much to make these cups. A few basic tools will get the job done.
- Mixing Bowls: One medium bowl for whisking the pudding. A larger bowl is helpful if you are making a big batch.
- Whisk: A standard balloon whisk works best for smooth pudding. It helps break up any lumps quickly.
- Plastic Cups or Glasses: Clear cups are essential for the visual effect. You want to see the layers. Small dessert cups or even mason jars work well.
- Ziplock Bags: Use these for crushing the cookies. It is much easier than using a mortar and pestle. It also contains the mess.
- Rolling Pin: Heavy enough to crush cookies effectively. A wine bottle can work in a pinch, but a rolling pin gives more control.
- Spoons: Small dessert spoons for serving. They fit nicely in the cups and are easy for kids to hold.
If you don’t have a rolling pin, you can use a heavy can. Just be careful not to break the bag. Budget-friendly options include using your hands to crush cookies, though it takes more effort. The key is to have the tools ready before you start mixing.
Preparation Method
Follow these steps to create your spooky dessert. The process is straightforward and forgiving.
- Prepare the Pudding Base: In a medium mixing bowl, combine the instant chocolate pudding mix with cold milk. Use exactly one cup of milk for a standard 3.4-ounce box. Whisk vigorously for two minutes. The mixture should thicken quickly. If it looks too thin, let it sit for five minutes. The residual heat and starch will help it set. Do not skip the whisking; it ensures a smooth texture without lumps.
- Crush the Cookies: Take four large chocolate sandwich cookies. Place them in a heavy-duty ziplock bag. Seal the bag tightly, removing as much air as possible. Use a rolling pin to crush the cookies into small pieces. You want a mix of fine crumbs and small chunks. This texture mimics dirt best. Be careful not to crush them into powder; you need some body.
- Assemble the Layers: Start with a layer of pudding in the bottom of your clear cups. Add about two tablespoons. Then, sprinkle a generous layer of cookie crumbs on top. The ratio is roughly equal parts pudding and crumbs. Repeat this layering process until the cup is full. Leave a little space at the top for garnish. The layers create the visual depth that makes these cups so appealing.
- Add the Fun Elements: Place gummy worms on top of the pudding layer. Push them slightly into the “dirt” so they look like they are emerging. Scatter mini marshmallows over the top. These add a white contrast that looks like bones or tombstones. You can also add candy bats or spiders if you have them. The more colorful the garnish, the better.
- Chill and Serve: Place the cups in the refrigerator for at least thirty minutes. This allows the pudding to set firmly and the flavors to meld. Serve chilled. The cold temperature enhances the chocolate flavor and keeps the cookies from getting too soggy. They can be made up to four hours in advance.
Watch for common issues like lumpy pudding. If this happens, whisk longer or strain the mixture. Ensure the cups are clean and dry before assembling. Moisture can cause the pudding to slide. Take your time with the layers; it makes a big difference in the final presentation.
Cooking Tips & Techniques
Professional techniques can make this simple recipe even better. Here are some insights from personal cooking trials.
- Temperature Matters: Always use cold milk. Warm milk will prevent the pudding from setting properly. It needs the cold to activate the thickeners quickly.
- Cookie Texture: Do not over-crush the cookies. You want distinct pieces, not a fine powder. The chunks provide the necessary crunch. If you use a food processor, pulse only a few times.
- Layering Order: Start with pudding, then crumbs. This helps the crumbs stick to the cup walls and creates a better visual effect. The first layer sets the foundation.
- Timing: Do not assemble too far in advance. The cookies will eventually get soft. Aim for serving within four hours of assembly. If you need to prep earlier, keep the components separate.
- Consistency: Taste the pudding before assembling. If it is too sweet, add a pinch of salt. This balances the flavor and makes the chocolate taste more intense.
I once made these with warm milk and they turned into soup. Lesson learned. Always check your milk temperature. Also, use fresh cookies. Old cookies taste stale and don’t crumble right. These small details make a big difference in the final result.
Variations & Adaptations
You can customize these cups to suit different tastes and dietary needs. Here are some ideas.
- Dietary Options: Use gluten-free cookies for a gluten-free version. Substitute dairy-free milk and pudding mix for a vegan option. There are many plant-based alternatives available now.
- Flavor Twists: Try mint chocolate pudding with mint Oreos. Or use vanilla pudding with chocolate cookies for a different flavor profile. Peanut butter pudding is also a delicious variation.
- Seasonal Changes: Add orange sprinkles for Halloween. Use red gummy worms for Valentine’s Day. The base recipe is versatile and can be adapted for any holiday.
- Allergen Substitutions: Use nut-free cookies if needed. Most standard Oreos are nut-free, but always check labels. Substitute marshmallows with fruit snacks for a chewy alternative.
I tried making these with peanut butter pudding once. It was surprisingly good. The saltiness paired well with the sweet cookies. Don’t be afraid to experiment. The basic structure allows for many creative changes.
Serving & Storage Suggestions
These cups are best served chilled. The cold temperature enhances the texture and flavor.
- Presentation: Serve on a spooky platter with other Halloween treats. Add a layer of shredded coconut around the base of the cups for extra “dirt.” Use tongs to place the cups neatly.
- Complementary Dishes: Pair with cold milk or hot chocolate. These cups go well with savory snacks like chips or pretzels. Balance the sweetness with salty sides.
- Storage: Store in the refrigerator for up to two days. Keep them covered to prevent odors from absorbing. Do not freeze, as the texture will change. The cookies will become too soft if left out for too long.
- Reheating: Do not reheat these cups. They are meant to be eaten cold. If the pudding softens, serve immediately. The flavor is best when fresh.
Flavors develop over time as the cookies absorb the pudding. This creates a richer taste after a few hours. However, the texture changes, so serve within the recommended timeframe. These cups are perfect for make-ahead parties.
Nutritional Information & Benefits
While these cups are a treat, they are relatively simple in ingredients.
- Calories: Each cup contains approximately 250-300 calories, depending on the size and ingredients used.
- Sugar: High in sugar due to the pudding mix and cookies. Enjoy in moderation.
- Fat: Moderate fat content from the milk and cookies. Use low-fat milk to reduce calories.
- Allergens: Contains dairy and gluten. Adjust ingredients for allergies.
These cups are a fun way to satisfy a sweet tooth without a heavy bake. They are light and easy to digest. I enjoy them as a post-dinner treat. They are not health food, but they are a joyful indulgence. Balance them with a healthy meal earlier in the day.
Conclusion
These Fun Gooey Graveyard Dirt Pudding Cups are a simple, spooky treat that anyone can make. They are perfect for Halloween or any casual gathering. I love them because they are easy and fun. They bring a smile to everyone’s face. Customize them to fit your style. Try different flavors and garnishes. Share them with friends and family.
I hope you enjoy making these as much as I do. They are a staple in my kitchen during the fall. Let me know how they turn out. Leave a comment below with your favorite variations. Share your photos online. I love seeing your creations. Happy Halloween!
FAQs
Can I make these cups ahead of time?
Yes, you can make them up to four hours in advance. Keep them covered in the refrigerator. The cookies will soften slightly, which adds to the texture. Do not make them more than a day ahead.
What can I use instead of Oreos?
You can use any chocolate sandwich cookies. Thin cookies work too, but they may not crumble as well. Try mint cookies or peanut butter cookies for a twist.
Can I make these gluten-free?
Yes, use gluten-free cookies and gluten-free pudding mix. Ensure all other ingredients are certified gluten-free. The texture may vary slightly.
How long do these cups last?
They last up to two days in the refrigerator. After that, the cookies become too soft. Discard any leftovers after two days for best quality.
Can I use homemade pudding?
Yes, but it may not set as firmly. Instant pudding mix is preferred for this recipe. If using homemade, chill the pudding before assembling. It may take longer to set.
Pin This Recipe!
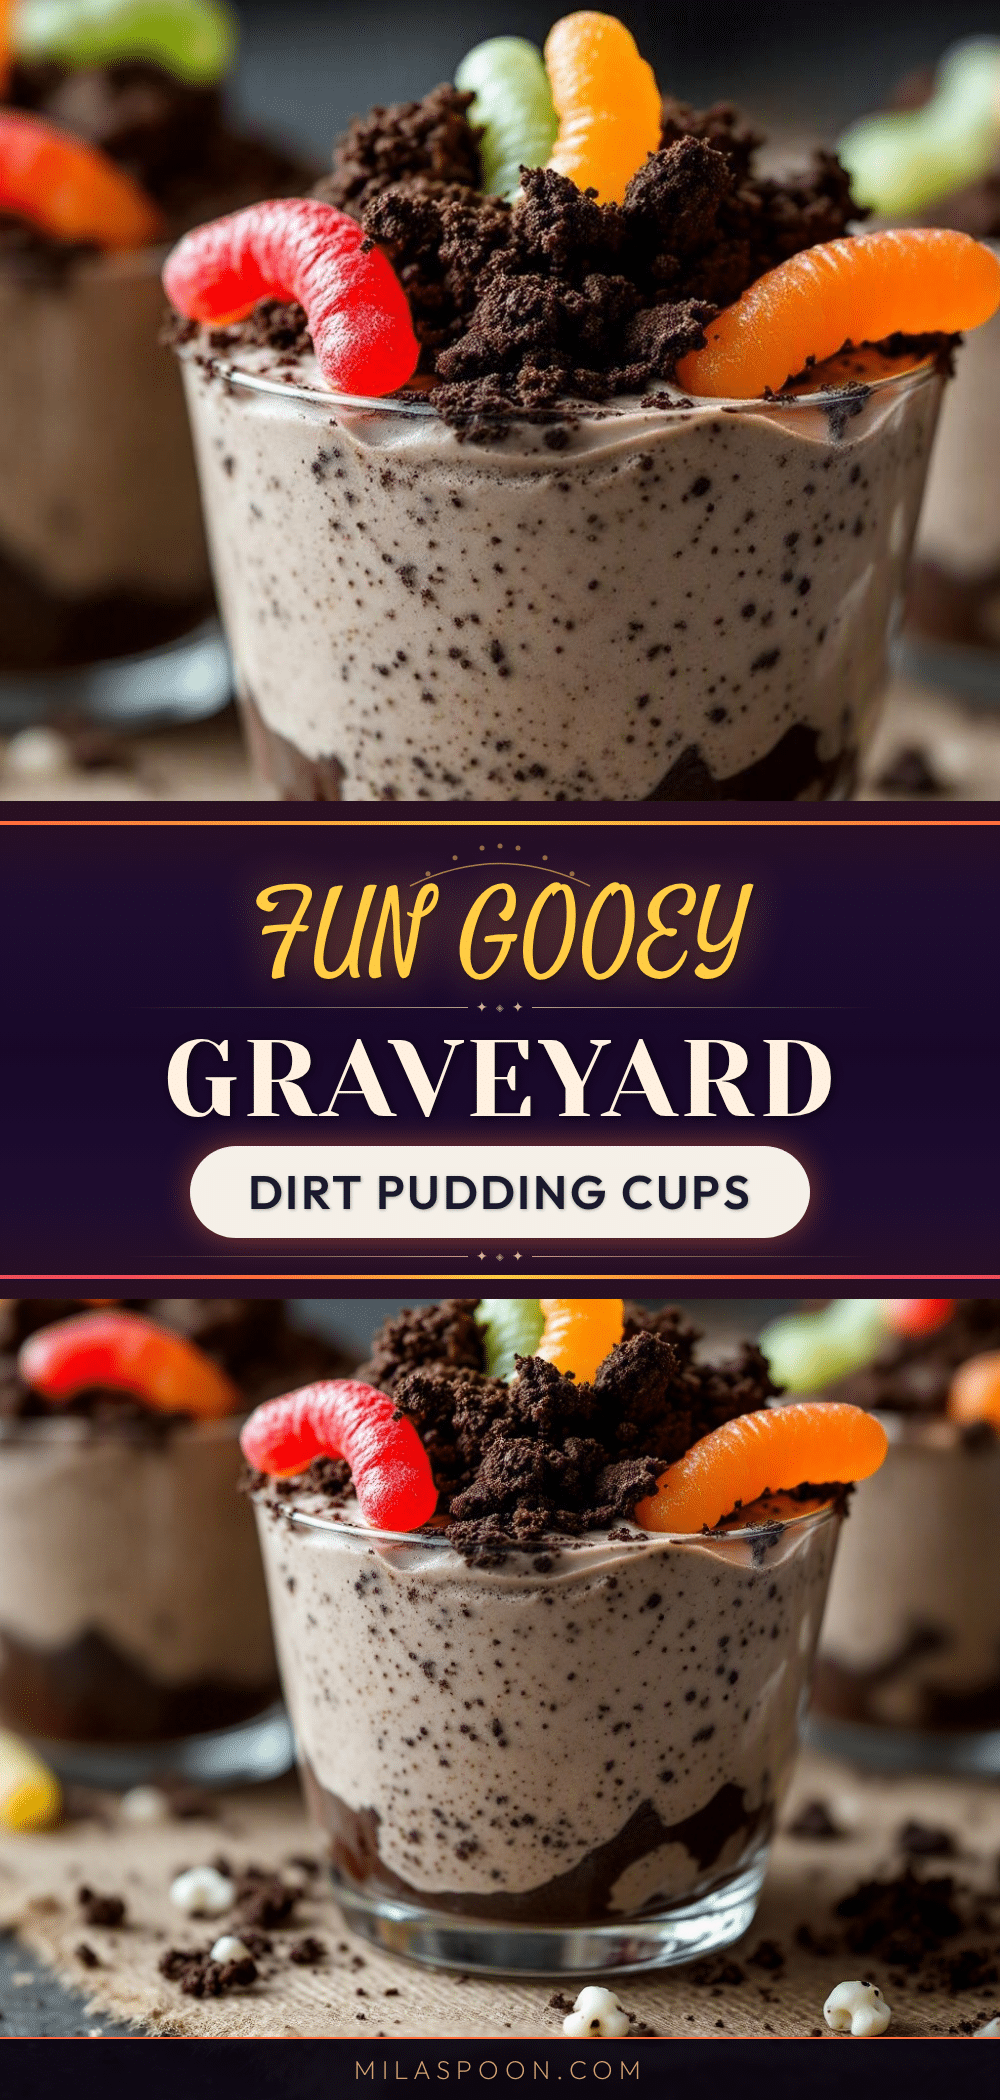
Fun Gooey Graveyard Dirt Pudding Cups

A quick, no-bake Halloween dessert featuring layers of chocolate pudding, crushed cookie ‘dirt’, and gummy worms. This easy treat comes together in under 15 minutes and is perfect for spooky gatherings.
- Prep Time: 15 minutes
- Cook Time: 0 minutes
- Total Time: 45 minutes
- Yield: 4 servings 1x
- Category: Dessert
- Cuisine: American
Ingredients
- 1 box (3.4 oz) instant chocolate pudding mix
- 1 cup cold whole milk
- 4 large chocolate sandwich cookies (e.g., Oreos)
- Gummy worms
- Mini marshmallows
- Heavy cream (optional, for fluffier texture)
Instructions
- In a medium mixing bowl, combine the instant chocolate pudding mix with cold milk. Whisk vigorously for two minutes until thickened.
- Place the chocolate sandwich cookies in a heavy-duty ziplock bag. Seal tightly and crush with a rolling pin into a mix of fine crumbs and small chunks.
- In clear plastic cups or glasses, add a layer of pudding (about 2 tablespoons), followed by a generous layer of cookie crumbs. Repeat until the cup is full, leaving space at the top.
- Garnish with gummy worms (pushing them slightly into the ‘dirt’) and scatter mini marshmallows on top.
- Refrigerate for at least 30 minutes to allow the pudding to set and flavors to meld before serving chilled.
Notes
Use cold milk to ensure the pudding sets properly. Do not over-crush the cookies; you want distinct pieces for texture. Serve within 4 hours of assembly for best texture, as cookies will soften over time. Can be made up to 4 hours in advance.
Nutrition
- Serving Size: 1 cup
- Calories: 275
- Sugar: 28
- Sodium: 250
- Fat: 12
- Saturated Fat: 5
- Carbohydrates: 40
- Fiber: 2
- Protein: 4
Keywords: Halloween dessert, no-bake pudding, dirt pudding cups, easy Halloween treat, kid-friendly dessert, graveyard pudding