Love this? Save it for later!
Share the inspiration with your friends
The first three times I made brown butter chocolate chip cookies, they came out flat as pancakes. Not the good kind of flat either — the sad, greasy, “what-did-I-do-wrong” kind of flat that makes you question your entire baking existence. I stood there staring at a baking sheet full of cookie puddles, wondering how every food blogger on the internet made these look so effortless.
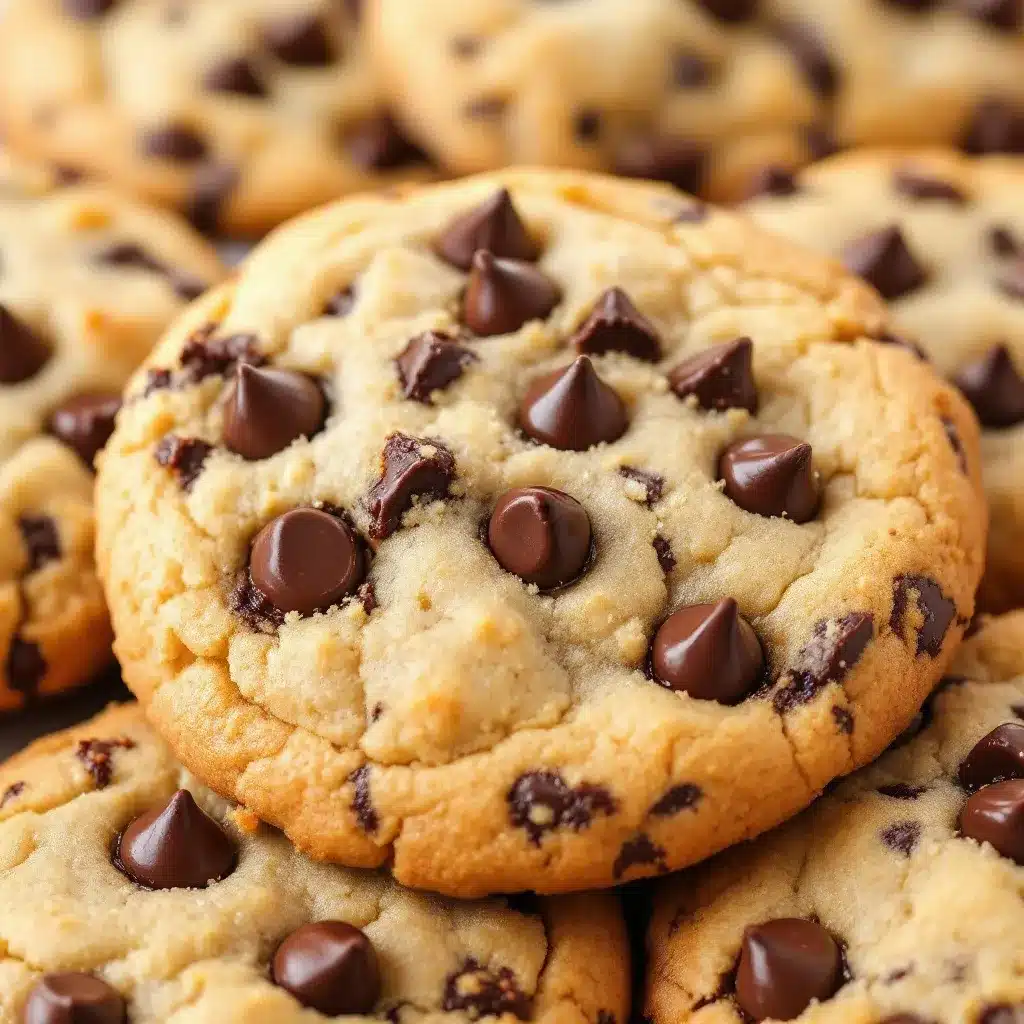
Turns out, I was rushing the brown butter. Letting it cool properly? That’s the secret nobody tells you about. The fourth batch changed everything — those cookies came out chewy, thick, with edges that shatter just a little when you bite in. I actually let out a relieved laugh in my empty kitchen.
These chewy brown butter chocolate chip cookies have become my signature bake. Friends request them for birthdays. My neighbor trades me a full lasagna for a dozen. And honestly? I finally understand the hype. The nutty, toasty flavor from the butter combined with that perfect chewy texture — it is the kind of cookie that makes you close your eyes after the first bite.
Why You’ll Love This Recipe
I have tested this recipe more times than I care to admit. Like, eight separate batches in one weekend kind of testing. My coworkers were very happy recipients of my “research.” Here is what makes these cookies stand out from every other chocolate chip cookie recipe out there:
- Brown Butter Magic : That nutty, caramelized flavor transforms ordinary cookies into something extraordinary. It adds depth you just cannot get from regular melted butter.
- Perfectly Chewy Texture : The combination of melted brown butter and an extra egg yolk creates cookies that stay soft and chewy for days — not cakey, not crispy, just right.
- Simple Pantry Ingredients : Nothing fancy here. Butter, sugar, eggs, flour, chocolate chips. You probably have everything except maybe the butter to brown.
- No Chill Time Required : I know, I know — most brown butter cookie recipes insist on chilling the dough. This one works beautifully baked immediately. Though they taste even better if you can wait.
- Crowd-Pleaser Guaranteed : I have brought these to potlucks, holiday parties, and casual get-togethers. They disappear faster than anything else on the table.
- Foolproof Once You Know the Tricks : After my early failures, I figured out exactly what works. I will walk you through every step so you skip the trial and error.
These cookies have that perfect balance — crispy edges, soft centers, melty chocolate in every bite. They are the kind of cookie that makes people ask for the recipe before they even finish the first one.
What Ingredients You Will Need
This recipe uses simple ingredients to create something genuinely special. The brown butter does most of the heavy lifting flavor-wise, so quality matters here.
- Unsalted butter, 1 cup (2 sticks or 226g) : Go for a good-quality European-style butter like Kerrygold for the richest brown butter flavor. The higher fat content creates deeper nutty notes when browning.
- Light brown sugar, 1 cup packed (200g) : This gives the cookies their chewiness and that molasses undertone that pairs perfectly with brown butter. Dark brown sugar works too for an even richer flavor.
- Granulated sugar, 1/2 cup (100g) : Adds structure and helps create those crispy edges. The combination of both sugars is key here.
- Large egg, 1 whole plus 1 egg yolk : The extra yolk adds richness and tenderness. Make sure they are room temperature so they incorporate smoothly into the warm butter mixture.
- Vanilla extract, 2 teaspoons : Pure vanilla extract makes a noticeable difference. I use Nielsen-Massey Madagascar vanilla — worth the splurge for baking.
- All-purpose flour, 2 cups plus 2 tablespoons (270g) : Spoon and level your flour. Scooping directly from the bag packs in too much flour and gives you dry cookies.
- Baking soda, 1 teaspoon : Helps the cookies spread just enough and gives them that slight lift.
- Salt, 1 teaspoon : I use fine sea salt. Do not skip this — salt balances the sweetness and enhances the brown butter flavor.
- Semi-sweet chocolate chips, 2 cups (340g) : Use good-quality chips like Guittard or Ghirardelli. You can also chop a high-quality chocolate bar for those beautiful chocolate puddles.
- Flaky sea salt, for finishing (optional but highly recommended) : Maldon salt flakes are perfect. That little crunch of salt on top takes these cookies to another level.
For the best results, weigh your ingredients if you have a kitchen scale. Flour measurement by volume can vary wildly, and baking is precise enough that those extra 20 grams matter.
Equipment Needed
You do not need fancy equipment for these cookies, but a few specific tools make the process smoother.
- Light-colored saucepan or skillet : A light-colored pan lets you see the butter change color as it browns. Dark pans make it nearly impossible to tell when the butter is done.
- Stand mixer or hand mixer : A stand mixer with the paddle attachment works beautifully, but a hand mixer and a large bowl get the job done too.
- Rubber spatula : For scraping every last bit of that precious brown butter into the mixing bowl. Do not waste a drop.
- Baking sheets : Rimmed baking sheets work best. I use Nordic Ware aluminum half-sheet pans — they conduct heat evenly and do not warp.
- Parchment paper or silicone baking mats : Parchment paper is my preference because it lets cookies spread evenly. Silicone mats work but sometimes inhibit browning slightly.
- Cookie scoop (2-tablespoon size) : A #40 scoop gives you consistent cookie sizes, which means even baking. Worth the few dollars investment.
- Cooling rack : Letting cookies cool on a rack prevents soggy bottoms. The air circulation keeps them crisp on the edges.
Preparation Method
Let me walk you through this step by step. I have included all the little details I wish someone had told me when I first started making these.
-
Brown the butter. Cut the butter into pieces and place it in your light-colored saucepan over medium heat. Stir occasionally with a rubber spatula. The butter will melt, foam up, and then start to crackle and pop. After about 5-7 minutes, the foam will subside and you will see golden brown specks forming at the bottom. The butter will smell nutty and toasty — that is your cue. Immediately remove it from the heat and pour it into a heat-safe bowl to stop the cooking process. Do not walk away from browning butter. It goes from perfect to burnt in about 30 seconds.
-
Cool the brown butter. This step is crucial. Let the brown butter cool for 10-15 minutes until it is warm but not hot — around 120°F if you are using a thermometer. If you add it to the sugars while it is still too hot, it will melt the sugar and your cookies will spread into flat puddles. Ask me how I know this.
-
Mix the wet ingredients. In your stand mixer bowl or a large mixing bowl, combine the cooled brown butter with the brown sugar and granulated sugar. Beat on medium speed for 2-3 minutes until the mixture looks like wet sand and has lightened slightly in color. Add the whole egg, egg yolk, and vanilla extract. Beat on medium for another minute until smooth and glossy. The mixture should look thick and almost pudding-like.
-
Combine the dry ingredients. In a separate bowl, whisk together the flour, baking soda, and salt. Whisking aerates the flour and distributes the leavening agents evenly — no one wants a pocket of baking soda in their cookie.
-
Combine wet and dry. Add the dry ingredients to the wet mixture in two additions, mixing on low speed after each addition. Mix just until the flour disappears — overmixing develops gluten and makes tough cookies. Scrape down the sides and bottom of the bowl with your spatula to make sure everything is incorporated.
-
Add the chocolate chips. Fold in the chocolate chips with your rubber spatula. Make sure they are evenly distributed throughout the dough. The dough will be thick and slightly greasy-looking — that is normal and good.
-
Portion the dough. Using your cookie scoop, portion the dough into 2-tablespoon balls (about 40g each). Place them on a parchment-lined baking sheet about 2 inches apart. You can bake them immediately or refrigerate the dough balls for up to 72 hours — cold dough produces thicker, chewier cookies.
-
Bake. Preheat your oven to 375°F. Bake the cookies for 10-12 minutes. At 10 minutes, the edges should be golden brown and the centers should still look slightly underdone and puffy. Do not overbake — they continue cooking on the hot baking sheet after you pull them out.
-
Finish with salt. As soon as the cookies come out of the oven, sprinkle each one with a tiny pinch of flaky sea salt. This step is optional but transformative — that salty crunch against the sweet, nutty cookie is pure magic.
-
Cool properly. Let the cookies cool on the baking sheet for 5 minutes. This allows them to set up without breaking apart. Then transfer them to a wire rack to cool completely. Or eat them warm, I will not judge.
Cooking Tips & Techniques
After making these cookies dozens of times, I have collected some hard-earned wisdom. Here are the tips that make the biggest difference.
Watch the butter like a hawk. I ruined three batches of brown butter before I learned to pay attention. The butter goes from golden to burnt fast. Swirl the pan constantly in the final minute and remove it at the first sign of nutty aroma and amber color. Pour it into a separate bowl immediately — the hot pan keeps cooking the butter even off the heat.
Use a light-colored pan for browning. This is non-negotiable. A dark nonstick pan hides the color change and you will end up with burnt butter every time. My go-to is a stainless steel saucepan — easy to see through and cleans up beautifully.
Room temperature eggs matter. Cold eggs seize up the warm brown butter mixture and create a greasy dough. Let your eggs sit on the counter for 30 minutes before starting, or place them in a bowl of warm water for 5 minutes.
Do not skip the extra egg yolk. That single yolk is what gives these cookies their signature chewiness. The fat from the yolk tenderizes the gluten and keeps the cookies soft for days. I have tested it without — the texture is noticeably different.
Weigh your flour. I cannot stress this enough. Measuring flour by volume is wildly inconsistent. One cup of flour can weigh anywhere from 120g to 150g depending on how you scoop. For these cookies, 270g is the sweet spot. Too much flour and they are dry and cakey. Too little and they spread into thin crisps.
Chill the dough if you can. While this recipe works without chilling, refrigerating the dough balls for at least 30 minutes (or up to 72 hours) produces noticeably thicker, chewier cookies. The cold butter takes longer to melt in the oven, which means less spreading. I have made these from both fresh and chilled dough — chilled wins every time for texture.
Bang the pan. About halfway through baking, take the pan out of the oven and bang it on the counter a couple times. This deflates the puffy centers and creates those beautiful rippled edges. It also gives the cookies that slightly crisp exterior with a soft interior. Game changer.
Variations & Adaptations
One of the best things about this recipe is how adaptable it is. Here are some variations I have tried and loved.
Dark Chocolate Sea Salt Version : Swap the semi-sweet chips for dark chocolate chunks (70% cacao or higher). The bitterness of dark chocolate pairs beautifully with the nutty brown butter and flaky salt. This is my personal favorite variation.
Brown Butter Pecan Chocolate Chip : Toast 1 cup of chopped pecans in the oven at 350°F for 8 minutes, then fold them into the dough along with the chocolate chips. The crunch adds texture and the pecans reinforce that nutty brown butter flavor. I make this version every Thanksgiving.
Gluten-Free Adaptation : Substitute the all-purpose flour with a 1:1 gluten-free baking flour blend that contains xanthan gum. I have had excellent results with King Arthur Measure for Measure. The cookies spread slightly more, so chill the dough for at least an hour before baking.
Double Chocolate Brown Butter Cookies : Replace 1/4 cup of the flour with 1/4 cup of unsweetened cocoa powder. Use white chocolate chips or a mix of dark and white. The brown butter and chocolate combination is intensely rich and decadent.
Brown Butter Maple Snickerdoodles : If you love the brown butter technique, you should try my brown butter maple snickerdoodles — they use the same browning method but with cinnamon sugar coating and maple flavor. Completely different cookie, equally addictive.
Small Batch Option : Halve all the ingredients and use one whole egg instead of the egg plus yolk. Bake as directed — perfect for when you want just 8-10 cookies without a full batch staring at you from the counter.
Serving & Storage Suggestions
These cookies are at their absolute best warm from the oven, but they stay delicious for days when stored properly.
Serving Temperature : Serve warm or at room temperature. If you want that fresh-from-the-oven experience, pop a cooled cookie in the microwave for 10-15 seconds. The chocolate gets melty again and the texture softens beautifully.
Pairing Ideas : A cold glass of milk is the classic pairing, but these cookies also shine alongside a scoop of vanilla ice cream for an impromptu ice cream sandwich. For a grown-up treat, try them with a cup of strong coffee or a glass of bourbon — the nutty brown butter plays beautifully with both.
Room Temperature Storage : Store cookies in an airtight container at room temperature for up to 5 days. Place a slice of bread in the container — the cookies will absorb moisture from the bread and stay soft. Replace the bread slice every couple of days.
Freezer Instructions : These cookies freeze beautifully. You have two options: freeze the baked cookies in a freezer-safe bag for up to 3 months, or freeze the raw dough balls on a baking sheet until solid, then transfer to a freezer bag. Bake frozen dough balls straight from the freezer — just add 2-3 minutes to the baking time. I always keep a stash of dough balls in my freezer for emergency cookie cravings.
How Flavors Develop : Interestingly, these cookies taste even better the day after baking. The brown butter flavor deepens and melds with the chocolate overnight. If you can resist eating them all immediately, store them in an airtight container and enjoy them tomorrow — you will taste the difference.
Nutritional Information & Benefits
Let’s be real — these are cookies, not health food. But knowing what is in them helps with mindful indulgence.
| Nutrient | Per Cookie (based on 24 cookies) |
|---|---|
| Calories | 195 |
| Total Fat | 11g |
| Saturated Fat | 7g |
| Cholesterol | 35mg |
| Sodium | 155mg |
| Total Carbohydrates | 24g |
| Dietary Fiber | 1g |
| Sugars | 16g |
| Protein | 3g |
Pin This Recipe!

Chewy Brown Butter Chocolate Chip Cookies: The Best Easy Recipe

These chewy brown butter chocolate chip cookies have a nutty, caramelized flavor from browned butter and a perfectly chewy texture. They are simple to make with pantry ingredients, require no chill time, and are guaranteed to be a crowd-pleaser.
- Prep Time: 15 minutes
- Cook Time: 12 minutes
- Total Time: 27 minutes
- Yield: 24 servings 1x
- Category: Dessert
- Cuisine: American
Ingredients
- 1 cup (2 sticks or 226g) unsalted butter
- 1 cup packed (200g) light brown sugar
- 1/2 cup (100g) granulated sugar
- 1 large egg plus 1 egg yolk, room temperature
- 2 teaspoons vanilla extract
- 2 cups plus 2 tablespoons (270g) all-purpose flour
- 1 teaspoon baking soda
- 1 teaspoon fine sea salt
- 2 cups (340g) semi-sweet chocolate chips
- Flaky sea salt, for finishing (optional)
Instructions
- Brown the butter: Cut the butter into pieces and place in a light-colored saucepan over medium heat. Stir occasionally with a rubber spatula. The butter will melt, foam, and crackle. After 5-7 minutes, the foam will subside and golden brown specks will form at the bottom. The butter will smell nutty and toasty. Immediately remove from heat and pour into a heat-safe bowl to stop cooking.
- Cool the brown butter: Let the brown butter cool for 10-15 minutes until warm but not hot (around 120°F).
- Mix the wet ingredients: In a stand mixer or large bowl, combine the cooled brown butter with brown sugar and granulated sugar. Beat on medium speed for 2-3 minutes until the mixture looks like wet sand and lightens slightly. Add the whole egg, egg yolk, and vanilla extract. Beat on medium for another minute until smooth and glossy.
- Combine the dry ingredients: In a separate bowl, whisk together the flour, baking soda, and salt.
- Combine wet and dry: Add the dry ingredients to the wet mixture in two additions, mixing on low speed after each addition. Mix just until the flour disappears. Scrape down the sides and bottom of the bowl.
- Add the chocolate chips: Fold in the chocolate chips with a rubber spatula until evenly distributed.
- Portion the dough: Using a cookie scoop, portion the dough into 2-tablespoon balls (about 40g each). Place on a parchment-lined baking sheet about 2 inches apart. Bake immediately or refrigerate for up to 72 hours.
- Bake: Preheat oven to 375°F. Bake for 10-12 minutes. At 10 minutes, edges should be golden brown and centers should look slightly underdone and puffy.
- Finish with salt: As soon as cookies come out of the oven, sprinkle each with a tiny pinch of flaky sea salt (optional).
- Cool properly: Let cookies cool on the baking sheet for 5 minutes, then transfer to a wire rack to cool completely.
Notes
Let brown butter cool properly to avoid flat cookies. Use room temperature eggs. Weigh flour for best results. Chilling dough for at least 30 minutes produces thicker cookies. Bang the pan halfway through baking for rippled edges. Store in an airtight container at room temperature for up to 5 days; freeze dough balls or baked cookies for up to 3 months.
Nutrition
- Serving Size: 1 cookie
- Calories: 195
- Sugar: 16
- Sodium: 155
- Fat: 11
- Saturated Fat: 7
- Carbohydrates: 24
- Fiber: 1
- Protein: 3
Keywords: brown butter chocolate chip cookies, chewy cookies, easy cookie recipe, no chill cookies, chocolate chip cookies


