Love this? Save it for later!
Share the inspiration with your friends
Three Thursdays ago, right before the school bell rang, I found myself scrambling in the kitchen because I’d completely forgotten to pack snacks for my daughter’s lunchbox. Honestly, I was staring at a sad, half-empty pantry and wondering how to whip something up fast enough to catch the bus. That’s when I remembered a dusty recipe card tucked away in a drawer — a simple, chewy peanut butter chocolate chip cookie recipe I’d scribbled down years ago from a friend I met at the farmer’s market.
The aroma of warm peanut butter melting into sweet chocolate chips filled the air just as my daughter burst through the door, backpack slung on one shoulder, ready to run out again. I managed to bake a batch in record time, packed them up, and watched her smile as she bit into one at lunch the next day. You know that feeling when a recipe just hits the spot — not too sweet, with the perfect chew, and a nostalgic hug of peanut butter and chocolate? That’s exactly why these chewy peanut butter chocolate chip lunch box cookies have become my go-to for busy mornings.
Let me tell you, this isn’t your average cookie recipe. There’s something about the balance of flavors and textures that keeps me coming back — even when I’m not pressed for time. Maybe you’ve been there, needing a snack that’s kid-approved but doesn’t fall apart in the lunchbox. Well, this recipe’s got you covered, and I’m excited to share the full scoop.
Why You’ll Love This Recipe
After testing dozens of peanut butter cookie recipes, this one stands out for several reasons. It’s been a family favorite, a crowd-pleaser at potlucks, and a lifesaver on hectic school mornings. Here’s why these chewy peanut butter chocolate chip lunch box cookies might just become your new favorite snack:
- Quick & Easy: Ready from start to finish in about 25 minutes — perfect for last-minute snack emergencies or weekend baking sessions.
- Simple Ingredients: No need for fancy pantry items. You probably have all these staples on hand already, making it stress-free and budget-friendly.
- Perfect for Lunchboxes: These cookies hold their shape and stay chewy throughout the day, so they don’t turn into crumbs by lunchtime.
- Crowd-Pleaser: Kids and adults rave about the chewy texture combined with melty chocolate chips and that irresistible peanut butter flavor.
- Unbelievably Delicious: The secret is a little brown sugar and a quick chill of the dough — it gives the cookies just the right chew without being dry or cakey.
What makes this recipe different? Well, instead of the usual all-butter base, I use a mix of butter and peanut butter that creates this perfectly tender, chewy texture. Plus, I toss in semi-sweet chocolate chips for a melty, gooey surprise in every bite. Honestly, once I started using this technique, I never looked back. It’s comfort food that feels homemade but comes together effortlessly — which is exactly what busy parents need.
What Ingredients You Will Need
This recipe uses simple, wholesome ingredients to deliver bold flavor and satisfying texture without the fuss. All pantry staples, easy to find, and mostly interchangeable if needed.
- Peanut butter: 1 cup (250g) creamy peanut butter (I prefer natural, unsweetened for a richer flavor)
- Unsalted butter: ½ cup (115g), softened (adds richness and tenderness)
- Brown sugar: ¾ cup (150g), packed (for chewiness and depth)
- Granulated sugar: ¼ cup (50g) (balances sweetness)
- Large egg: 1, room temperature (helps bind everything)
- Vanilla extract: 1 tsp (adds warmth and aroma)
- All-purpose flour: 1 cup (125g) (for structure; can swap with gluten-free flour blend if needed)
- Baking soda: ½ tsp (for leavening)
- Salt: ¼ tsp (enhances flavors)
- Semi-sweet chocolate chips: 1 cup (175g) (the melty goodness everyone loves)
If you’re craving a twist, try adding chopped roasted peanuts or a sprinkle of flaky sea salt on top before baking. I sometimes swap the vanilla for a little almond extract — it gives the cookies a subtle nutty undertone that’s unexpected but amazing.
Equipment Needed
- Mixing bowls (medium and large)
- Electric mixer or sturdy wooden spoon (I use a hand mixer, but a strong arm works too!)
- Measuring cups and spoons (accuracy matters here)
- Baking sheets lined with parchment paper or silicone mats
- Cooling rack (helps cookies cool evenly without sogginess)
- Optional: cookie scoop for even-sized cookies — I find it speeds up the process and helps with uniform baking
If you don’t have an electric mixer, no worries — just mix the butter, peanut butter, and sugars really well by hand until creamy. Also, parchment paper is a lifesaver for cleanup and prevents sticking, but a lightly greased baking sheet works in a pinch. I’ve baked these cookies on both traditional and convection ovens, and just adjust the time slightly to avoid over-browning.
Preparation Method
- Preheat your oven: Set it to 350°F (175°C). Line two baking sheets with parchment paper or silicone mats to avoid sticking.
- Cream the fats and sugars: In a large bowl, beat ½ cup softened unsalted butter, 1 cup creamy peanut butter, ¾ cup packed brown sugar, and ¼ cup granulated sugar together until light and fluffy. This usually takes about 3-4 minutes with a hand mixer. You’ll notice the mixture becomes pale and creamy — that’s your texture cue.
- Add egg and vanilla: Crack in 1 large egg and add 1 tsp vanilla extract. Beat until fully combined. The dough might look a little loose here, but don’t worry.
- Mix dry ingredients: In a separate bowl, whisk together 1 cup all-purpose flour, ½ tsp baking soda, and ¼ tsp salt. This ensures the leavening is evenly distributed.
- Combine wet and dry: Gradually add the flour mixture to the wet ingredients, stirring gently until just combined. Avoid overmixing to keep the cookies tender.
- Fold in chocolate chips: Stir in 1 cup semi-sweet chocolate chips evenly throughout the dough. You’ll want these pockets of melty chocolate everywhere.
- Chill the dough (optional but recommended): Cover the bowl with plastic wrap and refrigerate for 20-30 minutes. This step helps the dough firm up and prevents cookies from spreading too much.
- Portion the dough: Using a cookie scoop or tablespoon, drop dough balls about 2 inches apart on your prepared baking sheets.
- Bake: Place one tray in the oven and bake for 10-12 minutes until the edges are set but the centers still look slightly soft. This ensures a chewy center.
- Cool: Let cookies rest on the baking sheet for 5 minutes before transferring to a wire rack to cool completely. This resting time helps them firm up while staying chewy inside.
Pro tip: If you notice your cookies spreading too thin, chill the dough again and use slightly less butter next time. Also, keep an eye on the baking time — ovens vary, and pulling them out just as they start to brown around the edges is key to that perfect chew.
Cooking Tips & Techniques
One of the biggest challenges with peanut butter cookies is balancing chewiness with structural integrity. Too much peanut butter, and they flatten like pancakes; too little, and they’re dry and crumbly. Here’s what I learned after many trial runs:
- Mixing matters: Creaming the butter and peanut butter with sugars until fluffy traps air that gives your cookies a lighter texture.
- Don’t skip chilling: Chilling the dough firms it up, preventing excessive spreading. I sometimes even pop the trays in the freezer for 10 minutes if I’m in a rush.
- Watch the bake time: Cookies continue to cook on the hot sheet after coming out of the oven. Pull them out when edges are set but centers look slightly underbaked for that chewy center.
- Use room temperature eggs: They blend better into the batter, improving texture and rise.
- Measure flour carefully: Too much flour weighs down cookies. Use a spoon and level method for accuracy.
I once accidentally used crunchy peanut butter and thought the cookies would be a flop, but the extra texture was surprisingly delightful — just don’t expect the same chew. And if you’re pressed for time, baking smaller cookies cuts the baking time down and gives a bit more crispy edge, which some people love.
Variations & Adaptations
If you’re feeling adventurous or have dietary needs, these chewy peanut butter chocolate chip lunch box cookies are easy to customize.
- Gluten-Free: Swap the all-purpose flour with a 1:1 gluten-free baking blend. I’ve had great results with Bob’s Red Mill Gluten-Free Flour.
- Vegan: Use dairy-free butter and replace the egg with a flax egg (1 tbsp ground flaxseed + 3 tbsp water, let sit for 5 minutes).
- Nut-Free: Substitute sunflower seed butter or soy nut butter instead of peanut butter. The flavor shifts but the chewiness remains.
- Flavor Twist: Add a teaspoon of cinnamon or a pinch of cayenne pepper for a subtle kick. I once added chopped dried cherries and it was a hit at our book club.
- Mix-Ins: Swap chocolate chips for white chocolate or peanut butter chips, or add toasted coconut flakes for texture.
One variation I love is swapping half the chocolate chips for mini butterscotch chips — it’s like a nostalgic throwback that makes these cookies feel a little more special.
Serving & Storage Suggestions
These cookies are best served at room temperature, but honestly, they’re a treat straight from the fridge too — firmer and fudge-like. For lunchboxes, pack them in an airtight container or a small resealable bag to keep them from drying out.
Pair these cookies with a cold glass of milk or a warm cup of tea for the ultimate comfort snack. They also go surprisingly well alongside a peanut butter and jelly sandwich for a peanut butter lover’s dream lunch.
Store baked cookies in an airtight container at room temperature for up to 4 days. They freeze beautifully — just separate layers with parchment paper and thaw at room temperature before serving. Dough balls can be frozen too; bake straight from frozen, adding a minute or two to the bake time.
Fun fact: The flavors actually deepen a bit after a day or two, making them taste even better after resting.
Nutritional Information & Benefits
Each cookie (based on 24 cookies per batch) contains approximately:
- Calories: 150
- Protein: 4g (thanks to the peanut butter)
- Fat: 9g (mostly from healthy peanut fats)
- Carbohydrates: 15g
- Fiber: 1g
Peanut butter is a great source of protein and healthy monounsaturated fats, which help keep you full and energized. Using natural peanut butter keeps added sugars and preservatives low. Plus, dark or semi-sweet chocolate chips provide antioxidants when enjoyed in moderation.
This recipe makes a satisfying snack that balances indulgence with some nutritional benefits — perfect for busy families and active kids.
Conclusion
If you’re looking for a snack that’s chewy, flavorful, and holds up perfectly in lunchboxes, these chewy peanut butter chocolate chip lunch box cookies are the real deal. I love how easy they are to make, how the flavors just sing together, and how they bring a little joy to hectic days. Plus, they’re endlessly adaptable — so you can make them just right for your family’s tastes and dietary needs.
Give this recipe a try, tweak it a bit to your liking, and let me know how your batch turns out. I promise, once you nail this recipe, it’ll be one of those staples you find yourself baking again and again. Happy baking!
FAQs About Chewy Peanut Butter Chocolate Chip Lunch Box Cookies
How do I keep my cookies chewy and not crispy?
Make sure to not overbake — pull the cookies out when edges are set but centers still look soft. Also, chilling the dough helps maintain chewiness and prevents spreading.
Can I use crunchy peanut butter instead of creamy?
Yes! Crunchy peanut butter adds texture and a bit of crunch, but it might change the chewiness slightly. It’s delicious if you like a little extra bite.
How long can I store these cookies?
Store them in an airtight container at room temperature for up to 4 days. For longer storage, freeze baked cookies or dough balls for up to 3 months.
Can I make these cookies gluten-free?
Absolutely. Replace the all-purpose flour with a 1:1 gluten-free flour blend for a great gluten-free version.
What can I use instead of an egg?
Try a flax egg (1 tbsp ground flaxseed mixed with 3 tbsp water, let sit for 5 minutes) for a vegan alternative. It helps bind the dough similarly to a regular egg.
For those wanting to try more snack recipes, you might enjoy the crispy garlic chicken or the classic vanilla cupcakes that I’ve shared before — both are quick and crowd-pleasers!
Pin This Recipe!

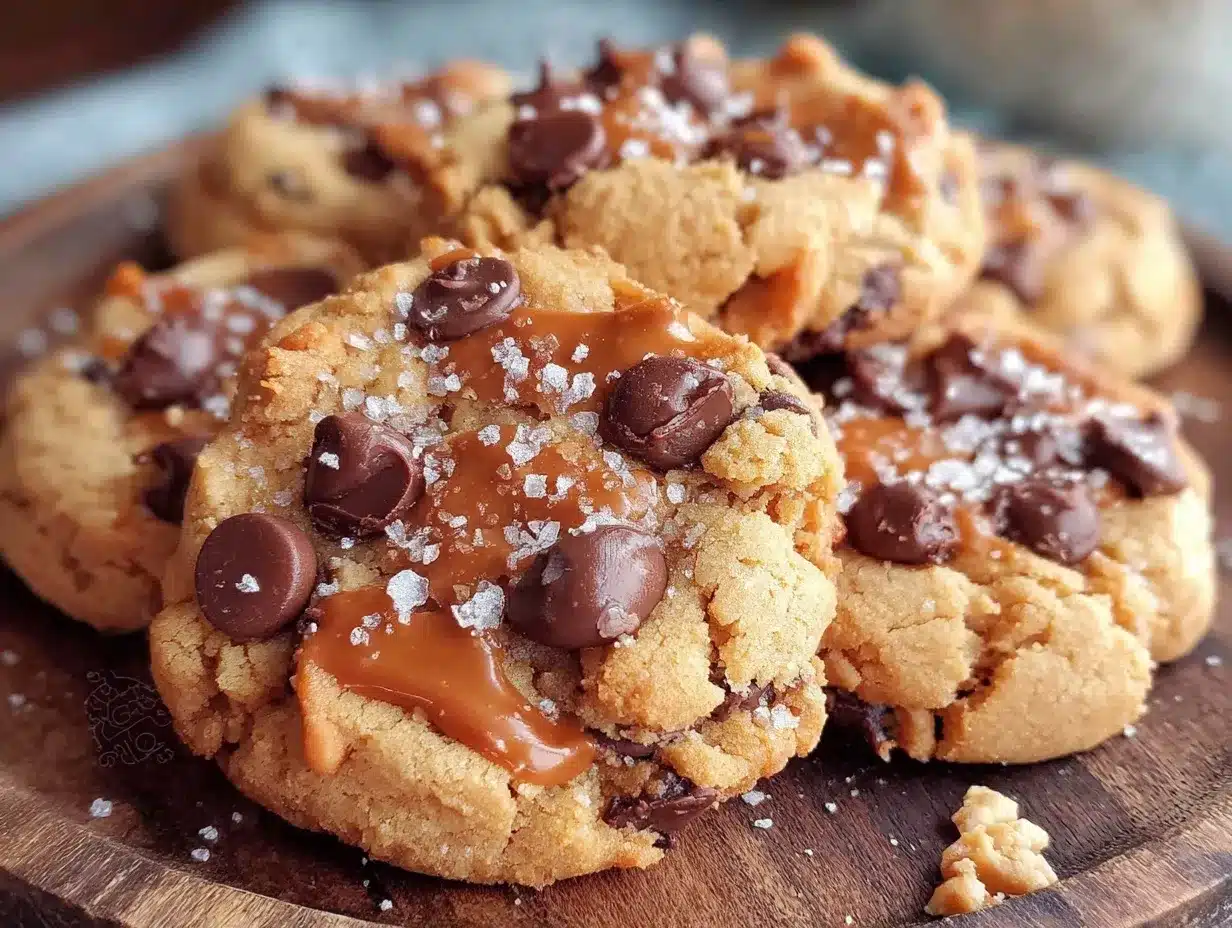
Chewy Peanut Butter Chocolate Chip Lunch Box Cookies

These chewy peanut butter chocolate chip cookies are perfect for lunchboxes, offering a balanced flavor and texture that stays soft and delicious throughout the day. Quick and easy to make, they are a crowd-pleaser for kids and adults alike.
- Prep Time: 10 minutes
- Cook Time: 12 minutes
- Total Time: 22 minutes
- Yield: 24 cookies 1x
- Category: Snack
- Cuisine: American
Ingredients
- 1 cup (250g) creamy peanut butter (natural, unsweetened preferred)
- ½ cup (115g) unsalted butter, softened
- ¾ cup (150g) packed brown sugar
- ¼ cup (50g) granulated sugar
- 1 large egg, room temperature
- 1 tsp vanilla extract
- 1 cup (125g) all-purpose flour (or gluten-free flour blend)
- ½ tsp baking soda
- ¼ tsp salt
- 1 cup (175g) semi-sweet chocolate chips
Instructions
- Preheat your oven to 350°F (175°C). Line two baking sheets with parchment paper or silicone mats.
- In a large bowl, beat ½ cup softened unsalted butter, 1 cup creamy peanut butter, ¾ cup packed brown sugar, and ¼ cup granulated sugar together until light and fluffy, about 3-4 minutes.
- Add 1 large egg and 1 tsp vanilla extract to the mixture and beat until fully combined.
- In a separate bowl, whisk together 1 cup all-purpose flour, ½ tsp baking soda, and ¼ tsp salt.
- Gradually add the dry ingredients to the wet ingredients, stirring gently until just combined. Avoid overmixing.
- Fold in 1 cup semi-sweet chocolate chips evenly throughout the dough.
- Cover the bowl with plastic wrap and refrigerate the dough for 20-30 minutes (optional but recommended).
- Using a cookie scoop or tablespoon, drop dough balls about 2 inches apart on the prepared baking sheets.
- Bake for 10-12 minutes until edges are set but centers still look slightly soft.
- Let cookies rest on the baking sheet for 5 minutes before transferring to a wire rack to cool completely.
Notes
Chilling the dough helps prevent spreading and improves chewiness. Pull cookies out when edges are set but centers are still soft for the perfect chewy texture. Dough can be frozen and baked from frozen with a slight increase in bake time. For vegan version, replace egg with a flax egg and use dairy-free butter. For gluten-free, substitute flour with a gluten-free blend.
Nutrition
- Serving Size: 1 cookie
- Calories: 150
- Fat: 9
- Carbohydrates: 15
- Fiber: 1
- Protein: 4
Keywords: peanut butter cookies, chocolate chip cookies, chewy cookies, lunchbox snacks, easy cookies, kid-friendly snacks