Love this? Save it for later!
Share the inspiration with your friends
Fourth time in two weeks and I finally stopped adding extra flour. The dough was tacky, sure, but it held its shape just fine—and the crumb opened up like a little autumn miracle. I kept thinking it needed more structure, more handling, more of what I knew from regular loaves. But pumpkin sourdough doesnt play by those rules. It wants to be a little soft, a little forgiving. The first few loaves came out dense and almost gummy near the center. Edible, sure, but not the kind of bread you tear into with a grin. This time I let the dough be what it was. I shaped it gently, proved it just until it jiggled, and scored it with a single confident slash. The oven did the rest. That crackling sound as it baked—honestly, I stood there listening like it was telling me something. And maybe it was. This is the loaf that finally felt like mine.
The thing about pumpkin sourdough is that it smells like everything you want fall to be before you even take a bite. Cinnamon, nutmeg, clove—they bloom in the heat and fill your kitchen with that cozy, golden-hour scent that makes you want to light a candle and put on a sweater. The pumpkin adds a subtle sweetness and the most beautiful orange tint, but it also keeps the crumb tender in a way that regular sourdough never quite achieves. It is not a sweet bread, mind you. It is savory-adjacent, earthy, and perfect for slathering with butter or dipping into a warm bowl of soup. I have been making it every week since the weather turned, and I am not sure I will stop anytime soon.
This recipe is the result of those repeated attempts, the slightly over-floured disasters, and the one glorious loaf that finally worked. I am sharing it because I think everyone deserves a fall baking project that actually delivers. No complicated techniques, no fussy starter schedules—just real, honest bread that tastes like the season.
Why You Will Love This Recipe
I have tested this recipe more times than I care to admit, and each attempt taught me something new about how pumpkin behaves in sourdough. It is a finicky ingredient—too much and your bread turns into a dense brick, too little and you lose that beautiful color and moisture. But I have dialed it in, and I promise this version works.
- Perfectly Tender Crumb : The pumpkin adds just enough moisture to create a soft, open crumb without making the dough unmanageable. It is the kind of bread that tears apart easily and stays fresh for days.
- Warm Fall Spices : Cinnamon, nutmeg, ginger, and clove are blended right into the dough, so every bite tastes like a cozy autumn afternoon. No need for add-ins or toppings—the flavor is baked right in.
- Simple Ingredients : You probably already have most of these in your pantry. Pumpkin puree, bread flour, your active sourdough starter, and a handful of spices. No fancy equipment required.
- Great for Beginners and Pros Alike : If you have made sourdough before, this will feel familiar but exciting. If you are newer to it, the forgiving nature of this dough makes it a great next step after a basic loaf.
- Versatile and Delicious : Slather it with salted butter, dip it in soup, or toast it for breakfast with a drizzle of honey. It works for every meal, honestly.
What sets this recipe apart is the balance. I have seen pumpkin sourdough recipes that are either too dry or too wet, too spiced or not spiced enough. This one hits the sweet spot. The fermentation adds a subtle tang that plays beautifully with the warm spices, and the pumpkin keeps everything tender without making it cake-like. It is bread, through and through—just bread that happens to taste like fall in every single bite.
What Ingredients You Will Need
This recipe relies on simple, wholesome ingredients that work together to create a loaf with depth, texture, and that unmistakable autumn flavor. Here is what you will need and a little bit about why each one matters.
- Bread flour (400g / about 3 ¼ cups) : Bread flour gives this loaf structure and helps it rise properly. The higher protein content creates a stronger gluten network, which is important when you are adding pumpkin puree—a wet ingredient that can otherwise weigh the dough down. I prefer King Arthur Bread Flour for its consistent protein content, but any good bread flour will work.
- Pumpkin puree (200g / about ¾ cup plus 2 tablespoons) : Make sure you are using pure pumpkin puree, not pumpkin pie filling. The difference matters—pie filling has added sugar and spices that will throw off the balance of this recipe. I like Libbys or store-brand pure pumpkin. If you have homemade puree, just make sure it is not too watery. Pat it with a paper towel if needed.
- Active sourdough starter (100g / about ½ cup) : Your starter should be bubbly, doubled in size, and passing the float test before you use it. A mature, well-fed starter gives this bread its signature tang and helps it rise even with the added moisture from the pumpkin. If your starter is sluggish, feed it a few times before attempting this recipe.
- Water (150g / about ⅔ cup) : Room temperature water works best here. The pumpkin adds quite a bit of moisture already, so you do not need as much water as you would in a standard sourdough loaf. Adjust slightly if your dough feels too stiff or too slack.
- Salt (9g / about 1 ½ teaspoons) : Fine sea salt is my go-to. It enhances the flavor of the flour and the spices, and it also helps regulate fermentation. Do not skip it or reduce it too much—the bread will taste flat.
- Ground cinnamon (2 teaspoons) : The star of the spice blend. Cinnamon adds warmth and sweetness without being overpowering. I use Vietnamese cinnamon for its bold flavor, but any good cinnamon will work.
- Ground nutmeg (1 teaspoon) : Freshly grated nutmeg is a game-changer here if you have it. The flavor is brighter and more aromatic than pre-ground. But pre-ground works perfectly fine in a pinch.
- Ground ginger (½ teaspoon) : Ginger adds a gentle warmth and a little kick that complements the pumpkin beautifully. It also helps balance the sweetness of the spices.
- Ground cloves (¼ teaspoon) : A little goes a long way. Cloves are potent, so measure carefully. They add that deep, almost floral note that makes fall baking smell so intoxicating.
Optional add-ins : If you want to take this bread to another level, try folding in 100g (about ¾ cup) of toasted pecans or walnuts after the first set of stretch and folds. The crunch is a lovely contrast to the soft crumb. You could also add 50g (about ⅓ cup) of dried cranberries for little bursts of sweetness. I have done both, and each variation is wonderful in its own way.
Equipment Needed
You do not need a lot of fancy tools to make this bread, but a few key pieces will make the process smoother and more enjoyable. Here is what I use and recommend.
- Digital kitchen scale : This is non-negotiable for sourdough. Measuring by weight is far more accurate than using cups, especially when working with wet ingredients like pumpkin puree. A simple digital scale costs about fifteen dollars and will improve every bake.
- Large mixing bowl : A sturdy ceramic or glass bowl works well. You need enough room to mix the dough and perform stretch and folds without spilling.
- Bench scraper : This little tool is invaluable for dividing dough, scraping sticky surfaces, and shaping loaves. I have two—one plastic, one metal—and I use both every time I bake.
- Banneton or proofing basket : A banneton gives the dough support as it proofs and creates those beautiful rings on the crust. If you do not have one, a colander lined with a clean kitchen towel works just fine. Dust it generously with rice flour to prevent sticking.
- Dutch oven or baking stone : A Dutch oven creates steam, which is essential for a good crust and oven spring. I use a 5.5-quart enameled cast iron pot from Le Creuset, but any heavy pot with a lid will work. If you do not have a Dutch oven, you can bake the bread on a preheated baking stone with a tray of water in the oven to create steam.
- Lame or sharp knife : Scoring the bread before baking allows it to expand in a controlled way. A lame is ideal, but a very sharp paring knife works too. Just make sure it is clean and sharp.
- Cooling rack : Letting the bread cool completely on a rack prevents the bottom from getting soggy. I know it is tempting to cut into it immediately, but patience pays off here.
Preparation Method
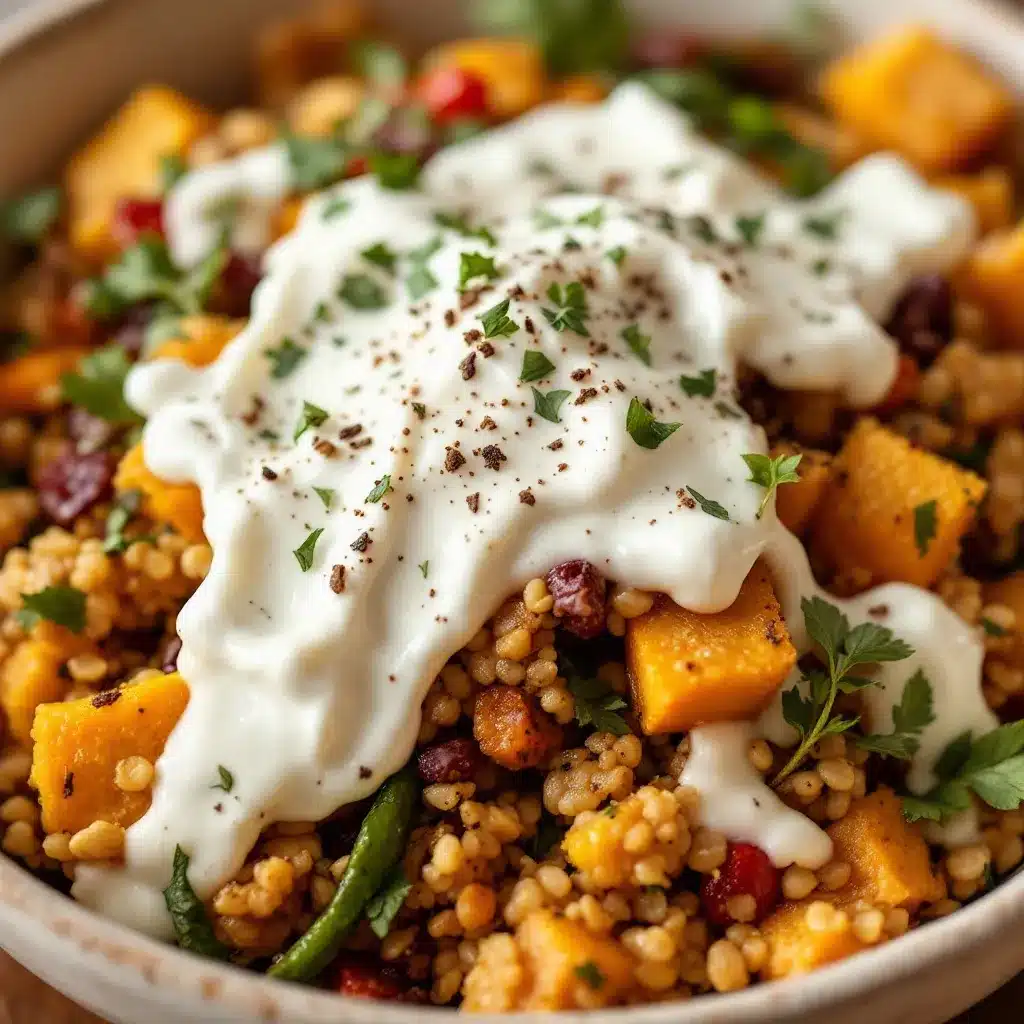
Making this bread takes time, but most of it is hands-off. Plan for a total of about 12 to 14 hours from start to finish, including the bulk fermentation and final proof. Here is the step-by-step process.
- Mix the dough (8:00 AM) : In a large bowl, combine 400g bread flour and all the spices—2 teaspoons cinnamon, 1 teaspoon nutmeg, ½ teaspoon ginger, and ¼ teaspoon cloves. Whisk them together so the spices are evenly distributed. Add 200g pumpkin puree, 100g active sourdough starter, 150g water, and 9g salt. Mix with your hands or a dough whisk until no dry bits of flour remain. The dough will be shaggy and fairly sticky. Cover the bowl with a damp towel or plastic wrap and let it rest for 30 minutes. This is called the autolyse, and it gives the flour time to hydrate fully.
- Stretch and folds (8:30 AM to 10:00 AM) : Over the next two hours, perform four sets of stretch and folds at 30-minute intervals. To do a stretch and fold, wet your hand slightly to prevent sticking, grab one side of the dough, stretch it up as far as it will go without tearing, and fold it over the top. Rotate the bowl a quarter turn and repeat until you have done all four sides. After the first two sets, the dough will start to feel smoother and more elastic. By the fourth set, it should be holding its shape better and showing some strength. If you are adding nuts or dried fruit, fold them in during the second or third set.
- Bulk fermentation (10:00 AM to 2:00 PM) : Cover the bowl and let the dough ferment at room temperature (about 70-75°F / 21-24°C) for 4 to 6 hours. The dough should roughly double in size and look slightly domed on top. It will feel airy and jiggly when you gently shake the bowl. If your kitchen is cooler, it may take longer; if warmer, less time. Keep an eye on the dough, not the clock.
- Shape the dough (2:00 PM) : Lightly flour your work surface. Turn the dough out gently, trying not to deflate it too much. Using a bench scraper, shape it into a round by folding the edges into the center and then flipping it over. Cup your hands around the dough and drag it toward you in small circular motions to create surface tension. The dough should feel soft but hold its shape. Let it rest on the counter, uncovered, for 20 minutes. This is called the bench rest.
- Final shaping and proofing (2:20 PM) : After the bench rest, shape the dough again using the same method. Dust your banneton or lined colander generously with rice flour. Place the dough seam-side up in the basket. Cover it with a clean kitchen towel or plastic bag and refrigerate it for 8 to 12 hours. This cold proof slows down fermentation, develops flavor, and makes the dough easier to score.
- Preheat the oven (next morning, 6:00 AM) : Place your Dutch oven in the oven and preheat to 500°F (260°C). Let it heat for at least 30 minutes so it is screaming hot.
- Score and bake (6:30 AM) : Carefully remove the hot Dutch oven from the oven. Take the dough out of the fridge and turn it out onto a piece of parchment paper. Score the top with a lame or sharp knife—a single deep slash or a simple cross pattern works beautifully. Lower the dough into the Dutch oven using the parchment as a sling. Cover with the lid and bake for 25 minutes. Remove the lid and bake for another 20 to 25 minutes, until the crust is deep golden brown and the internal temperature reaches about 205°F (96°C).
- Cool completely (7:15 AM) : Transfer the bread to a cooling rack and let it cool for at least 2 hours before slicing. I know the smell is intoxicating, but cutting into warm bread will make the crumb gummy. Trust the process.
Cooking Tips & Techniques
I have made plenty of mistakes with this bread, and I want you to avoid them. Here are the things I wish I had known from the start.
Do not over-flour your work surface. Pumpkin sourdough is stickier than regular dough, and it is tempting to dump a ton of flour on the counter to make it manageable. But too much flour will dry out the dough and create dense spots. Instead, use a light dusting and keep your hands and bench scraper slightly wet. The dough will cooperate more than you think.
Watch the bulk fermentation closely. Pumpkin puree adds sugars that can accelerate fermentation. If your kitchen is warm, check the dough after 3 hours instead of 4. An over-fermented dough will be slack, sticky, and hard to shape. It will also lose its oven spring and bake up flat. Look for the signs—domed top, jiggly texture, and visible bubbles on the surface.
Use rice flour for dusting. Rice flour does not absorb moisture like wheat flour, so it prevents sticking without integrating into the dough. It is especially useful for dusting your banneton or proofing basket. If you do not have rice flour, you can use a mix of all-purpose flour and semolina, but rice flour is truly the best option.
Score with confidence. A hesitant score will drag the dough and deflate it. Use a swift, decisive motion at a 45-degree angle. The cut should be about ½ inch deep. If the dough feels cold and firm from the fridge, it will score beautifully. If it is too warm, it may stick to the blade.
Steam is your friend. The Dutch oven traps steam, which keeps the crust soft during the first part of baking and allows the bread to expand fully. If you are using a baking stone instead, place a metal pan on the bottom rack and pour a cup of boiling water into it right after you load the bread. Close the oven door quickly to trap the steam.
Let it cool completely. I cannot stress this enough. The interior of the bread continues to set as it cools. Cutting too early releases steam and makes the crumb gummy and sticky. I usually set a timer for 2 hours and walk away. It is hard, but the result is worth it.
Variations & Adaptations
This recipe is a great base for experimentation. Here are a few variations I have tried and loved.
Whole wheat pumpkin sourdough : Substitute 100g of the bread flour with whole wheat flour. The whole wheat adds a nutty flavor and a denser crumb, which pairs beautifully with the pumpkin and spices. You may need to add an extra tablespoon of water, as whole wheat absorbs more moisture.
Vegan version : This recipe is already dairy-free, but if you want to make it fully vegan, just ensure your sourdough starter is fed with unbleached flour and water. No other changes needed—the pumpkin provides plenty of richness without butter or eggs.
Gluten-free adaptation : I have not tested this with gluten-free flour, but I have heard from readers that a good gluten-free bread flour blend with xanthan gum can work. The dough will be much stickier and harder to shape, so consider baking it in a loaf pan instead of free-form. Expect a denser texture.
Extra-spicy version : If you love bold spices, double the cinnamon and add a pinch of cardamom or allspice. I made a loaf with 1 teaspoon of cardamom once, and it was incredible with a smear of apple butter. It is worth trying if you like your fall flavors to really sing.
Sweet version : For a slightly sweeter bread, add 50g (about ¼ cup) of brown sugar or maple syrup to the dough along with the water. Reduce the water slightly to account for the extra liquid. This version is lovely toasted with butter and a drizzle of honey for breakfast.
Serving & Storage Suggestions
This bread is incredibly versatile. Here is how I like to serve it and how to keep it fresh.
Serving ideas : Slice it thick and toast it until golden. Spread with salted butter, apple butter, or a generous layer of honey. It is also wonderful alongside a bowl of cozy roasted tomato basil soup for dipping—the tangy bread and the creamy soup are a match made in heaven. For a heartier meal, use it for grilled cheese sandwiches with sharp cheddar and caramelized onions. I have even used it for French toast, and it was spectacular.
Storage : Store the bread at room temperature, cut-side down on a cutting board, or wrapped in a clean kitchen towel. It will stay fresh for 3 to 4 days. Do not store it in plastic, as that will make the crust soft and soggy. If the crust gets too hard, simply toast the slices to revive them.
Freezing : This bread freezes beautifully. Slice it first, then wrap the slices tightly in plastic wrap and place them in a freezer bag. They will keep for up to 3 months. Toast directly from frozen—no need to thaw. I always keep a stash in the freezer for lazy weekend mornings.
Reheating : For the best texture, reheat slices in a toaster or under the broiler for a minute or two. If you are reheating a whole loaf, wrap it in foil and warm it in a 350°F (175°C) oven for about 10 minutes.
Nutritional Information & Benefits
This bread is not health food, but it does have some redeeming qualities. Here is a rough estimate per slice (based on 12 slices per loaf).
| Nutrient | Amount per slice |
|---|---|
| Calories | 180 |
| Total Fat | 1g |
| Carbohydrates | 36g |
| Fiber | 2g |
| Sugar | 3g |
| Protein | 6g |
Pumpkin is rich in vitamin A and fiber, which supports eye health and digestion. The fermentation process in sourdough breaks down gluten and phytic acid, making the nutrients more bioavailable. The spices—cinnamon, nutmeg, ginger, and cloves—are all anti-inflammatory and packed with antioxidants. So while this is still bread, it is bread that does a little good along the way.
This recipe is naturally dairy-free and can be made vegan as written. It is not gluten-free, but the sourdough fermentation may be easier to digest for some people with mild gluten sensitivities.
Conclusion
This cozy pumpkin sourdough bread has become my favorite fall ritual. It is the kind of recipe that makes you slow down, pay attention to the dough, and appreciate the small transformations that happen along the way. The smell alone is worth the effort—warm spices and toasted flour filling the kitchen while the bread bakes. And that first slice, still warm from the oven, with butter melting into every nook and cranny? That is pure comfort.
I hope you give it a try, and I hope you make it your own. Add nuts if you like, or extra spices, or a drizzle of honey on top. Play with it. That is the beauty of bread—it is forgiving, it is rewarding, and it always tastes better when you share it. If you make this loaf, I would love to hear about it. Leave a comment below or tag me in your photos. Happy baking, friends.
Frequently Asked Questions
Can I use canned pumpkin pie filling instead of pure pumpkin puree?
No, I would not recommend it. Pumpkin pie filling has added sugar, spices, and often stabilizers that will change the texture and flavor of the bread. Stick with 100% pure pumpkin puree for the best results.
My dough is very sticky. Is that normal?
Yes, pumpkin sourdough is stickier than regular sourdough because of the moisture in the pumpkin. Resist the urge to add too much flour. Use wet hands and a bench scraper to handle it, and trust the stretch and folds to build strength.
Can I skip the cold proof and bake the same day?
You can, but the flavor will be less developed and the dough will be harder to score. The cold proof also makes the dough firmer, which helps it hold its shape during baking. If you are in a hurry, a 2-hour room temperature proof after shaping will work, but the results will not be as good.
Why did my bread not rise much?
Several factors could be at play. Your starter might not have been active enough, the bulk fermentation may have been too short, or the dough might have been over-floured during shaping. Make sure your starter is bubbly and doubled before you start, and keep an eye on the dough during bulk fermentation. It should look visibly puffy and airy.
How do I get a more open crumb?
A more open crumb comes from proper fermentation and gentle handling. Make sure your dough is well-fermented but not over-proofed. Use stretch and folds to build strength without deflating the dough. And be gentle during shaping—do not press out all the gas. A higher hydration dough also helps, but that is harder to manage with pumpkin puree in the mix.
Pin This Recipe!
Cozy Pumpkin Sourdough Bread with Fall Spices – Easy Homemade Recipe

This pumpkin sourdough bread is tender, spiced with cinnamon, nutmeg, ginger, and cloves, and perfect for fall. It’s a forgiving dough that yields a beautiful loaf with a soft crumb and warm autumn flavor.
- Prep Time: 30 minutes
- Cook Time: 45 minutes
- Total Time: 12 hours 30 minutes (including fermentation and proofing)
- Yield: 12 servings 1x
- Category: Bread
- Cuisine: American
Ingredients
- 400g bread flour (about 3 ¼ cups)
- 200g pumpkin puree (about ¾ cup plus 2 tablespoons)
- 100g active sourdough starter (about ½ cup)
- 150g water (about ⅔ cup)
- 9g fine sea salt (about 1 ½ teaspoons)
- 2 teaspoons ground cinnamon
- 1 teaspoon ground nutmeg
- ½ teaspoon ground ginger
- ¼ teaspoon ground cloves
- Optional: 100g toasted pecans or walnuts (about ¾ cup)
- Optional: 50g dried cranberries (about ⅓ cup)
Instructions
- Mix the dough: In a large bowl, combine 400g bread flour and all the spices (2 tsp cinnamon, 1 tsp nutmeg, ½ tsp ginger, ¼ tsp cloves). Whisk together. Add 200g pumpkin puree, 100g active sourdough starter, 150g water, and 9g salt. Mix until no dry bits remain. Cover and let rest for 30 minutes (autolyse).
- Stretch and folds: Over the next 2 hours, perform 4 sets of stretch and folds at 30-minute intervals. Wet your hand slightly, grab one side of the dough, stretch it up, and fold it over. Rotate the bowl and repeat for all four sides. If adding nuts or dried fruit, fold them in during the second or third set.
- Bulk fermentation: Cover the bowl and let the dough ferment at room temperature (70-75°F / 21-24°C) for 4 to 6 hours, until roughly doubled in size, domed on top, and jiggly.
- Shape the dough: Lightly flour your work surface. Gently turn out the dough. Using a bench scraper, shape into a round by folding edges into the center, then flip over. Cup your hands around the dough and drag it toward you to create surface tension. Let rest uncovered for 20 minutes (bench rest).
- Final shaping and proofing: After bench rest, shape again. Dust a banneton or lined colander generously with rice flour. Place dough seam-side up in the basket. Cover and refrigerate for 8 to 12 hours (cold proof).
- Preheat the oven: Place a Dutch oven in the oven and preheat to 500°F (260°C) for at least 30 minutes.
- Score and bake: Carefully remove the hot Dutch oven. Turn the dough out onto parchment paper. Score the top with a lame or sharp knife. Lower the dough into the Dutch oven using the parchment as a sling. Cover and bake for 25 minutes. Remove lid and bake for another 20 to 25 minutes, until deep golden brown and internal temperature reaches about 205°F (96°C).
- Cool completely: Transfer to a cooling rack and let cool for at least 2 hours before slicing.
Notes
Do not over-flour your work surface; use wet hands and a bench scraper instead. Watch bulk fermentation closely as pumpkin can accelerate it. Use rice flour for dusting to prevent sticking. Score with confidence at a 45-degree angle. Let the bread cool completely to avoid a gummy crumb.
Nutrition
- Serving Size: 1 slice
- Calories: 180
- Sugar: 3
- Sodium: 180
- Fat: 1
- Carbohydrates: 36
- Fiber: 2
- Protein: 6
Keywords: pumpkin sourdough, fall bread, sourdough bread, pumpkin bread, homemade bread, autumn recipe, sourdough with pumpkin


