Love this? Save it for later!
Share the inspiration with your friends
Three summers ago, I found myself staring at a half-empty jar of caramel sauce and a lonely stick of butter on a lazy Sunday afternoon. Honestly, I wasn’t planning to make ice cream; I just wanted something sweet and comforting without the fuss of churning or fancy machines. The kitchen was warm, the hum of the ceiling fan was the only sound, and I accidentally let the butter cook a bit too long. Instead of tossing it, I decided to roll with it, swirling that nutty brown butter flavor into the caramel—and then into a no-churn ice cream base. You know that feeling when a happy accident turns into a new favorite? That was exactly this recipe.
I remember the first spoonful—rich, creamy, with a perfect salty-sweet balance that made me close my eyes, just savoring the moment. This creamy brown butter salted caramel ice cream recipe no-churn style quickly became my go-to treat, especially when friends popped over unexpectedly. Maybe you’ve been there, craving something homemade but short on time or equipment. Let me tell you, this recipe stays with you because it’s simple, indulgent, and honestly, it tastes like the kind of ice cream you’d find in a cozy artisan shop—without the line or the price.
So, if you ever thought making ice cream at home meant complicated machines and hours of stirring, this might just change your mind. The combination of browned butter’s deep, toasty notes and salted caramel’s luscious sweetness is a game-changer. Plus, it’s no-churn, which means you can whip it up with just a few ingredients and minimal effort. I had a cracked mixing bowl that nearly spilled the whole batch when I got distracted by a buzzing phone call, but hey—that’s part of the charm, right? This recipe is proof that comfort food can be effortless, and I can’t wait for you to try it yourself.
Why You’ll Love This Recipe
- Quick & Easy: Comes together in under 20 minutes, perfect for busy weeknights or last-minute dessert cravings.
- Simple Ingredients: No fancy trips to specialty stores; you likely have everything needed in your pantry and fridge.
- Perfect for Summer Gatherings: Ideal for backyard BBQs, casual get-togethers, or just cooling off on a warm afternoon.
- Crowd-Pleaser: The rich, buttery caramel flavor paired with a hint of salt appeals to both kids and adults alike.
- Unbelievably Delicious: The brown butter adds a nutty depth that transforms this ice cream into something truly special.
This creamy brown butter salted caramel ice cream recipe no-churn style is different from the rest because of that browned butter magic. Instead of plain butter, browning it brings out these warm, toasty flavors that marry beautifully with the salted caramel. It’s not just sweetness; it’s a layered flavor experience. Plus, skipping the ice cream maker doesn’t mean skimping on texture. The whipped cream base keeps things light and creamy without the fuss.
Honestly, this ice cream makes you pause and savor every bite—it’s comfort food with a little twist that feels both nostalgic and fresh. Whether you’re impressing guests or treating yourself after a long day, it’s the kind of recipe that turns a simple dessert into a memorable moment.
What Ingredients You Will Need
This recipe uses simple, wholesome ingredients to deliver bold flavor and a satisfyingly creamy texture without any complex steps. Most are pantry staples, and substitutions are straightforward if you want to tweak it.
- Unsalted Butter (6 tablespoons): For browning—adds that signature nutty flavor. I like using Kerrygold for a richer taste.
- Granulated Sugar (3/4 cup): Sweetens the caramel; regular white sugar works perfectly.
- Heavy Cream (2 cups / 480 ml): Whipped to fluffy peaks, it forms the creamy base. Use full-fat for best results.
- Sweetened Condensed Milk (1 cup / 300 grams): Adds sweetness and creaminess without extra effort.
- Sea Salt (1 teaspoon): Balances the sweetness with a delicate salty kick. Maldon sea salt flakes work beautifully here.
- Vanilla Extract (1 teaspoon): Rounds out the flavors with a warm, fragrant note.
Optional:
- Flaked Sea Salt for Topping: Adds a finishing touch of crunch and saltiness.
- Chopped Toasted Pecans or Walnuts: For a nice texture contrast and extra nuttiness.
For caramel, you’ll make it from scratch using the sugar and browned butter, so no need for store-bought caramel sauce. If you want a dairy-free twist, swap the heavy cream with coconut cream and use a dairy-free condensed milk alternative.
Equipment Needed
- Medium Saucepan: For browning butter and making caramel. A heavy-bottomed pan helps prevent burning.
- Mixing Bowls: One large bowl for whipping cream and another for combining ingredients.
- Electric Mixer or Stand Mixer: Essential to whip the heavy cream to soft peaks. A whisk works if you have strong arms, but expect a workout!
- Spatula: For folding ingredients gently without losing airiness.
- Freezer-Safe Container: Preferably with a lid—an 8×8-inch pan or a plastic container works well.
If you don’t have an electric mixer, a handheld one is a budget-friendly alternative that still gets the job done. Also, I recommend cleaning your saucepan well after browning butter to avoid burnt bits in the caramel step, which can affect flavor.
Preparation Method
- Brown the Butter (5-7 minutes): In a medium saucepan over medium heat, melt the unsalted butter. Stir frequently as it foams and turns golden brown with a nutty aroma. Watch carefully—once it starts smelling toasted and you see browned bits at the bottom, remove from heat immediately to prevent burning.
- Make the Caramel (8-10 minutes): Using the same saucepan, add the granulated sugar over medium-low heat. Stir constantly until the sugar melts into a smooth amber liquid. Slowly whisk in the browned butter until fully combined. Remove from heat and stir in the sea salt and vanilla extract. Let it cool slightly while you prepare the cream.
- Whip the Heavy Cream (5 minutes): In a large mixing bowl, whip the heavy cream with an electric mixer until soft peaks form. Take care not to overbeat; you want light, billowy cream that holds shape but is still soft to the touch.
- Combine Ingredients (3 minutes): Gently fold the sweetened condensed milk into the whipped cream until just combined. Then carefully fold in the brown butter caramel mixture, making sure to swirl it throughout but not overmix (you want beautiful ribbons of caramel).
- Transfer & Freeze (6+ hours): Pour the mixture into your freezer-safe container. Smooth the top with a spatula and cover tightly. Freeze for at least 6 hours or until firm. For best texture, let the ice cream sit at room temperature for 5-10 minutes before scooping.
Pro tip: If your caramel cools too much and thickens before folding, gently warm it for a few seconds to loosen. Also, don’t rush freezing—it helps the ice cream develop that creamy, scoopable texture without ice crystals.
Cooking Tips & Techniques
Browning butter might seem intimidating at first, but honestly, it’s just about patience and attention. Stir often and don’t walk away—you want that beautiful golden color and nutty aroma, not burnt butter. I once nearly ruined a batch by getting distracted mid-step, so set a timer if you have to!
When making caramel, stirring constantly helps prevent clumps and burning. If sugar crystallizes on the sides of the pan, wipe it down with a wet pastry brush to keep things smooth.
Whipping cream requires cold bowls and beaters, so pop them in the fridge for 15 minutes before starting. This little trick makes a big difference in how quickly and well the cream whips.
Folding is key to keeping your ice cream light and airy. Use a gentle hand and a spatula to incorporate ingredients—vigorous stirring will deflate the cream and result in a denser texture.
Lastly, patience with freezing pays off. Resist the urge to dig in too soon; the ice cream firms up into a creamy, scoopable masterpiece after proper chilling.
Variations & Adaptations
- Nutty Delight: Add toasted chopped pecans or walnuts into the mix before freezing for extra crunch and flavor.
- Vegan Version: Use coconut cream whipped with a bit of maple syrup and swap condensed milk for a coconut-based condensed milk alternative. Brown the coconut oil instead of butter for that toasty note.
- Chocolate Swirl: Drizzle melted dark chocolate or chocolate ganache in ribbons during the folding step for a salted caramel chocolate combo.
I once tried adding a splash of espresso to the caramel for a mocha twist—it was surprisingly addictive and gave the ice cream a subtle coffee kick. Feel free to get creative and tailor this recipe to your taste buds or dietary needs.
Serving & Storage Suggestions
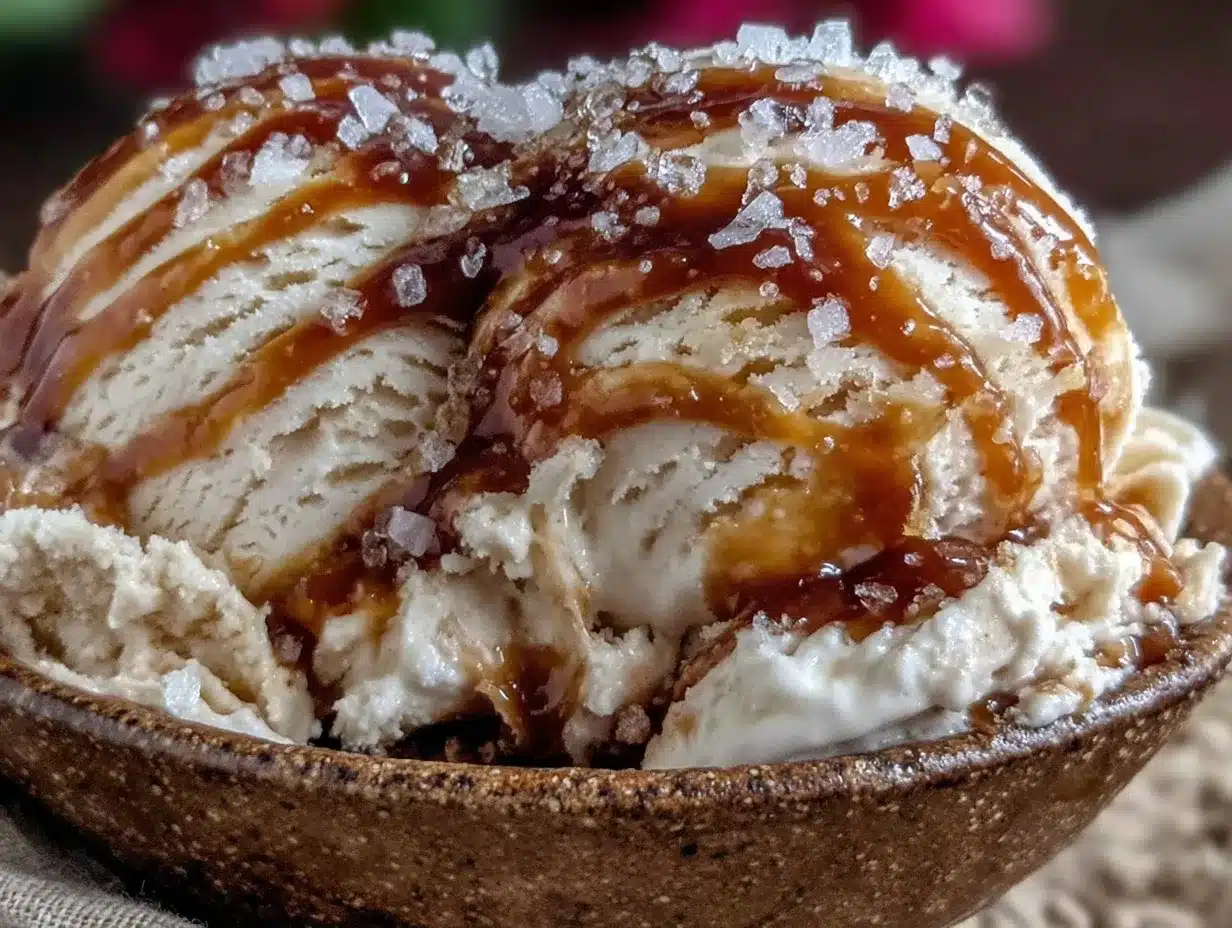
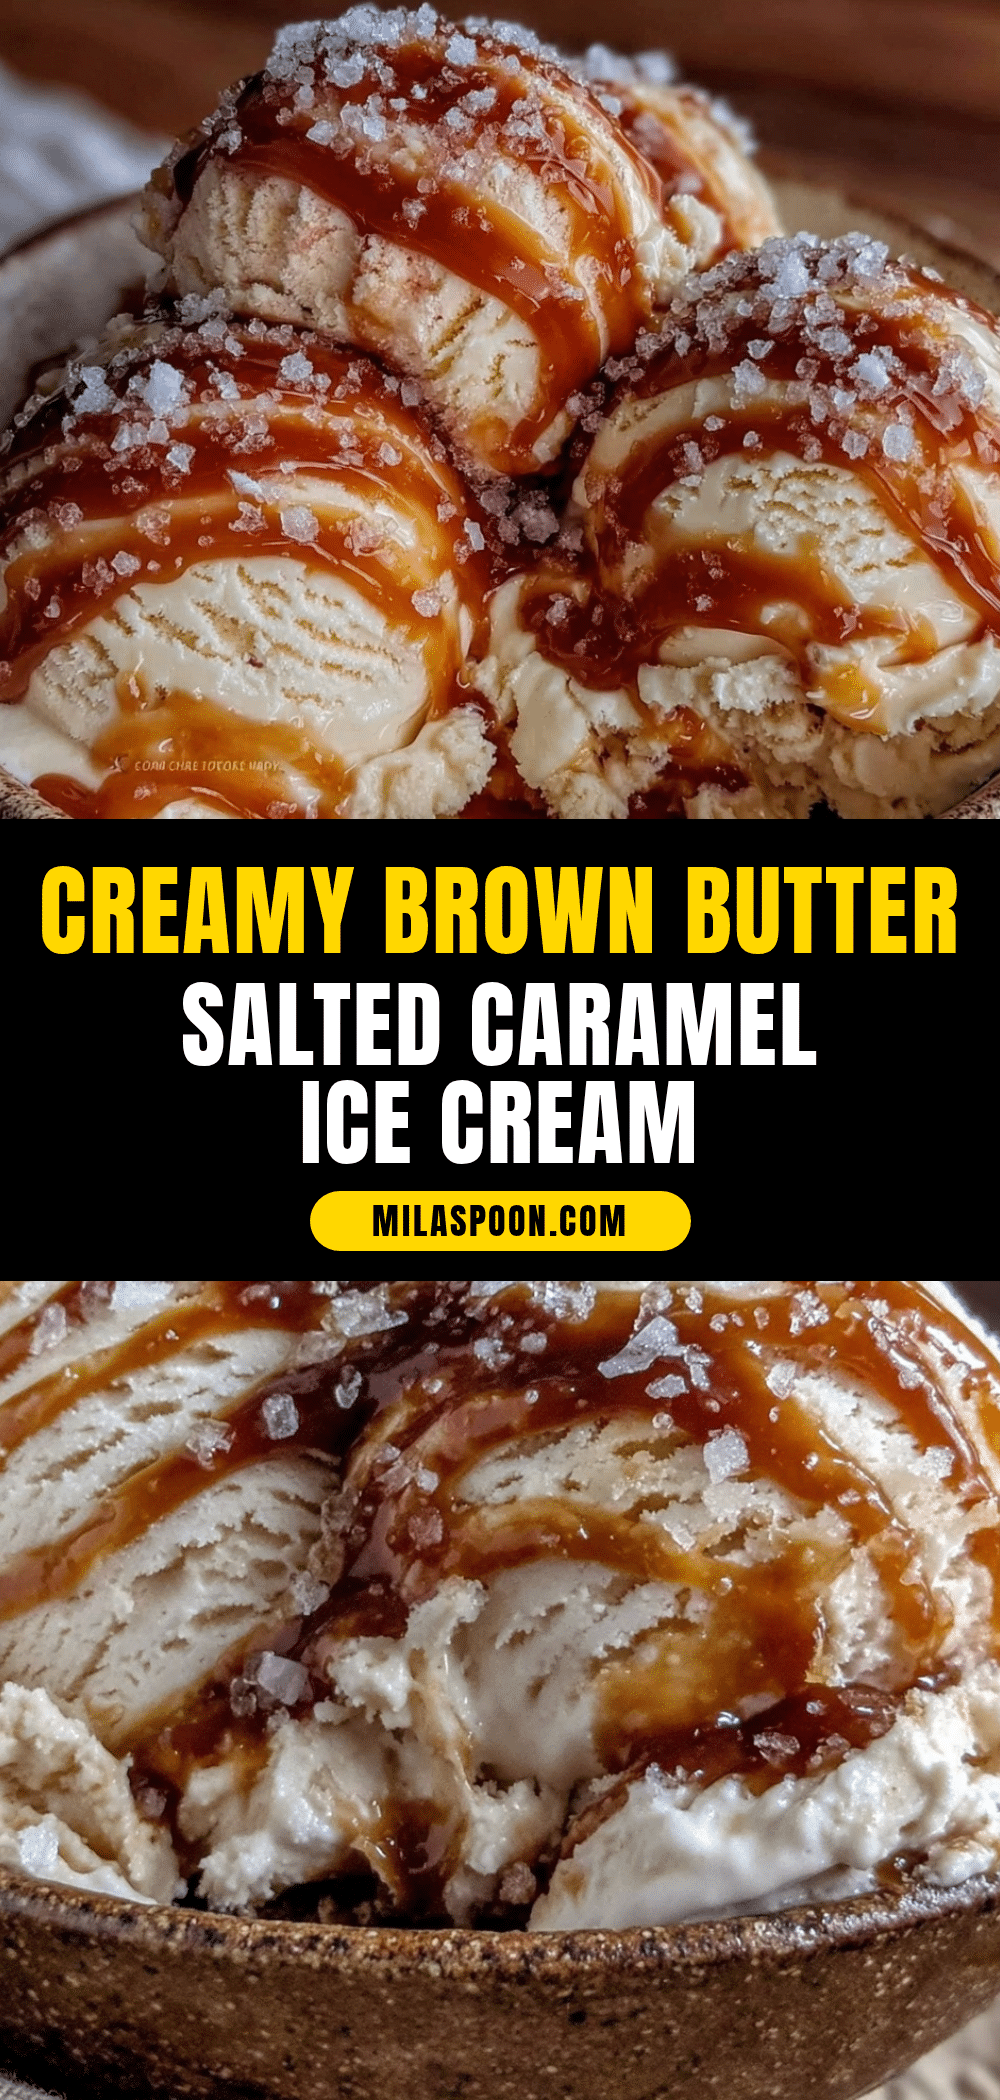
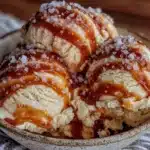
This no-churn creamy brown butter salted caramel ice cream is best served slightly softened—let it sit out for 5-10 minutes to become perfectly scoopable. Serve in bowls or cones with an extra sprinkle of sea salt flakes or chopped nuts on top for that final touch.
Pair it with warm apple pie, a drizzle of chocolate sauce, or even alongside a slice of pecan pie for an indulgent dessert spread. It also goes wonderfully with a cup of espresso or a glass of cold milk.
Store leftovers in an airtight container in the freezer for up to 2 weeks. When reheating, avoid microwaving—just let it thaw on the counter for a few minutes to keep the creamy texture intact. Over time, the flavors deepen, making it even more irresistible.
Nutritional Information & Benefits
Per serving (approximate, based on 8 servings): 280 calories, 18g fat, 28g carbohydrates, 3g protein.
Key ingredients like butter and heavy cream provide satiating fats that keep you full, while the small amount of salt helps balance flavor and may aid in electrolyte balance. This treat is rich and indulgent, so perfect for occasional enjoyment.
If you’re mindful of allergens, note this recipe contains dairy and is not gluten-free if add-ins like nuts are included. For a lighter version, try substituting part of the heavy cream with Greek yogurt, which adds protein and tang.
Conclusion
This creamy brown butter salted caramel ice cream recipe no-churn style is proof that homemade ice cream doesn’t have to be complicated to be outstanding. It’s a simple recipe that blends familiar ingredients into something rich, comforting, and a little bit special. I love it because it’s approachable, forgiving, and always impresses—whether I’m serving it to guests or sneaking spoonfuls solo on a quiet evening.
Feel free to tweak the flavors or mix-ins to make it your own. And when you do try it, I’d love to hear how it worked out for you—drop a comment or share your twist! Here’s to sweet moments made easy and delicious.
FAQs
Can I make this recipe without an ice cream maker?
Absolutely! This is a no-churn recipe designed to be simple and require no special equipment beyond a freezer-safe container.
How do I brown butter without burning it?
Cook the butter over medium heat, stirring frequently, and watch for it to turn a golden brown with a nutty aroma. Remove it from heat as soon as you see browned bits forming to prevent burning.
Can I use salted butter instead of unsalted?
It’s best to use unsalted butter so you can control the saltiness precisely, especially since salted caramel already has salt added.
How long does this ice cream keep in the freezer?
Stored properly in an airtight container, it will stay fresh for up to 2 weeks without losing texture or flavor.
Is there a dairy-free version of this ice cream?
Yes! Use coconut cream instead of heavy cream and look for a dairy-free condensed milk alternative. Brown coconut oil in place of butter for the nutty flavor.
Pin This Recipe!
Creamy Brown Butter Salted Caramel Ice Cream Recipe No-Churn Easy Homemade
A rich and creamy no-churn ice cream featuring nutty brown butter and luscious salted caramel, perfect for quick homemade indulgence without an ice cream maker.
- Prep Time: 15 minutes
- Cook Time: 15 minutes
- Total Time: 6 hours 30 minutes
- Yield: 8 servings 1x
- Category: Dessert
- Cuisine: American
Ingredients
- 6 tablespoons unsalted butter
- 3/4 cup granulated sugar
- 2 cups heavy cream (480 ml)
- 1 cup sweetened condensed milk (300 grams)
- 1 teaspoon sea salt
- 1 teaspoon vanilla extract
- Optional: flaked sea salt for topping
- Optional: chopped toasted pecans or walnuts
Instructions
- Brown the Butter (5-7 minutes): In a medium saucepan over medium heat, melt the unsalted butter. Stir frequently as it foams and turns golden brown with a nutty aroma. Remove from heat immediately once browned bits appear to prevent burning.
- Make the Caramel (8-10 minutes): Using the same saucepan, add granulated sugar over medium-low heat. Stir constantly until sugar melts into a smooth amber liquid. Slowly whisk in the browned butter until fully combined. Remove from heat and stir in sea salt and vanilla extract. Let cool slightly.
- Whip the Heavy Cream (5 minutes): In a large mixing bowl, whip the heavy cream with an electric mixer until soft peaks form. Avoid overbeating.
- Combine Ingredients (3 minutes): Gently fold sweetened condensed milk into whipped cream until just combined. Carefully fold in the brown butter caramel mixture, creating ribbons of caramel without overmixing.
- Transfer & Freeze (6+ hours): Pour mixture into a freezer-safe container, smooth the top, cover tightly, and freeze for at least 6 hours or until firm. Let sit at room temperature for 5-10 minutes before scooping.
Notes
Use unsalted butter to control saltiness. Whip cream in cold bowls for best results. Gently warm caramel if it thickens before folding. Let ice cream soften 5-10 minutes before serving for perfect scoopability. Store in airtight container up to 2 weeks. For dairy-free version, substitute coconut cream and dairy-free condensed milk, and brown coconut oil instead of butter.
Nutrition
- Serving Size: 1/8 of recipe
- Calories: 280
- Fat: 18
- Carbohydrates: 28
- Protein: 3
Keywords: brown butter, salted caramel, no-churn ice cream, homemade ice cream, easy dessert, summer dessert, caramel ice cream