Love this? Save it for later!
Share the inspiration with your friends
It was a Tuesday morning, 7:15 AM, and the lunchbox sat open and empty on the counter while I stared at it like it had personally offended me. My youngest had recently decided that sandwiches were “boring” — his exact word, delivered with the kind of dramatic sigh only a six-year-old can master. I needed something warm, something dippable, something that wouldn’t come back home uneaten. The cheese in the fridge caught my eye. The tortillas were right there. And honestly? I just started folding and cutting, not expecting much. What came out of that rushed, slightly desperate morning was a lunchbox hero I never saw coming. These Easy Cheese Quesadilla Dippers are now the thing my kids actually ask for. Not request. Ask. There’s a difference.
The first time I packed them, I held my breath during lunch pickup. But the container came back empty, and my son said, “Can you make the dippers again tomorrow?” That’s when I knew I had stumbled onto something real. These aren’t fancy. They aren’t complicated. But they are reliable in a way that matters when you’re racing against the school bell. And honestly? That’s the kind of recipe worth holding onto.
So here they are — the Easy Cheese Quesadilla Dippers that turned my lunchbox dread into something almost enjoyable. No stress, no fancy ingredients, just melted cheese and a little bit of mom ingenuity. You’re going to want these in your weekly rotation.
Why You’ll Love This Recipe
Let me tell you why these little cheese quesadilla dippers became a staple in my house — and why they’ll probably become one in yours too.
- Ready in Under 10 Minutes — From fridge to lunchbox in less time than it takes to find a matching lid for a container. Seriously. I time myself now.
- Simple Ingredients You Already Have — Tortillas and cheese. That’s it. No special grocery run required. You probably have both right now.
- Perfect for Picky Eaters — My kids went from ignoring their lunch to actually finishing it. The dipper format makes everything more fun, and the warm cheese is basically kid catnip.
- Stays Good in a Thermos — Unlike cold sandwiches that get sad by noon, these stay warm and melty when packed properly. I’ll show you how below.
- Endlessly Customizable — Once you master the basic version, you can add beans, chicken, or even a little salsa for dipping. It grows with your kid’s palate.
What makes these different from every other quesadilla recipe? It’s the size and the dipping factor. Cutting them into strips turns a regular lunch into an interactive experience. Kids love dipping things — it’s basically a law of nature. Pair these with a side of salsa, sour cream, or even a little guacamole, and suddenly lunch feels like a treat. I’ve tested this with my own kids, my niece, and a few skeptical neighborhood kids. Every single one came back for more. That’s not luck. That’s melted cheese science.
What Ingredients You Will Need
This recipe uses the simplest ingredients you can imagine. No long list, no strange finds. Just honest, pantry-friendly staples that come together fast.
- Flour tortillas (8-inch) — I prefer medium-sized flour tortillas for lunchbox portions. They fold easily and fit perfectly into thermoses. Corn tortillas work too, but they’re smaller and can crack when folded. For best results, use soft, pliable flour tortillas. I like the brand Mission or the store-brand version — both work fine. If you’re using larger burrito-sized tortillas, just cut the finished quesadilla into more strips.
- Shredded cheddar cheese (1 cup) — Sharp cheddar gives the best flavor, but mild cheddar works if your kids are sensitive to stronger tastes. Pre-shredded cheese is fine in a pinch, but freshly shredded melts more smoothly. I’ve used both, and honestly? On a busy morning, the bagged stuff saves time and my kids can’t tell the difference. For a creamier melt, mix in a little Monterey Jack or mozzarella.
- Butter or oil (1 tablespoon) — A little butter brushed on the outside of the tortilla gives you that golden, crispy edge that makes these dippers irresistible. Use unsalted butter so you control the salt level. Coconut oil or avocado oil work if you’re dairy-free. I’ve used olive oil in a pinch — it works, but butter tastes better.
- Optional: Salsa or sour cream for dipping — These aren’t required but they turn the dippers into a full experience. My kids love mild salsa. My husband prefers sour cream. I just pack a small container on the side and let them choose.
- Optional: Cooked chicken or black beans — If you want to add protein, finely shredded rotisserie chicken or mashed black beans blend right into the cheese layer. Just don’t overstuff or the quesadilla won’t seal properly.
That’s it. No fancy cheese blends, no obscure spices, no trips to three different stores. Just real food that works.
Equipment Needed
You don’t need much for these Easy Cheese Quesadilla Dippers. Here’s what I use:
- A non-stick skillet or griddle (10-inch) — This is your main tool. A good non-stick surface means less butter and easier flipping. I’ve been using the same basic non-stick pan for years — it cost me fifteen bucks and still works perfectly. Cast iron works too but needs more butter to prevent sticking.
- A sharp knife or pizza cutter — For cutting the quesadilla into dipper-sized strips. A pizza cutter gives you clean edges fast. A knife works just fine. I’ve used kitchen scissors in a rush — not elegant but effective.
- A thermos or insulated food jar — To keep the dippers warm until lunchtime. I use a Stanley thermos or a basic Thermos brand food jar. Both keep the cheese melty for hours. Pre-warm the thermos with hot water for five minutes before packing for best results.
- A small dipping container — If you’re sending salsa or sour cream, a small leakproof container is essential. I use the little silicone cups from a bento box set. They fit perfectly next to the dippers.
- A spatula — For flipping the quesadilla without breaking it. A thin, flexible spatula works best. I’ve had a cheap plastic one for years — it’s fine.
No fancy gadgets. No expensive equipment. Just basic kitchen tools you probably already own.
Preparation Method
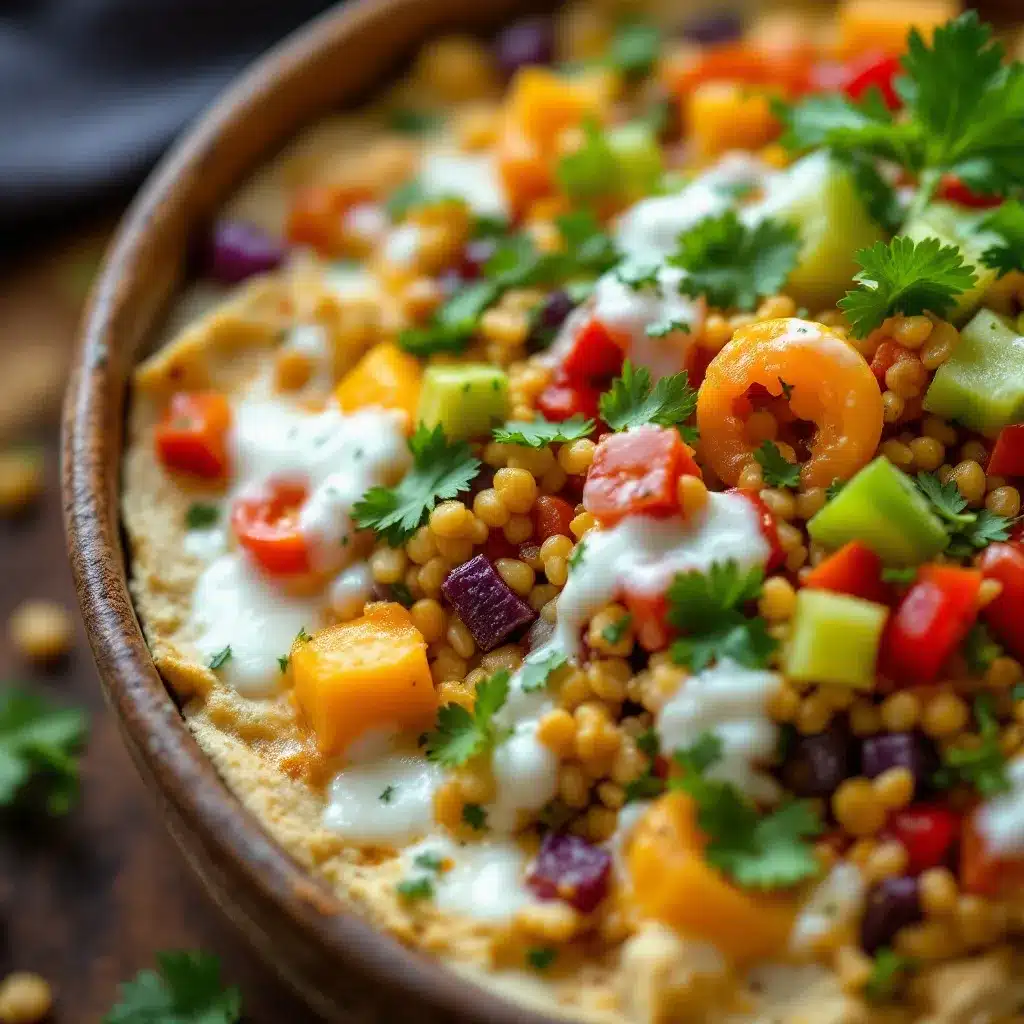
Here’s how I make these Easy Cheese Quesadilla Dippers step by step. I’ve tested this method more times than I can count, and it works every single time.
- Preheat your skillet over medium heat. Give it about two minutes to warm up. You want it hot but not smoking. If the pan is too hot, the tortilla will burn before the cheese melts. Too cold, and the tortilla gets soggy. Medium heat is your sweet spot. I learned this the hard way after a few blackened tortillas.
- Butter one side of each tortilla lightly. Use about half a tablespoon per tortilla. Spread it evenly with a knife or your fingers. The butter side goes face-down in the pan. This gives you that golden, crispy exterior that makes these dippers so good. If you’re using oil, brush it on instead.
- Place one tortilla, butter-side down, in the skillet. Let it cook for about 30 seconds until it starts to bubble slightly. This gives the bottom a head start before you add the cheese.
- Sprinkle about half a cup of shredded cheese evenly over the tortilla. Spread it out but leave a half-inch border around the edge. This prevents cheese from oozing out when you fold it. If you’re adding chicken or beans, sprinkle them on top of the cheese now.
- Place the second tortilla on top, butter-side up. Press down gently with your spatula. Let it cook for 2 to 3 minutes. You’ll know it’s ready when the bottom is golden brown and crispy. Peek underneath carefully — don’t flip too early or the cheese won’t be melted enough to hold everything together.
- Flip the quesadilla carefully. Use your spatula to lift and flip in one smooth motion. Cook for another 2 to 3 minutes until the second side is golden brown and the cheese is fully melted. Press down gently with the spatula once more to seal the edges.
- Transfer the quesadilla to a cutting board. Let it rest for 30 to 60 seconds. This helps the cheese set slightly so it doesn’t all ooze out when you cut. I know it’s tempting to cut immediately, but trust me — that short rest makes a difference.
- Cut into strips using a pizza cutter or sharp knife. I cut each quesadilla into 6 to 8 strips, depending on the size of the tortilla. For lunchboxes, I aim for strips about an inch wide. They’re easy for little hands to pick up and dip.
- Pack immediately into a pre-warmed thermos. Fill your thermos with hot water, let it sit for five minutes, then dump the water and add the dippers. Close the lid tight. They’ll stay warm and melty until lunchtime. I’ve tested this at the 4-hour mark — still warm.
That’s it. Nine steps, less than 10 minutes, and your kid gets a hot, dippable lunch that actually gets eaten.
Cooking Tips & Techniques
I’ve made these Easy Cheese Quesadilla Dippers more times than I can count, and I’ve learned a few things along the way. Here are my best tips:
Don’t overstuff the quesadilla. I know it’s tempting to pile on the cheese and extras, but too much filling makes the quesadilla hard to flip and the cheese will leak out everywhere. Stick to about half a cup of cheese per quesadilla. If you’re adding chicken or beans, use no more than a quarter cup. Less is more here.
Pre-warm your thermos every single time. This is the biggest game-changer for hot lunches. If you pack warm food into a cold thermos, it cools down fast. Fill the thermos with boiling water, let it sit for five minutes while you cook, then dump the water and add the dippers. The difference is dramatic — warm dippers at noon versus lukewarm ones. I forgot to do this once and my son came home saying his lunch was “just okay.” Never again.
Use medium heat, not high. High heat burns the tortilla before the cheese melts. Medium heat gives you a golden, crispy exterior and perfectly melted cheese. If your pan is smoking, it’s too hot. Turn it down and start over. I’ve burned plenty of tortillas learning this lesson.
Let the quesadilla rest before cutting. That 30-second rest lets the cheese set just enough that it doesn’t all squeeze out when you cut. Your strips will be cleaner and the cheese stays inside where it belongs. I learned this after cutting too early and ending up with a pile of cheese-covered strips and an empty tortilla shell.
Cut the strips while they’re still warm. Don’t wait until they cool completely or the cheese will harden and the strips won’t separate cleanly. Cut them while they’re warm but not hot, right after the rest period. Use a pizza cutter for the cleanest edges.
If you’re looking for more lunchbox inspiration, try my Smash Burger Tacos in a Thermos or my Deconstructed Pizza Lunchbox. Both are huge hits in my house.
Variations & Adaptations
Once you’ve got the basic Easy Cheese Quesadilla Dippers down, the possibilities are endless. Here are my favorite variations:
Protein-Packed Version: Add finely shredded rotisserie chicken or mashed black beans to the cheese layer before cooking. The key is to keep the additions small so the quesadilla still seals properly. My kids love the chicken version — it feels like a treat but adds protein to keep them full through afternoon classes.
Veggie Lover’s Version: Finely dice bell peppers, mushrooms, or spinach and sauté them quickly before adding to the quesadilla. The veggies need to be cooked first or they’ll release water and make the tortilla soggy. I’ve added finely chopped broccoli too — my kids didn’t even notice.
Spicy Adult Version: Add a pinch of cumin, chili powder, or a few dashes of hot sauce to the cheese layer. This is for your own lunch, obviously. I make a spicy version for myself while the kids get the mild version. It takes the same amount of time and everyone’s happy.
Cheese Swap: Try Monterey Jack for a creamier melt, pepper jack for a little heat, or a Mexican blend for more complexity. I’ve used mozzarella too — it’s milder but melts beautifully. Avoid hard cheeses like Parmesan — they don’t melt well and can make the quesadilla grainy.
Gluten-Free Version: Use gluten-free tortillas. Most brands work well, though they can be more fragile. Cook them a little longer on lower heat to help them crisp up without breaking. I’ve used corn tortillas too — they’re smaller but work in a pinch.
For a sweeter lunchbox option, try my No-Bake Peanut Butter Oat Bites. They pair perfectly with these dippers for a balanced lunch.
Serving & Storage Suggestions
These Easy Cheese Quesadilla Dippers are best served warm, straight from the skillet into the thermos. But here’s how to handle them for different situations:
Serving Temperature: Warm is ideal. The cheese is melty, the tortilla is crispy, and everything tastes better. If you’re packing for lunch, pre-warm the thermos and pack immediately. For an after-school snack, serve them right away with salsa or sour cream on the side.
What to Serve With Them: Mild salsa, sour cream, guacamole, or even a little ranch dressing for dipping. I also pack fresh fruit, veggie sticks, or a small yogurt on the side for a complete lunch. My kids love them with apple slices and a cheese stick — it’s like a deconstructed quesadilla plate.
Storage Instructions: These are best fresh, but you can make them ahead. Cook the quesadillas, let them cool completely, then store them in an airtight container in the refrigerator for up to 3 days. To reheat, pop them in a dry skillet over medium heat for 2 to 3 minutes per side, or microwave for 30 seconds. The microwave makes them softer, the skillet keeps them crispy.
Freezer Instructions: Cook and cool the quesadillas completely. Wrap each one individually in plastic wrap, then place them in a freezer bag. They’ll keep for up to 2 months. To reheat from frozen, unwrap and cook in a skillet over medium heat for 4 to 5 minutes per side, or microwave for 1 to 2 minutes. The texture won’t be quite as crispy as fresh, but they’re still delicious.
Flavor Development: These are best fresh, honestly. The tortilla loses its crispiness over time, and the cheese can get a little firm. That’s why I recommend packing them in a thermos for lunch — it keeps them warm and melty. If you’re packing them cold, they’re still good, just not as amazing.
Nutritional Information & Benefits
Here’s the approximate nutritional breakdown for one serving of Easy Cheese Quesadilla Dippers (about 6 strips, using two 8-inch flour tortillas and half a cup of shredded cheddar cheese):
- Calories: 380-420
- Protein: 16-18 grams
- Fat: 20-24 grams
- Carbohydrates: 32-36 grams
- Fiber: 2-3 grams
- Calcium: 30-35% of daily value
Health Benefits: Cheese is a great source of calcium and protein, which support bone health and muscle growth in growing kids. Tortillas provide carbohydrates for energy. If you add chicken or beans, you’ll boost the protein content even more. For a lighter version, use whole wheat tortillas and reduced-fat cheese — the flavor is still great and the fiber content goes up.
Dietary Considerations: This recipe is vegetarian as written. For a gluten-free version, use gluten-free tortillas. For a dairy-free version, use dairy-free cheese and oil instead of butter. For a lower-sodium version, use low-sodium cheese and unsalted butter. Always check labels if you’re cooking for someone with allergies.
Potential Allergens: Dairy (cheese, butter), gluten (flour tortillas). If you’re serving these at a school with allergy policies, check with parents first. I’ve made dairy-free versions for my niece and they worked well with a good quality vegan cheese.
For a balanced lunch, pair these dippers with fresh fruit and veggie sticks. My kids love them with Turkey Pinwheel Rollups on the side for extra protein.
Conclusion
These Easy Cheese Quesadilla Dippers have genuinely changed my lunchbox game. What started as a rushed Tuesday morning experiment became the recipe my kids actually request. Not tolerate. Request. And honestly? That’s the highest compliment a parent can get.
The beauty of this recipe is how simple it is. Two ingredients. One pan. Less than ten minutes. And you get a warm, dippable, kid-approved lunch that doesn’t come home uneaten. It’s the kind of recipe that makes you feel like you’ve got this parenting thing figured out — even if just for one meal.
I’d love to hear how these turn out for you. Do your kids have a favorite dipping sauce? Have you tried any fun variations? Drop a comment below and let me know. And if you share a photo on social media, tag me — I love seeing these dippers in action. Until next time, happy cooking and even happier lunch packing!
Frequently Asked Questions
Can I make these quesadilla dippers ahead of time?
Yes, absolutely. Cook them, let them cool completely, and store in an airtight container in the refrigerator for up to 3 days. Reheat in a dry skillet for 2-3 minutes per side or microwave for 30 seconds. They won’t be as crispy as fresh, but they’re still delicious. For best results, pack them in a pre-warmed thermos for lunch.
What’s the best cheese for quesadilla dippers?
Sharp cheddar is my go-to — it melts well and has great flavor. Monterey Jack is creamier, and a Mexican blend adds nice complexity. Avoid hard cheeses like Parmesan that don’t melt smoothly. Pre-shredded cheese works in a pinch, but freshly shredded melts more evenly.
How do I keep the dippers warm until lunchtime?
Pre-warm your thermos by filling it with boiling water for 5 minutes. Dump the water, add the hot dippers immediately, and close the lid tight. They’ll stay warm for 4-5 hours. This method works every time and makes a huge difference in how your kids enjoy their lunch.
Can I freeze these cheese quesadilla dippers?
Yes. Cook and cool completely, wrap individually in plastic wrap, then place in a freezer bag. They’ll keep for up to 2 months. Reheat from frozen in a skillet for 4-5 minutes per side or microwave for 1-2 minutes. The texture won’t be quite as crispy, but they’re still tasty.
What can I serve with quesadilla dippers for a complete lunch?
Fresh fruit like apple slices or grapes, veggie sticks with ranch dip, a small yogurt, or a side of salsa and sour cream. For extra protein, add High-Protein Bento Box components like hard-boiled eggs or chickpeas. The key is balance — carbs, protein, and something fresh.
Pin This Recipe!
Easy Cheese Quesadilla Dippers: Best Kids Lunchbox Idea

These Easy Cheese Quesadilla Dippers are a quick, kid-friendly lunchbox solution made with just tortillas and cheese. Ready in under 10 minutes, they stay warm in a thermos and are perfect for picky eaters.
- Prep Time: 5 minutes
- Cook Time: 6 minutes
- Total Time: 11 minutes
- Yield: 4 servings 1x
- Category: Lunch
- Cuisine: Mexican-American
Ingredients
- 2 (8-inch) flour tortillas
- 1 cup shredded cheddar cheese
- 1 tablespoon butter or oil
- Optional: salsa or sour cream for dipping
- Optional: cooked chicken or black beans
Instructions
- Preheat a non-stick skillet over medium heat for about 2 minutes.
- Lightly butter one side of each tortilla (about 1/2 tablespoon per tortilla).
- Place one tortilla, butter-side down, in the skillet and cook for 30 seconds until it starts to bubble.
- Sprinkle about 1/2 cup of shredded cheese evenly over the tortilla, leaving a 1/2-inch border.
- Place the second tortilla on top, butter-side up, and press down gently. Cook for 2-3 minutes until the bottom is golden brown.
- Flip the quesadilla carefully and cook for another 2-3 minutes until the second side is golden brown and the cheese is fully melted.
- Transfer to a cutting board and let rest for 30-60 seconds.
- Cut into 6-8 strips using a pizza cutter or sharp knife.
- Pack immediately into a pre-warmed thermos (fill with hot water for 5 minutes, then dump and add dippers).
Notes
Pre-warm the thermos with hot water for 5 minutes before packing to keep dippers warm. Don’t overstuff the quesadilla; use about 1/2 cup cheese per quesadilla. Let the quesadilla rest before cutting to prevent cheese from oozing out. For best results, cut strips while still warm.
Nutrition
- Serving Size: 6 strips
- Calories: 400
- Sugar: 2
- Sodium: 620
- Fat: 22
- Saturated Fat: 12
- Carbohydrates: 34
- Fiber: 2.5
- Protein: 17
Keywords: quesadilla dippers, kids lunchbox, easy lunch, cheese quesadilla, thermos lunch, picky eater, quick lunch


