Love this? Save it for later!
Share the inspiration with your friends
My nephew Liam took one look at the stuffed peppers I was making and said, “Those look boring.” He was seven, and he wasn’t wrong. I had spent a solid twenty minutes browning meat, cooking rice, and carefully hollowing out four perfectly good bell peppers, and his only reaction was a shrug. That stung. I wanted something that would make him actually excited to eat dinner, not something he’d push around his plate while making a list of all the reasons he’d rather have pizza. So I carved a face into the next pepper before I stuffed it. Two triangle eyes and a jagged, lopsided grin. I slid it into the oven hoping for the best, fully prepared for it to collapse into a sad, shriveled mess.
It didn’t collapse. It puffed up slightly, the edges of the face darkened and toasted, and when I pulled the baking dish out, that pepper was grinning back at me like a goblin who just won a bet. Liam actually laughed. He ate two whole peppers that night, and he asked if we could have “monster peppers” every week. That was four years ago, and I’ve been making these Easy Jack-o’-Lantern Stuffed Bell Peppers every October since. They are not complicated. They are not fussy. They are just a really good stuffed pepper recipe that happens to look like a tiny, edible jack-o-lantern. And honestly, that visual trick does more work than any fancy spice blend ever could.
The filling is simple—ground beef, rice, tomato sauce, cheese, and a few seasonings—but the presentation makes it feel like a special occasion. The peppers soften as they bake, so the face stays intact but becomes tender enough to cut with a fork. You get the sweet, roasted flavor of the bell pepper wrapped around a savory, cheesy filling, and the whole thing feels like a little gift when it lands on the plate. I have made these for Halloween parties, for regular Tuesday dinners in October, and for a kids’ cooking class I helped with one year, and they always get the same reaction. People smile. That is the whole point.
Why You’ll Love This Recipe
I have tested this recipe more times than I care to admit, and I can tell you with confidence that it works. The peppers stay upright, the filling stays moist, and the face stays visible even after baking. Here is why this one is worth your time:
- Fun for Kids and Adults Alike : There is something about a food that looks back at you that makes dinner instantly more entertaining. My nephew is not the only one who fell for this trick—grown adults at parties have asked me for the recipe just because they thought the peppers were cute.
- Simple, Affordable Ingredients : You likely have most of these items in your pantry already. Ground beef, rice, canned tomatoes, cheese, and bell peppers. No weird specialty items, no expensive cuts of meat.
- Perfect for Halloween or Fall Gatherings : These work for a Halloween dinner, a fall potluck, or just a regular weeknight when you want to inject a little seasonal joy into the routine. They look festive without requiring any decorating skills.
- Customizable Filling : You can swap the ground beef for turkey, chicken, or a plant-based crumble. You can add black beans, corn, or diced mushrooms. The base recipe is forgiving and adaptable.
- Make-Ahead Friendly : You can assemble these peppers earlier in the day, refrigerate them, and bake them right before dinner. They hold up beautifully.
What makes this recipe different from other stuffed pepper recipes is the carving technique. I spent a few batches figuring out the best way to cut the faces so they stay open during baking instead of sealing shut or collapsing. The trick is to cut the eyes and mouth wide enough—about an inch across—and to angle the knife slightly outward so the edges have a little support. I also learned that orange bell peppers work best for the jack-o-lantern look, but red and yellow peppers also look great and tend to be sweeter.
This is the kind of recipe that makes you feel like a kitchen hero without actually doing anything difficult. You just stuff a pepper, carve a face, and bake. The oven does the heavy lifting, and you get all the credit. It is comfort food with a sense of humor, and that is a rare combination.
What Ingredients You Will Need
This recipe uses straightforward ingredients that come together to create a filling, satisfying dinner. The list is short, but each component plays a role in the final texture and flavor.
- 4 large bell peppers (orange for the classic jack-o-lantern look, or red/yellow for sweetness): Look for peppers that are squat and wide rather than tall and narrow. They sit more stably in the baking dish and give you a bigger canvas for the face. I prefer peppers that have flat bottoms so they do not tip over.
- 1 pound ground beef (85/15 or 90/10): The fat content keeps the filling moist without making it greasy. You can substitute ground turkey, ground chicken, or a plant-based crumble if you prefer. If using a leaner meat, add a tablespoon of olive oil to the pan when browning.
- 1 cup cooked rice (white, brown, or cauliflower rice): Leftover rice works perfectly here. If you do not have pre-cooked rice, cook 1/3 cup dry rice according to package directions to yield about 1 cup cooked. Cauliflower rice works well for a lower-carb option, but squeeze out the excess moisture before adding it to the filling.
- 1 can (15 ounces) tomato sauce: This adds moisture and binds the filling together. I prefer using a brand like Muir Glen or Hunt’s for consistent flavor. You can also use crushed tomatoes if that is what you have on hand, but the sauce will be slightly chunkier.
- 1 cup shredded cheese (cheddar, Monterey Jack, or a Mexican blend): Cheddar adds sharpness, while Monterey Jack melts more smoothly. I often use a mix of both. Reserve a little extra to sprinkle on top during the last five minutes of baking if you want a cheesy crust.
- 1/2 cup diced onion: Yellow or white onion works fine. Sauté it with the beef until translucent for the best flavor. If you are short on time, you can use 1 teaspoon of onion powder instead, but fresh onion adds better texture.
- 2 cloves garlic, minced: Fresh garlic is best here. Pre-minced garlic from a jar works in a pinch, but use 1 teaspoon instead of 2 cloves because it tends to be milder.
- 1 teaspoon dried oregano: This adds a warm, slightly bitter note that balances the sweetness of the peppers. You can substitute dried basil or Italian seasoning if you prefer.
- 1/2 teaspoon smoked paprika: This is optional but highly recommended. It adds a subtle smoky depth that makes the filling taste like it cooked for hours. Regular paprika also works.
- Salt and black pepper to taste: I use about 1 teaspoon of salt and 1/2 teaspoon of pepper for the full batch, but adjust based on your preference and the saltiness of your cheese and tomato sauce.
- Fresh parsley or chives for garnish (optional): A little green on top makes the orange peppers pop visually. It is not necessary, but it looks nice if you are serving these to guests.
Ingredient Selection Tip: When choosing bell peppers, look for ones that are firm and heavy for their size with smooth, unblemished skin. Avoid peppers that have soft spots or wrinkled areas, as they will collapse more easily during baking. If you are making these for a party, buy an extra pepper or two in case some are too tall or unstable to carve well.
Equipment Needed
You do not need anything fancy to make these peppers, but a few specific tools make the process smoother.
- Large baking dish (9×13 inch or similar): You need a dish that fits all four peppers snugly without them tipping over. A glass or ceramic dish works best because it distributes heat evenly. If your peppers are wobbly, you can trim a thin slice off the bottom to create a flat surface.
- Sharp paring knife: This is essential for carving the faces. A dull knife will tear the pepper skin instead of cutting cleanly. I use a small serrated knife for better control, but any sharp, narrow blade works.
- Large skillet: For browning the beef and sautéing the onions and garlic. A 12-inch skillet gives you plenty of room to stir without spilling.
- Cutting board: Use a stable cutting board for slicing the tops off the peppers and carving the faces. I recommend using a separate board for raw meat to avoid cross-contamination.
- Mixing bowl: For combining the filling ingredients. A medium-sized bowl is sufficient.
- Small spoon or cookie scoop: For stuffing the peppers. A cookie scoop makes the process faster and less messy, but a regular spoon works fine.
- Aluminum foil: For covering the baking dish during the first part of baking. This traps steam and helps the peppers soften without drying out.
- Measuring cups and spoons: For accurate ingredient portions. I recommend using dry measuring cups for the rice and liquid measuring cups for the tomato sauce.
Budget-Friendly Tip: If you do not have a large baking dish, you can use a rimmed baking sheet and create a foil “collar” around each pepper to keep them upright. Simply crumple long strips of foil and wrap them around the base of each pepper before placing them on the sheet. It is not pretty, but it works.
Preparation Method
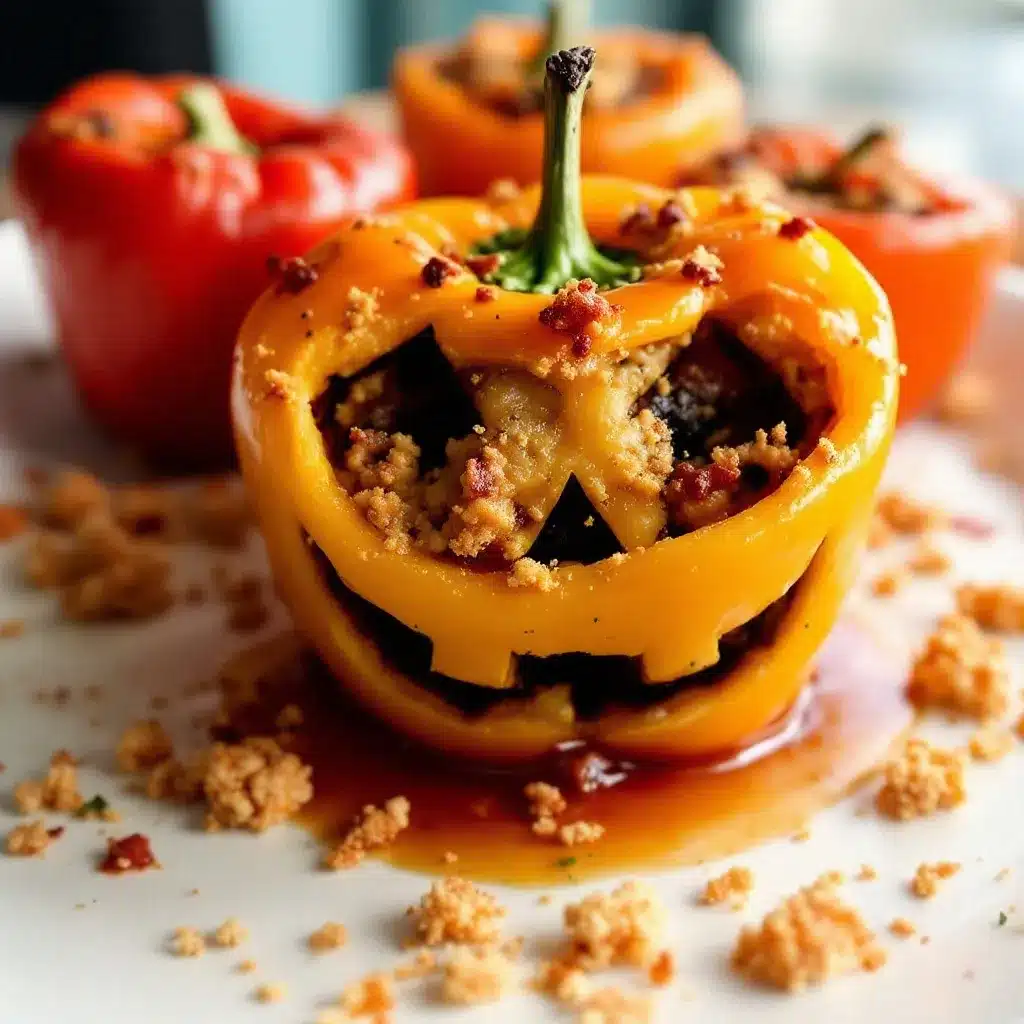
This recipe takes about 15 minutes of active prep time and 35 minutes of baking time. The steps are straightforward, but I have included some extra notes based on my own trial and error.
- Preheat your oven to 375°F (190°C). Position the rack in the center of the oven. While the oven heats, bring a large pot of water to a boil for blanching the peppers (optional, but recommended for softer peppers).
- Prepare the bell peppers. Wash and dry the peppers. Using a sharp knife, slice the top off each pepper about 1/2 inch below the stem. Set the tops aside (you can chop them up and add them to the filling if you want, or discard them). Carefully remove the seeds and white membranes from inside each pepper using your hands or a small spoon. Rinse the peppers inside and out to remove any remaining seeds.
- Blanch the peppers (optional but recommended). If you want softer peppers that are easier to cut and more tender to eat, drop the hollowed peppers into the boiling water for 3 minutes. Remove them with tongs and place them upside down on a paper towel to drain. This step also helps the peppers hold their shape better during baking. If you prefer firmer peppers with more crunch, skip this step.
- Cook the filling. Heat a large skillet over medium-high heat. Add the ground beef and cook, breaking it apart with a wooden spoon, until browned and no longer pink, about 5 to 7 minutes. If there is excess fat, drain it off, leaving about 1 tablespoon in the pan for flavor. Add the diced onion and cook for 2 to 3 minutes until softened. Add the minced garlic and cook for 30 seconds until fragrant.
- Combine the filling ingredients. Reduce the heat to low. Stir in the cooked rice, tomato sauce, dried oregano, smoked paprika, salt, and black pepper. Mix until everything is well combined. Remove the skillet from the heat and let the filling cool for 2 to 3 minutes. Stir in 1/2 cup of the shredded cheese. The residual heat will melt the cheese slightly, creating a creamy texture. Taste the filling and adjust the seasoning if needed.
- Stuff the peppers. Place the blanched peppers upright in the baking dish. If they wobble, trim a thin slice off the bottom to create a flat surface. Using a spoon or cookie scoop, divide the filling evenly among the four peppers. Pack the filling down gently but do not overstuff—leave about 1/4 inch of space at the top so the filling has room to expand during baking. The filling should be level with the top edge of the pepper.
- Carve the faces. This is the fun part. Using a sharp paring knife, carefully cut two triangles for eyes and a crescent or jagged mouth into the front of each pepper. Cut through the pepper skin and flesh, but try not to cut all the way through the back wall of the pepper. The pieces you remove will fall out as you cut. Make the eyes about 1 inch wide and the mouth about 2 inches wide. If you want a spookier look, cut jagged edges on the mouth. For a friendlier face, cut a smooth crescent shape. I have found that cutting the eyes slightly angled upward gives the pepper a mischievous expression that kids love.
- Top with cheese and bake. Sprinkle the remaining 1/2 cup of shredded cheese evenly over the tops of the stuffed peppers. If you want extra cheese, add more—I will not stop you. Cover the baking dish tightly with aluminum foil. Bake for 25 minutes. Then remove the foil and bake for an additional 8 to 10 minutes, until the cheese is melted and bubbly and the peppers are tender when pierced with a fork. If you want browner cheese, switch the oven to broil for the last 2 minutes, but watch closely so it does not burn.
- Rest and serve. Remove the baking dish from the oven and let the peppers rest for 5 minutes. This allows the filling to set slightly and makes the peppers easier to handle. Garnish with fresh parsley or chives if desired. Serve warm, with extra tomato sauce or sour cream on the side if you like.
Sensory Cue: When the peppers are done, the skin should be slightly wrinkled and tender enough that a fork slides in easily. The cheese on top should be golden and bubbling around the edges. The filling should be steaming and fragrant with oregano and garlic. If you cut into a pepper and the filling seems too wet, you can return it to the oven uncovered for another 5 minutes to let some moisture evaporate.
Cooking Tips & Techniques
I have made these peppers enough times to know exactly where things can go wrong. Here are the lessons I learned the hard way so you do not have to.
Do not overstuff the peppers. I made this mistake my first time. I packed the filling in so tightly that the pepper burst open during baking and the filling spilled out into the dish. Leave a little breathing room at the top. The rice will expand slightly as it absorbs moisture from the tomato sauce, and the cheese needs space to melt without overflowing.
Cut the faces after stuffing, not before. This was a game changer for me. If you carve the faces into empty peppers, the walls can collapse or warp when you add the filling. By carving after stuffing, the filling supports the pepper walls and keeps the face shape intact. The knife glides through the pepper flesh easily, and the filling stays securely inside.
Use a spoon to remove the carved pieces. Sometimes the cut-out pieces of pepper do not fall out on their own. Instead of poking around with the knife and risking tearing the face, use the tip of a small spoon to gently pop the pieces out. This keeps the edges clean and the face looking intentional rather than ragged.
Blanch the peppers if you want softer results. I prefer my peppers on the tender side, so I always blanch them for 3 minutes before stuffing. If you like your peppers with more bite, skip the blanching and just bake them covered for the full 25 minutes. The steam from the covered baking dish will soften them enough without making them mushy.
Watch the cheese during the final bake. The uncovered baking period is where the magic happens, but it is also where things can go wrong if you walk away. Cheese can go from perfectly golden to burnt in under a minute. Set a timer for 8 minutes, then check. If the cheese is not brown enough, give it 2 more minutes and check again. I have burned more than one batch of peppers because I got distracted by a phone call.
Multitasking strategy: While the peppers are baking covered, you can prepare a side dish like a simple salad or some roasted vegetables. I like to serve these peppers with a side of cozy roasted tomato basil soup for dipping, or a quick green salad with a tangy vinaigrette to cut through the richness of the cheese and beef.
Variations & Adaptations
One of the best things about this recipe is how easily it adapts to different diets, preferences, and occasions. Here are a few variations I have tried and loved.
Vegetarian Version: Swap the ground beef for 1 can (15 ounces) of black beans or chickpeas, drained and rinsed. Mash half of the beans lightly with a fork before adding them to the skillet to create a creamier texture. You can also add 1/2 cup of corn kernels or diced zucchini for extra bulk and color. The cooking time remains the same.
Spicy Version: Add 1/2 teaspoon of cayenne pepper or red pepper flakes to the filling along with the other seasonings. You can also mix in 2 tablespoons of diced pickled jalapeños for a tangy kick. For extra heat, use pepper jack cheese instead of cheddar. My brother-in-law requests this version every year, and he always eats three peppers in one sitting.
Mexican-Inspired Version: Replace the oregano with 1 teaspoon of ground cumin and add 1/2 cup of canned black beans and 1/4 cup of salsa to the filling. Top the peppers with crumbled cotija cheese and fresh cilantro instead of parsley. Serve with a dollop of sour cream and a squeeze of lime. This version pairs beautifully with flavorful chicken burrito bowls for a full fiesta dinner.
Low-Carb Version: Replace the cooked rice with 1 cup of riced cauliflower. Make sure to squeeze the excess moisture out of the cauliflower rice using a clean kitchen towel before adding it to the filling. You can also use ground pork or turkey instead of beef for a leaner option. The filling will be slightly less cohesive, but the flavor is still excellent.
Breakfast Version: This is a weird one, but hear me out. Replace the tomato sauce with 1/2 cup of salsa verde, swap the ground beef for cooked breakfast sausage, and use pepper jack cheese. Top each stuffed pepper with a cracked egg during the last 10 minutes of baking and cook until the egg white is set but the yolk is still runny. It is messy and ridiculous, and it is my favorite way to eat these peppers on a lazy Saturday morning.
Serving & Storage Suggestions
These peppers are best served warm, straight from the oven, but they also hold up well for leftovers. Here is how to get the most out of them.
Serving Temperature: Serve the peppers hot, ideally within 10 minutes of removing them from the oven. The cheese should be melted and stretchy, and the filling should be steaming. If you let them sit too long, the cheese will firm up and the peppers will lose some of their tenderness. I like to serve them on a bed of simple greens or alongside a slice of crusty bread to soak up any extra sauce in the dish.
Presentation Ideas: Arrange the peppers on a platter with the carved faces facing outward so everyone can see the jack-o-lantern smiles. Sprinkle fresh parsley or chives on top for a pop of green. If you are serving these at a Halloween party, you can add a small dollop of sour cream on top of each pepper and place a black olive slice on top to look like a witch’s hat. It is silly, but it gets a laugh every time.
Complementary Dishes: These peppers pair well with a variety of sides. A simple green salad with a lemon vinaigrette cuts through the richness of the cheese and beef. Roasted broccoli or green beans add color and texture. For a heartier meal, serve the peppers alongside crispy hatch chili cheddar cornbread or a bowl of creamy hatch green chili corn chowder for a full fall spread.
Storage Instructions: Store leftover stuffed peppers in an airtight container in the refrigerator for up to 4 days. The peppers will soften further as they sit, but the flavor actually improves after a day or two as the seasonings meld together. To reheat, place the peppers in a baking dish, cover with foil, and warm in a 350°F oven for 15 to 20 minutes. You can also microwave individual peppers on a plate for 2 to 3 minutes, but the peppers will be softer and the cheese will not be as melty.
Freezing Instructions: These peppers freeze beautifully. Assemble the peppers completely (including carving the faces and adding the cheese) but do not bake them. Place the stuffed peppers on a baking sheet and freeze until solid, about 2 hours. Transfer the frozen peppers to a freezer-safe bag or container and store for up to 3 months. To bake from frozen, place the peppers in a baking dish, cover with foil, and bake at 375°F for 40 to 45 minutes. Remove the foil for the last 10 minutes to brown the cheese. No need to thaw first.
Flavor Development Note: The filling becomes more flavorful after a day in the refrigerator. The tomato sauce, spices, and cheese have time to meld together, creating a deeper, more cohesive taste. I actually prefer the leftovers over the fresh version for this reason. Do not be afraid to make these a day ahead if you are planning a party.
Nutritional Information & Benefits
This recipe is a balanced meal on its own, providing protein, carbohydrates, vegetables, and dairy in one convenient package. Here is the estimated nutritional breakdown for one stuffed pepper (using 85/15 ground beef, white rice, and cheddar cheese).
| Nutrient | Amount Per Serving |
|---|---|
| Calories | 410 |
| Total Fat | 22g |
| Saturated Fat | 9g |
| Cholesterol | 85mg |
| Sodium | 720mg |
| Total Carbohydrates | 28g |
| Dietary Fiber | 4g |
| Sugars | 8g |
| Protein | 28g |
| Vitamin A | 45% DV |
| Vitamin C | 150% DV |
| Calcium | 20% DV |
| Iron | 20% DV |
Health Benefits: Bell peppers are an excellent source of vitamin C, with a single pepper providing more than the daily recommended intake. Vitamin C supports immune function and collagen production. The red and orange varieties are also rich in beta-carotene, which the body converts into vitamin A for healthy vision and skin. The ground beef provides high-quality protein and iron, which is important for energy and oxygen transport in the blood. Using lean ground beef (90/10) reduces the saturated fat content without sacrificing flavor. If you use brown rice instead of white rice, you will add about 2 grams of fiber per serving.
Dietary Considerations: This recipe is naturally gluten-free (check your tomato sauce label to be sure). To make it dairy-free, omit the cheese or use a plant-based shredded cheese alternative. To make it lower in sodium, use no-salt-added tomato sauce and reduce the added salt to 1/2 teaspoon. The recipe is also easily adaptable for low-carb diets by substituting cauliflower rice for the white rice.
Potential Allergens: This recipe contains dairy (cheese). It does not contain nuts, eggs, soy, or shellfish, but always check the labels on your specific ingredients if you have severe allergies.
Conclusion
These Easy Jack-o’-Lantern Stuffed Bell Peppers are proof that dinner does not have to be serious to be delicious. They are fun without being gimmicky, festive without being complicated, and satisfying without requiring a trip to a specialty grocery store. The faces make people smile, the filling keeps them coming back for seconds, and the whole thing comes together in under an hour with ingredients you probably already have in your kitchen.
I love this recipe because it reminds me that cooking does not always have to be about precision and perfection. Sometimes it is about carving a crooked grin into a pepper and watching a seven-year-old actually laugh at dinner. That is the kind of cooking I want to do more of. I hope you make these peppers your own—carve happy faces or scary faces, stuff them with your favorite fillings, and serve them to the people you love. And if you come up with a variation I have not tried, I would love to hear about it. Drop a comment below and tell me how your peppers turned out. Did the kids love them? Did you try a weird filling combination that actually worked? I want to know.
Thank you for spending this time with me in the kitchen. Now go carve some peppers and make dinner fun again.
Frequently Asked Questions
Can I use any color of bell pepper for this recipe?
Yes, absolutely. Orange bell peppers look the most like traditional jack-o-lanterns, but red, yellow, and even green peppers work perfectly. Red and yellow peppers tend to be sweeter, while green peppers have a slightly more bitter, grassy flavor. I recommend using orange or red for the best visual effect and sweetness.
How do I keep the peppers from tipping over in the baking dish?
If your peppers are wobbly, use a sharp knife to trim a very thin slice off the bottom of each pepper to create a flat, stable surface. Be careful not to cut through the bottom of the pepper—just remove enough to level it. You can also use crumpled aluminum foil to create “rings” around the base of each pepper to hold them upright.
Can I make these peppers ahead of time?
Yes, this is one of the best things about this recipe. You can assemble the peppers completely (including carving the faces and adding the cheese) up to 24 hours in advance. Cover the baking dish with plastic wrap or foil and refrigerate. When you are ready to bake, add about 10 minutes to the covered baking time to account for the cold filling. You can also freeze the assembled, unbaked peppers for up to 3 months.
What can I use instead of ground beef?
Ground turkey, ground chicken, ground pork, or a plant-based meat crumble all work well. If using a very lean meat like ground turkey breast, add a tablespoon of olive oil to the pan when browning to keep the filling moist. For a vegetarian option, use black beans or chickpeas mashed lightly with a fork. The cooking time and temperature remain the same regardless of the protein you choose.
Why did my pepper face collapse during baking?
This usually happens for one of two reasons. Either the face cutouts were too large (over 1.5 inches wide), which weakens the pepper wall, or the pepper was over-blanched and became too soft to hold its shape. To fix this, keep your face cutouts moderate in size and blanch the peppers for no more than 3 minutes. If you skip the blanching step entirely, the peppers will hold their shape even better, though they will be slightly firmer when eaten.
Pin This Recipe!
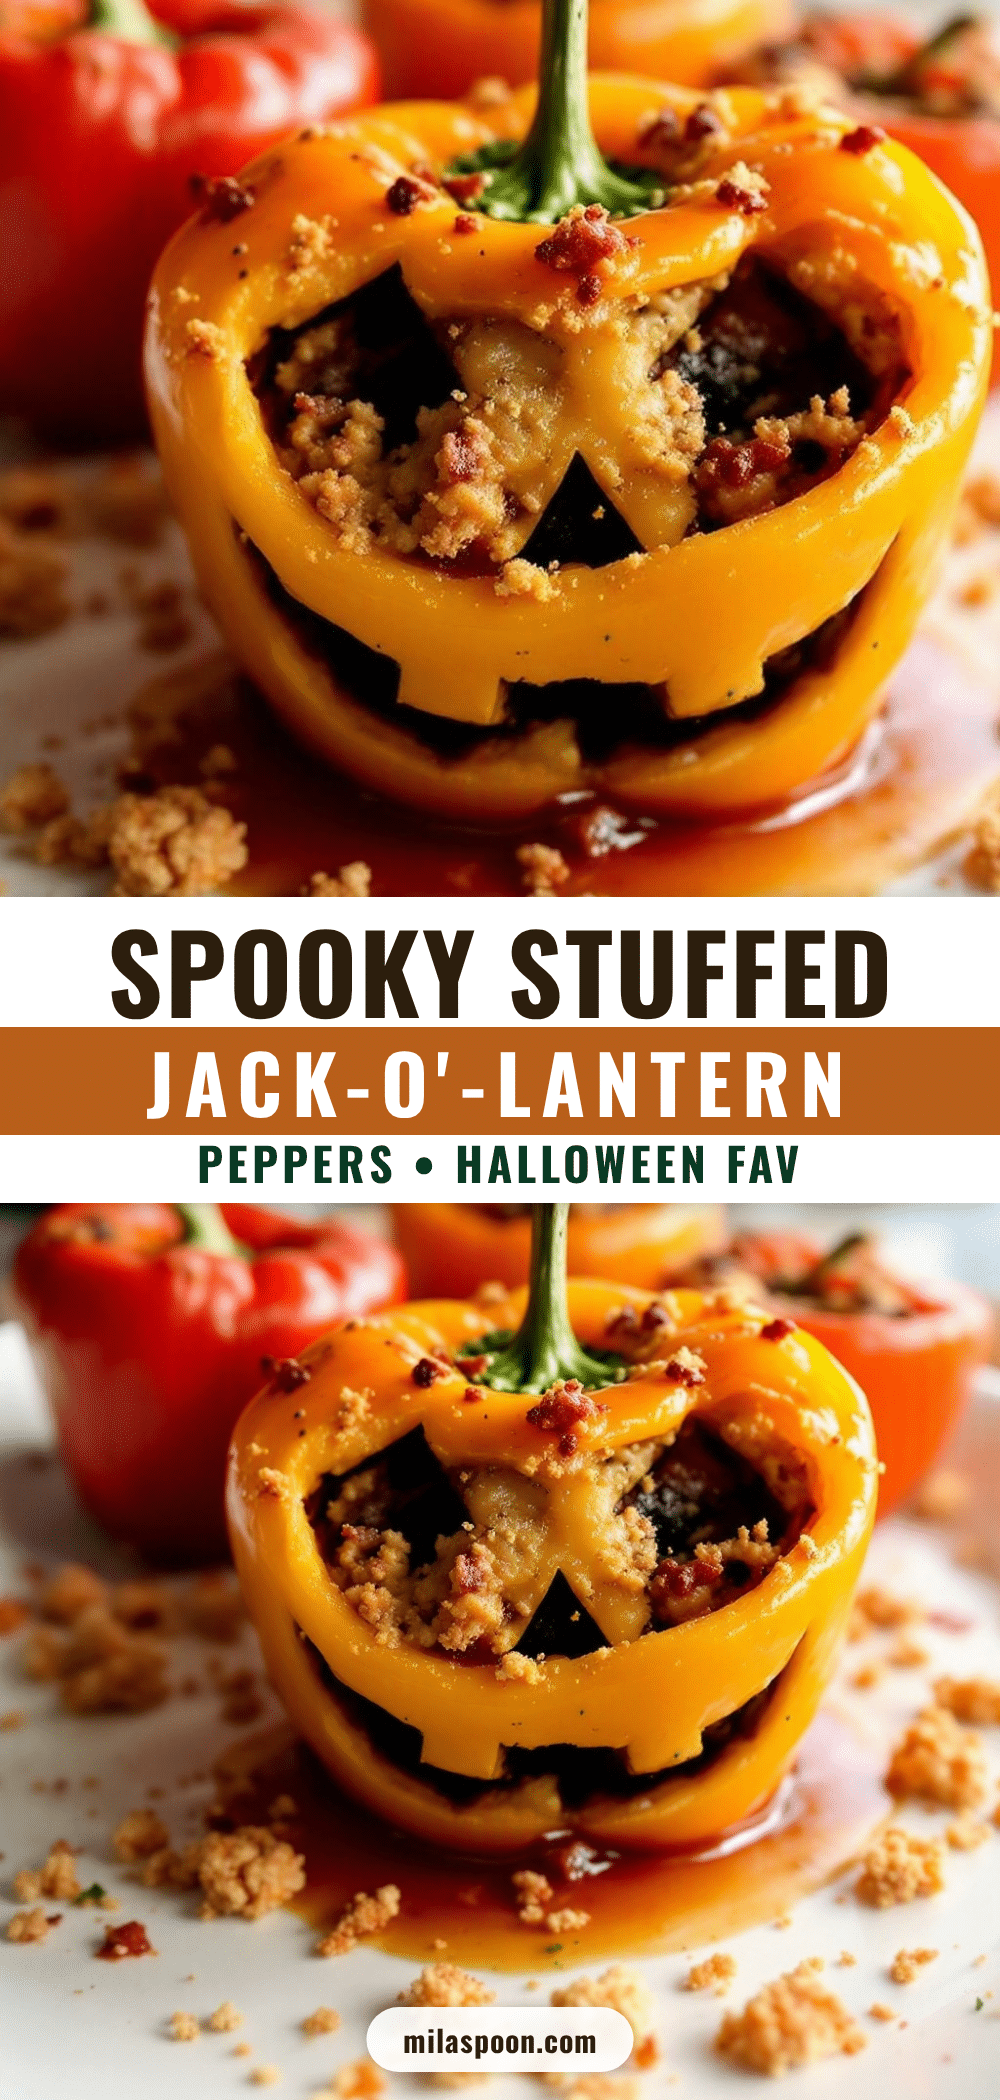
Easy Jack-o-Lantern Stuffed Bell Peppers: Perfect Fall Dinner
Fun and festive stuffed bell peppers carved to look like jack-o-lanterns, filled with a savory mixture of ground beef, rice, tomato sauce, and cheese. A perfect Halloween or fall dinner that kids and adults will love.
- Prep Time: 15 minutes
- Cook Time: 35 minutes
- Total Time: 50 minutes
- Yield: 4 servings 1x
- Category: Main Course
- Cuisine: American
Ingredients
- 4 large bell peppers (orange for classic jack-o-lantern look, or red/yellow for sweetness)
- 1 pound ground beef (85/15 or 90/10)
- 1 cup cooked rice (white, brown, or cauliflower rice)
- 1 can (15 ounces) tomato sauce
- 1 cup shredded cheese (cheddar, Monterey Jack, or Mexican blend)
- 1/2 cup diced onion (yellow or white)
- 2 cloves garlic, minced
- 1 teaspoon dried oregano
- 1/2 teaspoon smoked paprika (optional)
- Salt and black pepper to taste (about 1 teaspoon salt, 1/2 teaspoon pepper)
- Fresh parsley or chives for garnish (optional)
Instructions
- Preheat your oven to 375°F (190°C). Position the rack in the center of the oven. While the oven heats, bring a large pot of water to a boil for blanching the peppers (optional, but recommended for softer peppers).
- Prepare the bell peppers. Wash and dry the peppers. Using a sharp knife, slice the top off each pepper about 1/2 inch below the stem. Set the tops aside (you can chop them up and add them to the filling if you want, or discard them). Carefully remove the seeds and white membranes from inside each pepper using your hands or a small spoon. Rinse the peppers inside and out to remove any remaining seeds.
- Blanch the peppers (optional but recommended). If you want softer peppers that are easier to cut and more tender to eat, drop the hollowed peppers into the boiling water for 3 minutes. Remove them with tongs and place them upside down on a paper towel to drain. This step also helps the peppers hold their shape better during baking. If you prefer firmer peppers with more crunch, skip this step.
- Cook the filling. Heat a large skillet over medium-high heat. Add the ground beef and cook, breaking it apart with a wooden spoon, until browned and no longer pink, about 5 to 7 minutes. If there is excess fat, drain it off, leaving about 1 tablespoon in the pan for flavor. Add the diced onion and cook for 2 to 3 minutes until softened. Add the minced garlic and cook for 30 seconds until fragrant.
- Combine the filling ingredients. Reduce the heat to low. Stir in the cooked rice, tomato sauce, dried oregano, smoked paprika, salt, and black pepper. Mix until everything is well combined. Remove the skillet from the heat and let the filling cool for 2 to 3 minutes. Stir in 1/2 cup of the shredded cheese. The residual heat will melt the cheese slightly, creating a creamy texture. Taste the filling and adjust the seasoning if needed.
- Stuff the peppers. Place the blanched peppers upright in the baking dish. If they wobble, trim a thin slice off the bottom to create a flat surface. Using a spoon or cookie scoop, divide the filling evenly among the four peppers. Pack the filling down gently but do not overstuff—leave about 1/4 inch of space at the top so the filling has room to expand during baking. The filling should be level with the top edge of the pepper.
- Carve the faces. This is the fun part. Using a sharp paring knife, carefully cut two triangles for eyes and a crescent or jagged mouth into the front of each pepper. Cut through the pepper skin and flesh, but try not to cut all the way through the back wall of the pepper. The pieces you remove will fall out as you cut. Make the eyes about 1 inch wide and the mouth about 2 inches wide. If you want a spookier look, cut jagged edges on the mouth. For a friendlier face, cut a smooth crescent shape. …
- Top with cheese and bake. Sprinkle the remaining 1/2 cup of shredded cheese evenly over the tops of the stuffed peppers. If you want extra cheese, add more—I will not stop you. Cover the baking dish tightly with aluminum foil. Bake for 25 minutes. Then remove the foil and bake for an additional 8 to 10 minutes, until the cheese is melted and bubbly and the peppers are tender when pierced with a fork. If you want browner cheese, switch the oven to broil for the last 2 minutes, but watch closely s…
- Rest and serve. Remove the baking dish from the oven and let the peppers rest for 5 minutes. This allows the filling to set slightly and makes the peppers easier to handle. Garnish with fresh parsley or chives if desired. Serve warm, with extra tomato sauce or sour cream on the side if you like.
Notes
Do not overstuff the peppers. Cut the faces after stuffing, not before. Use a spoon to remove the carved pieces. Blanch the peppers if you want softer results. Watch the cheese during the final bake to prevent burning.
Nutrition
- Serving Size: 1 stuffed pepper
- Calories: 410
- Sugar: 8
- Sodium: 720
- Fat: 22
- Saturated Fat: 9
- Carbohydrates: 28
- Fiber: 4
- Protein: 28
Keywords: stuffed bell peppers, jack-o-lantern peppers, Halloween dinner, fall dinner, ground beef stuffed peppers, easy stuffed peppers, kid-friendly dinner


