Love this? Save it for later!
Share the inspiration with your friends
My neighbor’s kid, Leo, stared at the treat bag I handed him last Halloween and said, “This is the best one,” before even opening it. And honestly? That moment made the whole sticky, flour-covered afternoon worth it. I had spent hours testing these mini pumpkin pie cookies, trying to get them small enough for goody bags but sturdy enough to survive the chaos of a costume party. Watching a six-year-old judge them purely by their crinkly cellophane wrapper—that was my real test kitchen moment.
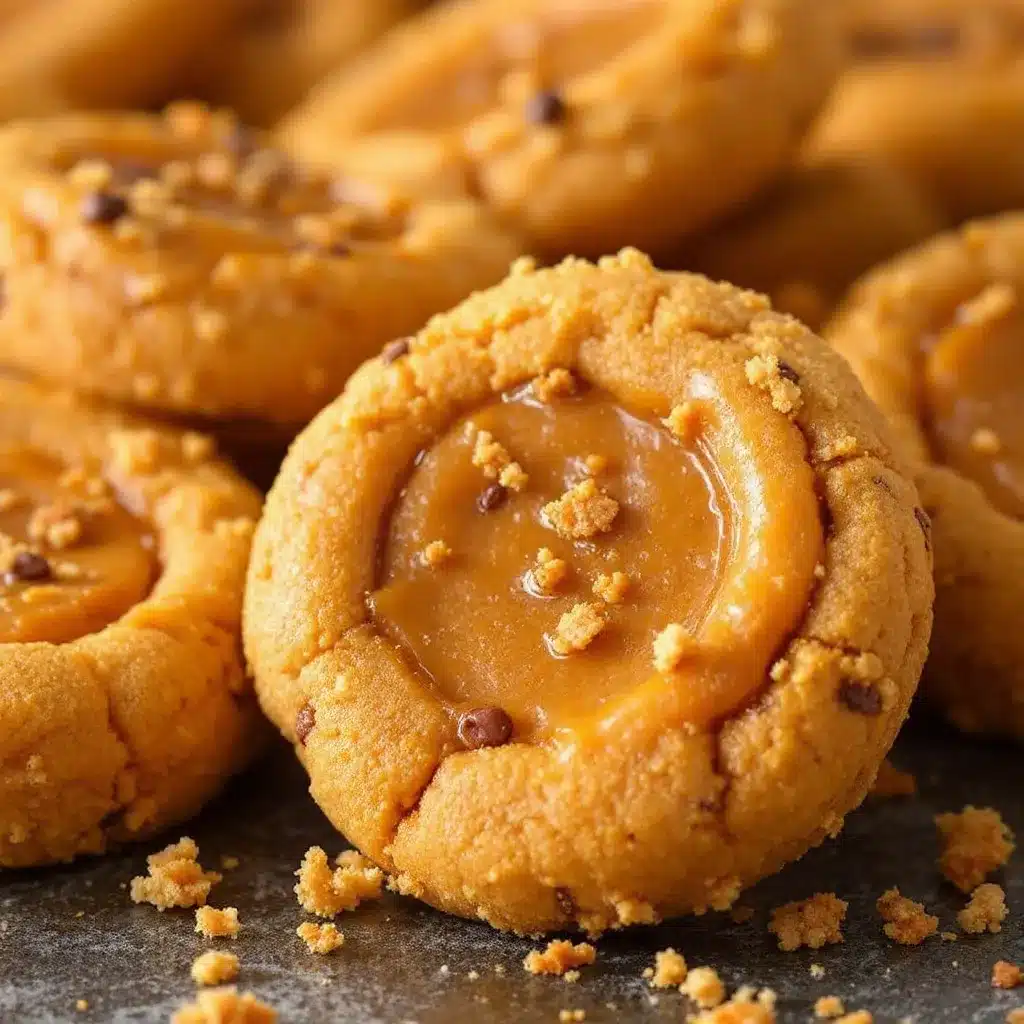
These aren’t your typical pumpkin cookies. They’re more like a two-bite pumpkin pie that met a shortbread crust and decided to become a cookie. The filling is creamy, spiced, and tastes like Thanksgiving, but the size screams “Halloween treat.” I wanted something that felt special but didn’t require a pastry degree. After burning my fingers on a few test batches (ouch) and learning the hard way that butter temperature actually matters, I landed on this version. It’s the one that made Leo’s eyes go wide.
So if you need a homemade Halloween treat that stands out from the candy pile, these mini pumpkin pie cookies are it. They’re cute, portable, and just sweet enough to satisfy without sending kids into a total sugar spiral. Let’s make some.
Why You’ll Love This Recipe
These mini pumpkin pie cookies check a lot of boxes, and honestly, I’m still surprised how well they work. They started as a happy accident—I was trying to make regular pumpkin cookies and ended up with something way better. Here’s why you’ll fall for them too:
- Quick & Easy: From start to finish, you’re looking at about 45 minutes. That includes chilling time. Perfect for last-minute Halloween prep or when you realize the school party is tomorrow morning.
- Simple Ingredients: No weird extracts or specialty flours here. You probably have most of this in your pantry right now. Canned pumpkin, butter, sugar, flour, and your spice rack—that’s the whole list.
- Perfect for Halloween Parties: These fit perfectly into treat bags, lunchboxes, or on a dessert table. They’re not messy, they don’t melt, and they actually look adorable sitting next to all those candy wrappers.
- Crowd-Pleaser: Kids love the cookie part, adults appreciate the pumpkin spice. It’s that rare treat that makes everyone happy without anyone feeling like they’re eating “healthy” pumpkin stuff.
- Unbelievably Delicious: The texture is what gets me. The crust stays buttery and slightly firm, while the filling stays soft and almost custard-like. It’s like a pumpkin pie thumbprint cookie had a baby with a shortbread.
What makes these different from other pumpkin cookies? It’s the method. Instead of mixing everything into one dough, you’re building layers. A shortbread base, a spiced pumpkin filling, and a tiny dollop on top. It sounds fancy but it’s actually simpler than most cookie recipes. And the result? That first bite makes you forget you’re eating a cookie—it tastes like a tiny pie.
This recipe is the kind that makes you close your eyes after the first bite. It’s comfort food reimagined for Halloween—faster, cuter, but with the same soul-soothing satisfaction. Perfect for impressing other parents at the school party without spending all night in the kitchen.
What Ingredients You Will Need
This recipe uses simple, wholesome ingredients to deliver that perfect pumpkin pie flavor without any fuss. Most of these are pantry staples, which is exactly what you want when you’re making treats for a crowd.
For the Shortbread Cookie Base
- Unsalted butter, softened to room temperature (1 cup / 226g) — I use Kerrygold for the flavor, but any good unsalted butter works. Let it sit out for about 30 minutes before you start.
- Granulated sugar (½ cup / 100g) — regular white sugar keeps the shortbread tender. Don’t substitute brown sugar here; it changes the texture too much.
- All-purpose flour (2 cups / 240g) — spoon and level it. Scooping directly with the measuring cup packs in too much flour and makes the cookies dry.
- Vanilla extract (1 teaspoon) — pure vanilla, not imitation. It makes a difference in the buttery flavor.
- Salt (¼ teaspoon) — just enough to balance the sweetness.
For the Pumpkin Pie Filling
- Canned pumpkin puree (¾ cup / 170g) — not pumpkin pie filling. Get the 100% pure pumpkin. Libby’s is my go-to because it’s consistently thick and not watery.
- Brown sugar, packed (¼ cup / 50g) — light or dark works. Dark gives a deeper molasses flavor that I personally love with the pumpkin.
- One large egg yolk — just the yolk. The white would make the filling too runny and it won’t set properly.
- Heavy cream (2 tablespoons / 30ml) — adds richness. You can substitute whole milk in a pinch, but the filling won’t be as creamy.
- Pumpkin pie spice (1½ teaspoons) — store-bought is fine, but I mix my own: 1 teaspoon cinnamon, ½ teaspoon ginger, ¼ teaspoon nutmeg, and a pinch of cloves. Tastes fresher.
- Vanilla extract (½ teaspoon) — rounds out the spices.
For the Topping
- Heavy cream (¼ cup / 60ml) — for brushing the tops before baking. This gives them that golden, slightly shiny finish.
- Turbinado sugar (2 tablespoons) — that coarse, sparkly sugar. It adds crunch and makes them look bakery-worthy. Regular sanding sugar works too.
- Optional: A pinch of flaky sea salt for sprinkling after baking. It sounds weird with pumpkin, but trust me, it works.
Ingredient Selection Tips
Look for canned pumpkin that’s thick and not watery. If your puree seems thin, drain it on a paper towel for 10 minutes before using. For the butter, make sure it’s truly softened—you should be able to press your finger into it and leave an indent, but it shouldn’t be greasy or melted. And please, please use fresh spices. Pumpkin pie spice that’s been sitting in your cabinet for three years won’t give you that warm, aromatic flavor.
Equipment Needed
You don’t need a fancy kitchen to make these cookies. Here’s what you’ll actually use:
- Baking sheets (2) — rimmed sheets work best. Line them with parchment paper for easy cleanup.
- Electric mixer — a stand mixer with the paddle attachment is ideal, but a hand mixer works perfectly fine. You just need to cream the butter and sugar until fluffy.
- Mixing bowls — one large for the dough, one medium for the filling.
- Measuring cups and spoons — dry measuring cups for flour and sugar, liquid measuring cup for the cream.
- Cookie scoop (1 tablespoon size) — this makes the cookies uniform. If you don’t have one, use a tablespoon measure and roll the dough into balls.
- Small offset spatula — for spreading the filling. A butter knife works too, but the offset spatula makes it easier without touching the hot baking sheet.
- Parchment paper — non-negotiable. It prevents sticking and helps the cookies bake evenly.
- Cooling rack — wire rack for letting the cookies cool completely before storing.
I’ve made these with just a hand mixer and a wooden spoon when my stand mixer was in the shop. It takes a little more elbow grease, but the cookies turn out just as good. Don’t let missing equipment stop you.
Preparation Method
Let’s get baking. I’ve broken this down so you can follow along without feeling rushed. Take your time with the dough—it’s forgiving.
- Preheat your oven to 350°F (175°C). Line two baking sheets with parchment paper. This step matters because you want the oven fully hot when the cookies go in.
- Make the shortbread dough. In a large bowl, beat the softened butter and granulated sugar together until light and fluffy—about 3 minutes with an electric mixer on medium speed. You’ll see the mixture turn pale and almost double in volume. Scrape down the sides once.
- Add the vanilla and salt. Beat for another 30 seconds until combined. The mixture should look creamy and smooth.
- Add the flour gradually. With the mixer on low, add the flour in two additions. Mix just until the dough comes together. It will look crumbly at first, then form a soft, cohesive dough. Don’t overmix—that develops gluten and makes the cookies tough.
- Shape the cookies. Using your tablespoon cookie scoop, portion the dough into 24 equal balls. Roll each between your palms until smooth. Place them on the prepared baking sheets, spacing about 2 inches apart. You should fit 12 per sheet.
- Create the wells. Using your thumb or the back of a ½ teaspoon measuring spoon, press an indent into the center of each dough ball. Make it deep enough to hold the filling but not so deep that you touch the baking sheet. The edges might crack slightly—that’s okay, it looks rustic.
- Chill the dough. Pop the baking sheets into the refrigerator for 15 minutes. This step is crucial. Chilling prevents the cookies from spreading too much and helps the wells hold their shape. I learned this the hard way after my first batch turned into flat pumpkin blobs.
- Make the filling while the dough chills. In a medium bowl, whisk together the pumpkin puree, brown sugar, egg yolk, heavy cream, pumpkin pie spice, and vanilla extract. Whisk until completely smooth. The mixture should be thick but spoonable—like a loose pudding.
- Fill the cookies. Remove the chilled dough from the fridge. Using a small spoon or a piping bag (I just use a zip-top bag with the corner snipped), fill each well with about ½ teaspoon of the pumpkin mixture. Don’t overfill—it will puff slightly during baking. Leave a tiny border around the edge.
- Brush and sprinkle. Lightly brush the exposed cookie edges with heavy cream. This helps them brown beautifully. Sprinkle turbinado sugar over the tops, including the filling. Don’t skip this—the sugar adds that signature crunch.
- Bake. Place one sheet on the middle rack and bake for 14-16 minutes, rotating halfway through. The cookies should be lightly golden around the edges and the filling should look set but still slightly jiggly in the center. They’ll firm up as they cool.
- Cool completely. Let the cookies cool on the baking sheet for 5 minutes, then transfer to a wire rack. Don’t try to move them sooner—they’re fragile when warm. Let them cool completely before adding to treat bags or storing.
Cooking Tips & Techniques
I’ve made these mini pumpkin pie cookies probably a dozen times now, and I’ve collected a few tricks that make a real difference.
Don’t skip the chill. I know it’s tempting to rush, but those 15 minutes in the fridge are what keep the cookies from turning into flat discs. If your kitchen is warm, chill them for 20 minutes instead. The dough should feel firm to the touch before baking.
Watch your butter temperature. Softened butter doesn’t mean melted butter. If you microwave it, do it in 5-second bursts and check frequently. Butter that’s too soft won’t cream properly, and your cookies will spread like crazy. If you accidentally melt it, put the bowl in the fridge for 10 minutes to firm it back up.
Make the wells deep enough. I used to make shallow indents, and the filling would spill over the edges during baking. Now I press down firmly with the back of a ½ teaspoon measure. The filling should sit inside the cookie, not on top of it.
Use a piping bag for the filling. A zip-top bag with a tiny corner cut off works perfectly. It keeps the filling contained and makes it easy to fill each well without making a mess. Plus, you can control exactly how much goes in each cookie.
Rotate your baking sheets. Halfway through baking, swap the top and bottom sheets and rotate them front to back. Ovens have hot spots, and this ensures even browning. I forgot to do this once and ended up with half a batch of pale cookies.
Let them cool completely. I know it’s hard to wait, but these cookies need to set. The filling is soft when it comes out of the oven, and moving them too soon can cause the wells to collapse. Give them a full 5 minutes on the sheet, then another 15 on the rack before you even think about eating one.
Variations & Adaptations
One of my favorite things about this recipe is how easy it is to change up. Here are some variations I’ve tried and loved:
Gluten-Free Version: Substitute the all-purpose flour with a 1:1 gluten-free baking flour blend. I’ve used Bob’s Red Mill and King Arthur Measure for Measure with great results. The texture is slightly more delicate, but the flavor is spot on. Just make sure your blend contains xanthan gum for structure.
Dairy-Free Adaptation: Use vegan butter (I like Miyoko’s) and substitute the heavy cream with full-fat coconut cream. The flavor changes slightly, but the cookies still hold together well. For the brushing step, use a little coconut oil instead of cream.
Spice It Up: Add a pinch of cayenne pepper or chipotle powder to the filling for a sweet-spicy kick. I did this for a Halloween party and the adults went crazy for them. The heat is subtle—just enough to make you wonder what’s different.
Chocolate Drizzle: Once the cookies are completely cool, drizzle melted dark chocolate over the tops. Let it set before bagging. The chocolate and pumpkin combination is surprisingly good, and it makes them look even more special for treat bags.
Mini Pie Version: If you want to go full pie mode, press the shortbread dough into a mini muffin tin instead of shaping it into cookies. Fill each cup with the pumpkin mixture and bake for the same time. You’ll get tiny pie tarts that look like they came from a bakery. Just grease the pan well first.
I personally love the chocolate drizzle version for Halloween. It adds a little extra something that makes these cookies feel like a real treat, not just another pumpkin recipe.
Serving & Storage Suggestions
These mini pumpkin pie cookies are incredibly versatile when it comes to serving. Here’s how I handle them:
Serving Temperature: They’re best at room temperature. The shortbread stays crisp and the filling softens to the perfect texture. If you’ve stored them in the fridge, let them sit out for about 20 minutes before serving. Cold cookies taste fine, but the texture is better at room temp.
Presentation Ideas: For Halloween treat bags, place 2-3 cookies in a clear cellophane bag and tie with orange or black ribbon. Add a small tag that says “Trick or Treat” for a personal touch. For a party platter, arrange them on a cake stand with a dusting of powdered sugar and some cinnamon sticks for decoration.
Complementary Dishes: These cookies pair beautifully with a hot cup of apple cider or a pumpkin spice latte. If you’re serving them at a fall gathering, try them alongside my pumpkin cream cheese swirl muffins for a full pumpkin spread. They also go great with a scoop of vanilla ice cream for a simple dessert.
Storage Instructions: Store the cookies in an airtight container at room temperature for up to 3 days. Layer them with parchment paper between each layer to prevent sticking. If you need to stack them, make sure they’re completely cool first, or the filling will smush.
Freezer Tips: These freeze beautifully. Place the cooled cookies in a single layer on a baking sheet and freeze for 1 hour. Then transfer to a freezer-safe container or zip-top bag. They’ll keep for up to 2 months. To thaw, let them sit at room temperature for about 30 minutes. Don’t microwave them—the shortbread gets soggy.
Flavor Development: Honestly, these cookies taste even better the next day. The flavors meld together overnight, and the shortbread softens just slightly, making the texture even more pie-like. If you can resist eating them all on day one, you’re in for a treat on day two.
Nutritional Information & Benefits
While these are definitely a treat, they’re not as indulgent as you might think. Each cookie (based on 24 servings) contains approximately:
- Calories: 145
- Total Fat: 9g
- Saturated Fat: 5g
- Carbohydrates: 16g
- Sugar: 8g
- Protein: 2g
- Fiber: 1g
Health Benefits: Pumpkin is packed with vitamin A, which supports eye health and immune function. It’s also a good source of fiber, which helps with digestion. The shortbread base provides a small amount of calcium from the butter. Plus, the spices—cinnamon, ginger, and nutmeg—have anti-inflammatory properties.
Dietary Considerations: This recipe is vegetarian and can be made gluten-free and dairy-free with the substitutions mentioned above. It contains eggs and dairy in the original version. The cookies are relatively low in sugar compared to many Halloween treats, which is a nice bonus when you’re filling treat bags.
I’m not a nutritionist, but I feel good about giving these to my family. They’re a homemade treat made with real ingredients, and that counts for a lot in my book.
Conclusion
These mini pumpkin pie cookies have become my go-to Halloween treat, and I think they’ll become yours too. They’re easy enough for a weeknight bake, but special enough to make you look like a rockstar at the school party. The combination of buttery shortbread and spiced pumpkin filling is just perfect—like a tiny Thanksgiving in every bite.
Don’t be afraid to make them your own. Add chocolate, change the spices, or double the batch for a big crowd. The recipe is forgiving and flexible, which is exactly what you want when you’re baking for a holiday. And honestly, watching someone’s face light up when they bite into one of these—that’s the best part.
I’d love to hear how yours turn out. Drop a comment below and let me know if you tried any variations, or tag me in your photos on social media. Happy Halloween, and happy baking!
Frequently Asked Questions
Can I use fresh pumpkin instead of canned?
Yes, but you’ll need to roast and puree it first, then drain it well. Fresh pumpkin has more water than canned, so spread the puree on a paper towel for about 15 minutes to remove excess moisture. Otherwise, your filling will be too runny.
Why did my cookies spread too much?
This usually happens when the dough isn’t chilled enough or the butter was too soft. Make sure you chill the shaped cookies for the full 15 minutes. If your kitchen is warm, chill for 20 minutes. Also, check that your butter was softened, not melted.
Can I make the dough ahead of time?
Absolutely. You can make the shortbread dough up to 3 days in advance. Wrap it tightly in plastic wrap and keep it in the fridge. When you’re ready to bake, let it sit at room temperature for about 10 minutes to soften slightly before shaping.
How do I keep the filling from bubbling over?
Don’t overfill the wells. Use about ½ teaspoon of filling per cookie, and leave a small border around the edge. The filling will puff slightly during baking, but it shouldn’t overflow if you keep the portions small. Also, make sure your wells are deep enough.
Can I double this recipe?
Yes, and I often do for parties. The recipe doubles easily. Just make sure you have enough baking sheets and space in your fridge for chilling. You might need to bake in batches, but the dough and filling hold up well at room temperature for about an hour.
Pin This Recipe!
Easy Mini Pumpkin Pie Cookies for Halloween Treat Bags
These two-bite pumpkin pie cookies feature a buttery shortbread crust and a creamy, spiced pumpkin filling. Perfect for Halloween treat bags, they’re cute, portable, and just sweet enough to satisfy without a sugar overload.
- Prep Time: 15 minutes
- Cook Time: 16 minutes
- Total Time: 45 minutes
- Yield: 24 cookies 1x
- Category: Dessert
- Cuisine: American
Ingredients
- 1 cup (226g) unsalted butter, softened
- ½ cup (100g) granulated sugar
- 2 cups (240g) all-purpose flour
- 1 teaspoon vanilla extract
- ¼ teaspoon salt
- ¾ cup (170g) canned pumpkin puree
- ¼ cup (50g) packed brown sugar
- 1 large egg yolk
- 2 tablespoons (30ml) heavy cream
- 1½ teaspoons pumpkin pie spice
- ½ teaspoon vanilla extract
- ¼ cup (60ml) heavy cream (for brushing)
- 2 tablespoons turbinado sugar
- Optional: flaky sea salt for sprinkling
Instructions
- Preheat oven to 350°F (175°C). Line two baking sheets with parchment paper.
- In a large bowl, beat softened butter and granulated sugar together until light and fluffy, about 3 minutes.
- Add vanilla extract and salt; beat for 30 seconds until combined.
- Gradually add flour on low speed, mixing just until a soft dough forms. Do not overmix.
- Using a tablespoon cookie scoop, portion dough into 24 equal balls. Roll smooth and place 2 inches apart on prepared sheets (12 per sheet).
- Press an indent into the center of each ball using your thumb or the back of a ½ teaspoon measure, making a deep well without touching the baking sheet.
- Refrigerate the baking sheets for 15 minutes to chill the dough.
- Meanwhile, in a medium bowl, whisk together pumpkin puree, brown sugar, egg yolk, 2 tablespoons heavy cream, pumpkin pie spice, and ½ teaspoon vanilla until smooth.
- Remove chilled dough from fridge. Fill each well with about ½ teaspoon of pumpkin mixture, leaving a small border.
- Lightly brush exposed cookie edges with remaining ¼ cup heavy cream. Sprinkle turbinado sugar over tops.
- Bake one sheet at a time on the middle rack for 14-16 minutes, rotating halfway through, until edges are lightly golden and filling is set but slightly jiggly.
- Cool on baking sheet for 5 minutes, then transfer to a wire rack to cool completely.
Notes
Chilling the dough is crucial to prevent spreading. Use a piping bag or zip-top bag with a snipped corner for easy filling. Let cookies cool completely before storing or bagging. For best texture, serve at room temperature.
Nutrition
- Serving Size: 1 cookie
- Calories: 145
- Sugar: 8
- Sodium: 45
- Fat: 9
- Saturated Fat: 5
- Carbohydrates: 16
- Fiber: 1
- Protein: 2
Keywords: mini pumpkin pie cookies, Halloween cookies, pumpkin cookies, shortbread cookies, treat bag cookies, fall baking


