Love this? Save it for later!
Share the inspiration with your friends
The top of a well-made pumpkin dump cake should look like a golden-brown, crinkled patchwork quilt — some parts dark and caramelized where the butter soaked through, other parts pale and sandy where the cake mix stayed dry. That uneven, almost rustic surface is what I’m after every single time I make this Easy Pumpkin Dump Cake with Yellow Cake Mix. Because honestly, that visual tells you everything you need to know before you even take a bite. It says, “I’m not fussy, but I am ridiculously good.”
I first made this dessert on a Wednesday night in October, not for a holiday gathering or a dinner party, but because I had a can of pumpkin puree staring at me from the pantry and a box of yellow cake mix that was about to expire. I had zero energy for layering, creaming, or frosting anything. So I dumped, I poured, and I crossed my fingers. What came out of the oven was so absurdly good — that soft, almost pudding-like pumpkin layer beneath a buttery, crunchy crust — that I actually stood at the counter eating it straight from the pan with a fork. No shame.
That’s the thing about this recipe. It’s not trying to be fancy. It’s a 4-ingredient miracle that tastes like you spent hours on it. The pumpkin layer stays silky and spiced, while the cake mix on top transforms into something between a crisp and a crumble. The butter melts down through the dry mix and creates these little pockets of chewy, caramelized goodness. It’s the kind of dessert that makes people ask for the recipe, and when you tell them how easy it is, they don’t believe you. But they will after they make it. You don’t need a mixer. You don’t need a piping bag. You just need a 9×13 pan and a little bit of trust in the process.
Why You’ll Love This Recipe
I’ve tested this Easy Pumpkin Dump Cake with Yellow Cake Mix more times than I can count, tweaking the butter distribution and the spice blend until it was just right. Here’s why I keep coming back to it, and why I think you will too.
- Only 4 Ingredients: Pumpkin puree, evaporated milk, yellow cake mix, and butter. That’s it. No eggs needed for the filling, no heavy cream, no complicated list.
- No Mixing Bowls Required: You literally dump everything into the baking dish. The filling gets whisked right in the pan, and the cake mix gets sprinkled on top. Less dishes, more time for eating.
- Perfect for Fall Gatherings: This is the dessert you bring to Friendsgiving, potlucks, or Thanksgiving dinner when you want something impressive but low-stress. It serves a crowd and disappears fast.
- Foolproof Texture: The filling sets into a custard-like layer that’s soft but sliceable, while the top stays crunchy and buttery. Every bite has contrast.
- Customizable in Seconds: You can add nuts, chocolate chips, or a drizzle of caramel before baking. The base recipe is a blank canvas for your fall cravings.
What makes this recipe different from other pumpkin desserts is the texture contrast. A lot of pumpkin cakes can be dense or wet, but this one has a distinct separation between the creamy pumpkin layer and the crunchy, crumbly topping. It’s not a cake in the traditional sense — it’s more like a hybrid between a pudding cake and a crisp. And that’s what makes it so addictive. I’ve made versions with a sprinkle of cinnamon sugar on top, and I’ve swapped in white cake mix for a lighter flavor, but the yellow cake mix version remains my favorite. It has that classic, slightly buttery vanilla taste that pairs perfectly with pumpkin spice.
What Ingredients You Will Need
This Easy Pumpkin Dump Cake with Yellow Cake Mix relies on simple, pantry-friendly ingredients to deliver that signature layered texture. Each component plays a specific role, and there’s very little room for error — which is exactly why it works so well. Here’s what you need and why it matters.
- 1 can (15 oz) pumpkin puree: Not pumpkin pie filling. Make sure you grab 100% pure pumpkin puree. The pie filling has sugar and spices already added, which will throw off the sweetness and texture. I prefer Libby’s for consistent thickness, but store brands work fine too. If your puree looks watery, blot it with a paper towel before using.
- 1 can (12 oz) evaporated milk: This is not the same as sweetened condensed milk. Evaporated milk adds richness and helps the pumpkin layer set into a silky custard without being too heavy. If you’re in a pinch, you can use half-and-half, but the texture will be slightly less firm.
- 1 box (15.25 oz) yellow cake mix: The star of the show. Use a standard size box — not the larger “family size” or the smaller 13-ounce boxes. I’ve used Betty Crocker and Duncan Hines, and both work beautifully. The dry mix gets sprinkled over the pumpkin layer and absorbs the butter as it bakes, creating that signature crunchy top. Do not prepare the mix according to the box directions. You want it dry.
- 1 cup (2 sticks) unsalted butter, melted: Salted butter works too, just reduce any added salt in the recipe. The butter is what transforms the dry cake mix into a golden, crispy crust. Pour it evenly over the top — don’t stir it in. Let the butter do its magic as it bakes.
- Optional add-ins: 1 teaspoon pumpkin pie spice (add to the pumpkin mixture for extra warmth), 1/2 cup chopped pecans or walnuts (sprinkle over the cake mix before adding butter), or 1/2 cup chocolate chips (because chocolate and pumpkin are a great combo).
Equipment Needed
You don’t need a fancy kitchen to make this Easy Pumpkin Dump Cake with Yellow Cake Mix. In fact, the equipment list is almost as short as the ingredient list. Here’s what you’ll need.
- 9×13-inch baking dish: Glass or ceramic works best because it distributes heat evenly and lets you see the bottom layer as it bakes. Metal pans work too, but keep an eye on the edges — they can brown faster.
- Whisk or fork: For mixing the pumpkin and evaporated milk right in the pan. A fork works in a pinch, but a whisk makes it smoother.
- Measuring cups and spoons: For the melted butter and any optional spices or add-ins.
- Small saucepan or microwave-safe bowl: To melt the butter. I usually use the microwave — 45 seconds on high, then stir until fully melted.
- Cooling rack: Essential for letting the cake cool evenly before serving. If you let it cool in the pan on the counter, the bottom can get soggy from trapped steam.
I’ve made this in a disposable aluminum pan for potlucks, and it works fine. Just keep an eye on the baking time, as aluminum conducts heat differently. And if you don’t have a whisk, a fork will do the job — just make sure there are no lumps of pumpkin in the filling.
Preparation Method
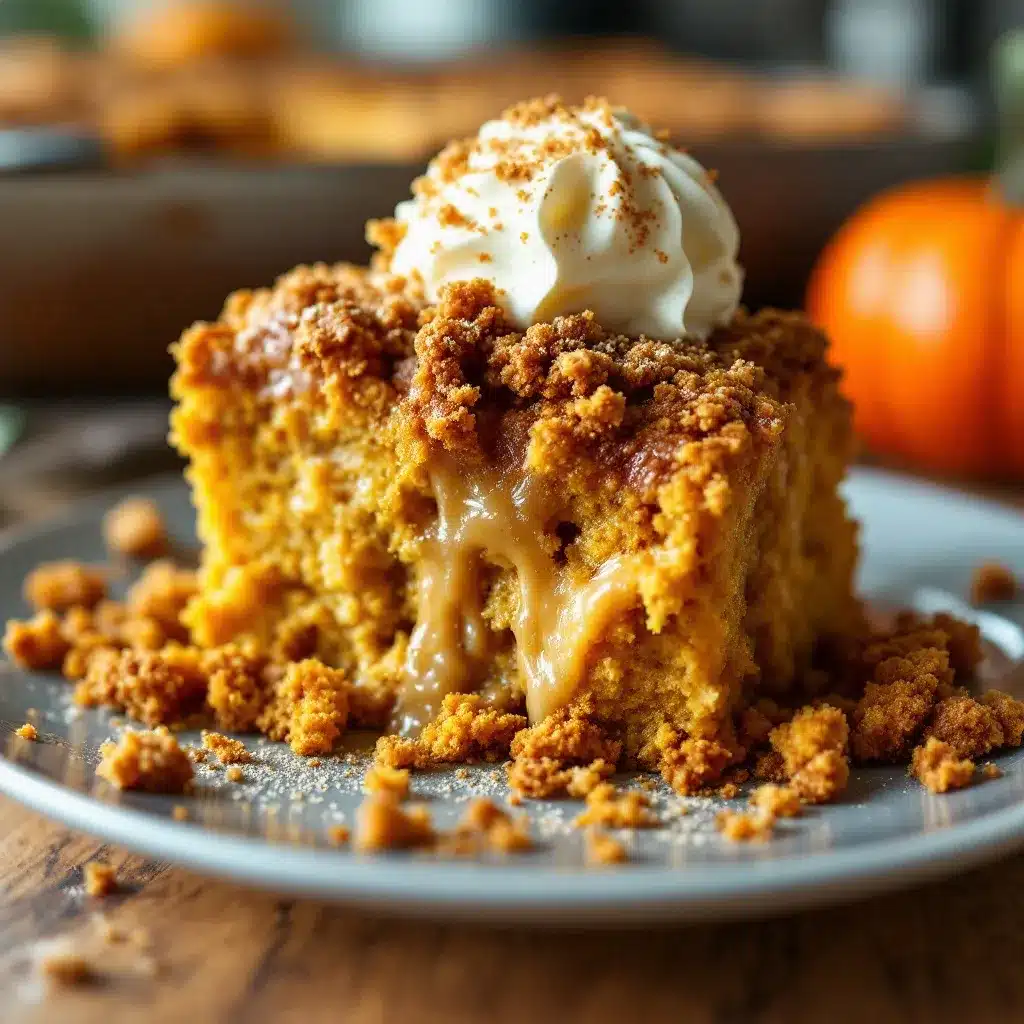
This is the easiest dessert you will make all fall. The method is almost laughably simple, but the results are anything but. Follow these steps for a perfect Easy Pumpkin Dump Cake with Yellow Cake Mix every time.
- Preheat your oven to 350°F (175°C). Position the rack in the center of the oven. While it heats, spray your 9×13-inch baking dish with nonstick cooking spray or grease it lightly with butter. This step is crucial — the pumpkin layer can stick to the bottom if the pan isn’t well-greased.
- Make the pumpkin layer. Dump the entire can of pumpkin puree into the prepared baking dish. Add the full can of evaporated milk. If you’re using pumpkin pie spice, add 1 teaspoon now. Whisk everything together right in the pan until smooth and fully combined. The mixture should be a uniform orange color with no streaks of milk. Spread it evenly across the bottom of the dish.
- Sprinkle the dry cake mix. Open the box of yellow cake mix and sprinkle the dry powder evenly over the pumpkin mixture. Do not stir. Do not mix. Just let it sit on top like a blanket. Make sure you cover the entire surface, including the corners. If you have any clumps, break them up with your fingers.
- Add the melted butter. Drizzle the melted butter evenly over the top of the cake mix. Try to cover as much of the dry mix as possible, but don’t worry if there are a few dry spots — the butter will spread as it bakes. Do not stir the butter into the cake mix. The whole point is that the butter absorbs into the dry mix and creates that crunchy crust.
- Add optional toppings. If you’re using chopped pecans, walnuts, or chocolate chips, sprinkle them over the top now. Press them gently into the buttered cake mix so they stick.
- Bake for 40-45 minutes. The cake is done when the top is golden brown and the edges are bubbly. The center should look set, not jiggly. If you insert a toothpick into the topping, it should come out with a few moist crumbs, not wet batter. The pumpkin layer underneath will still be soft — that’s normal.
- Cool completely before serving. Place the dish on a cooling rack and let it cool for at least 30 minutes. The filling will continue to set as it cools. If you cut into it too soon, it will be runny. I know it’s hard to wait, but trust me on this. For best results, let it cool for 2 hours.
- Serve warm or at room temperature. Scoop into bowls and top with whipped cream or a scoop of vanilla ice cream. The contrast between the warm, spiced pumpkin and the cold, creamy topping is pure magic.
Cooking Tips & Techniques
I’ve made this Easy Pumpkin Dump Cake with Yellow Cake Mix at least a dozen times, and I’ve learned a few things the hard way. Here are my best tips for getting it right every time.
Don’t overmix the pumpkin layer. Whisk just until smooth. Overmixing can incorporate too much air, which can cause the filling to puff up and then collapse as it cools. You want it dense and silky, not foamy.
Use cold butter for a crunchier top. If you want an extra-crispy crust, try using cold, thinly sliced butter instead of melted butter. Arrange the slices over the cake mix in an even layer. The butter will melt as it bakes, but the slower melting process creates more distinct, crunchy bits on top. I’ve done this both ways, and the cold butter method gives a more textured, almost toffee-like crust.
Watch the edges. The edges of the cake tend to brown faster than the center. If you notice the edges getting too dark around the 35-minute mark, tent the dish loosely with aluminum foil for the remaining baking time. This keeps the center cooking without burning the edges.
Let it rest. I cannot stress this enough — let the cake cool completely before cutting. The first time I made this, I cut into it after 15 minutes and ended up with a soupy mess. The filling needs time to set. If you’re in a hurry, you can pop it in the fridge for 20 minutes after it cools on the counter.
Double the recipe for a crowd. This recipe fits perfectly in a 9×13 pan, but if you’re feeding a large group, you can double it and bake it in a half-sheet pan (about 12×17 inches). Increase the baking time by 5-10 minutes, and check for doneness with a toothpick.
Variations & Adaptations
One of the best things about this Easy Pumpkin Dump Cake with Yellow Cake Mix is how easily it adapts to different tastes and dietary needs. Here are some variations I’ve tried and loved.
Gluten-free version: Use a gluten-free yellow cake mix. I’ve tested this with King Arthur’s gluten-free yellow cake mix, and it works perfectly. The texture is slightly crumblier, but the flavor is spot-on. Just make sure your pumpkin puree and evaporated milk are also gluten-free (they usually are).
Vegan adaptation: Replace the evaporated milk with full-fat coconut milk (from a can, not the carton) and use a vegan butter stick. For the cake mix, check the label — some yellow cake mixes contain milk powder. I’ve used Duncan Hines vegan-friendly yellow cake mix with great results. The coconut milk adds a subtle tropical flavor that pairs surprisingly well with pumpkin.
Spiced-up version: Add 1/2 teaspoon ground ginger, 1/4 teaspoon ground cloves, and a pinch of black pepper to the pumpkin mixture. The pepper adds a subtle warmth without making it spicy. It’s a trick I learned from a friend who makes pumpkin pies for a living.
Chocolate pumpkin dump cake: Swap the yellow cake mix for a chocolate cake mix. The chocolate and pumpkin combination is surprisingly good — think chocolate pumpkin bread, but easier. Add 1/2 cup chocolate chips on top for extra decadence.
Nutty crunch: Sprinkle 1/2 cup chopped pecans or walnuts over the cake mix before adding the butter. The nuts toast as the cake bakes, adding a crunchy, savory element that balances the sweetness. I prefer pecans because they have a buttery flavor that matches the cake mix.
Serving & Storage Suggestions
This Easy Pumpkin Dump Cake with Yellow Cake Mix is best served warm, but it’s also delicious at room temperature. The texture changes slightly as it cools — the top becomes less crunchy and more chewy, which some people actually prefer. Here’s how to serve and store it.
Serving temperature: I like to serve it warm with a generous scoop of vanilla ice cream or a dollop of whipped cream. The cold creaminess against the warm, spiced pumpkin is the kind of contrast that makes you close your eyes. If you’re serving it at a party, let it cool completely and serve at room temperature with a dusting of powdered sugar on top.
Complementary dishes: This cake pairs beautifully with a hot cup of coffee or spiced apple cider. For a full fall spread, serve it alongside a batch of moist pumpkin cream cheese swirl muffins with crunchy pecan topping for a brunch that will have everyone asking for your secrets. Or, if you’re feeling extra cozy, pair it with a bowl of cozy roasted tomato basil soup with easy gruyère grilled cheese croutons for a sweet-savory fall meal.
Storage instructions: Cover the baking dish tightly with plastic wrap or aluminum foil and store in the refrigerator for up to 5 days. The cake will soften slightly as it sits, but the flavor actually improves after a day or two — the spices meld together and become more pronounced.
Freezing: This cake freezes beautifully. Let it cool completely, then wrap the entire dish (or individual portions) in plastic wrap, followed by a layer of aluminum foil. Freeze for up to 3 months. To thaw, place it in the refrigerator overnight, then reheat in a 350°F oven for 10-15 minutes until warmed through. The top will regain some of its crunch.
Reheating: The best way to reheat individual servings is in the microwave for 20-30 seconds. For a larger portion, reheat in a 350°F oven for 10 minutes. If the top has softened, you can pop it under the broiler for 1-2 minutes to crisp it up again — just watch it carefully so it doesn’t burn.
Nutritional Information & Benefits
While this Easy Pumpkin Dump Cake with Yellow Cake Mix is definitely a treat, it does have some redeeming qualities. Here’s the estimated nutritional breakdown per serving (based on 12 servings).
| Nutrient | Amount per Serving |
|---|---|
| Calories | 320 |
| Total Fat | 18g |
| Saturated Fat | 11g |
| Cholesterol | 45mg |
| Sodium | 380mg |
| Total Carbohydrates | 38g |
| Dietary Fiber | 2g |
| Sugars | 22g |
| Protein | 4g |
| Vitamin A | 120% DV |
Pumpkin is a nutritional powerhouse — it’s packed with vitamin A (in the form of beta-carotene), which supports eye health and immune function. It’s also a good source of fiber, which helps with digestion and keeps you feeling full. The evaporated milk adds calcium and protein, while the butter and cake mix are mostly for indulgence. If you’re looking for a lighter version, you can use a sugar-free cake mix and reduced-fat butter, but honestly, this is one of those desserts where I say go for the real thing. It’s a once-in-a-while treat, and it should taste like it.
For those with dietary restrictions, this recipe contains gluten (from the cake mix), dairy (from the butter and evaporated milk), and eggs (if your cake mix contains them). Always check labels if you’re serving someone with allergies.
Conclusion
This Easy Pumpkin Dump Cake with Yellow Cake Mix is the kind of recipe that makes you look like a hero with almost zero effort. It’s the dessert you bring to Thanksgiving when you’re already stressed about the turkey, the one you make on a random Tuesday because you need something warm and spiced and comforting. It’s forgiving, it’s flexible, and it’s genuinely delicious — not “good for how easy it is,” but just good, period.
I love this recipe because it reminds me that cooking doesn’t have to be complicated to be memorable. Some of the best things come from a can of pumpkin, a box of cake mix, and a little bit of faith in the process. The first time I made it, I ate half the pan over two days, and I didn’t feel bad about it at all. That’s the kind of relationship I want you to have with this cake.
So go ahead — preheat that oven, grab your 9×13 pan, and make this dump cake. Then come back and tell me how it went. Did you add nuts? Chocolate chips? Did you eat it straight from the pan like I did? Drop a comment below, and don’t forget to share this recipe with someone who needs a little fall comfort in their life. Happy baking!
Frequently Asked Questions
Can I use pumpkin pie filling instead of pumpkin puree?
No, I don’t recommend it. Pumpkin pie filling has sugar and spices already added, which will make your dump cake overly sweet and throw off the texture. Stick with 100% pure pumpkin puree for the best results. If you want extra spice, add your own pumpkin pie spice to the puree — that way you control the amount.
Do I need to refrigerate pumpkin dump cake?
Yes, because it contains dairy (evaporated milk and butter), it should be stored in the refrigerator. Cover it tightly and it will keep for up to 5 days. You can serve it cold, at room temperature, or reheated — all three are delicious in different ways.
Can I make this pumpkin dump cake ahead of time?
Absolutely. You can bake it a day or two in advance and store it in the fridge. The flavors actually meld together and become richer after a day. Just reheat it in a 350°F oven for 10-15 minutes before serving, and the top will crisp up again. You can also freeze it for up to 3 months.
Why is my pumpkin dump cake runny in the middle?
This usually happens for one of two reasons: either you didn’t bake it long enough, or you cut into it too soon. The filling needs time to set as it cools. Make sure you bake it until the center is set (not jiggly) and let it cool for at least 30 minutes before serving. If it’s still runny after cooling, it might need a few more minutes in the oven next time.
Can I use a different cake mix flavor?
Yes! Yellow cake mix is my favorite because it has a buttery, vanilla flavor that pairs perfectly with pumpkin, but you can also use white cake mix, spice cake mix, or even chocolate cake mix. Spice cake mix adds extra warmth from cinnamon and nutmeg, while chocolate cake mix creates a rich, almost brownie-like topping. Just keep the baking time the same and check for doneness with a toothpick.
Pin This Recipe!
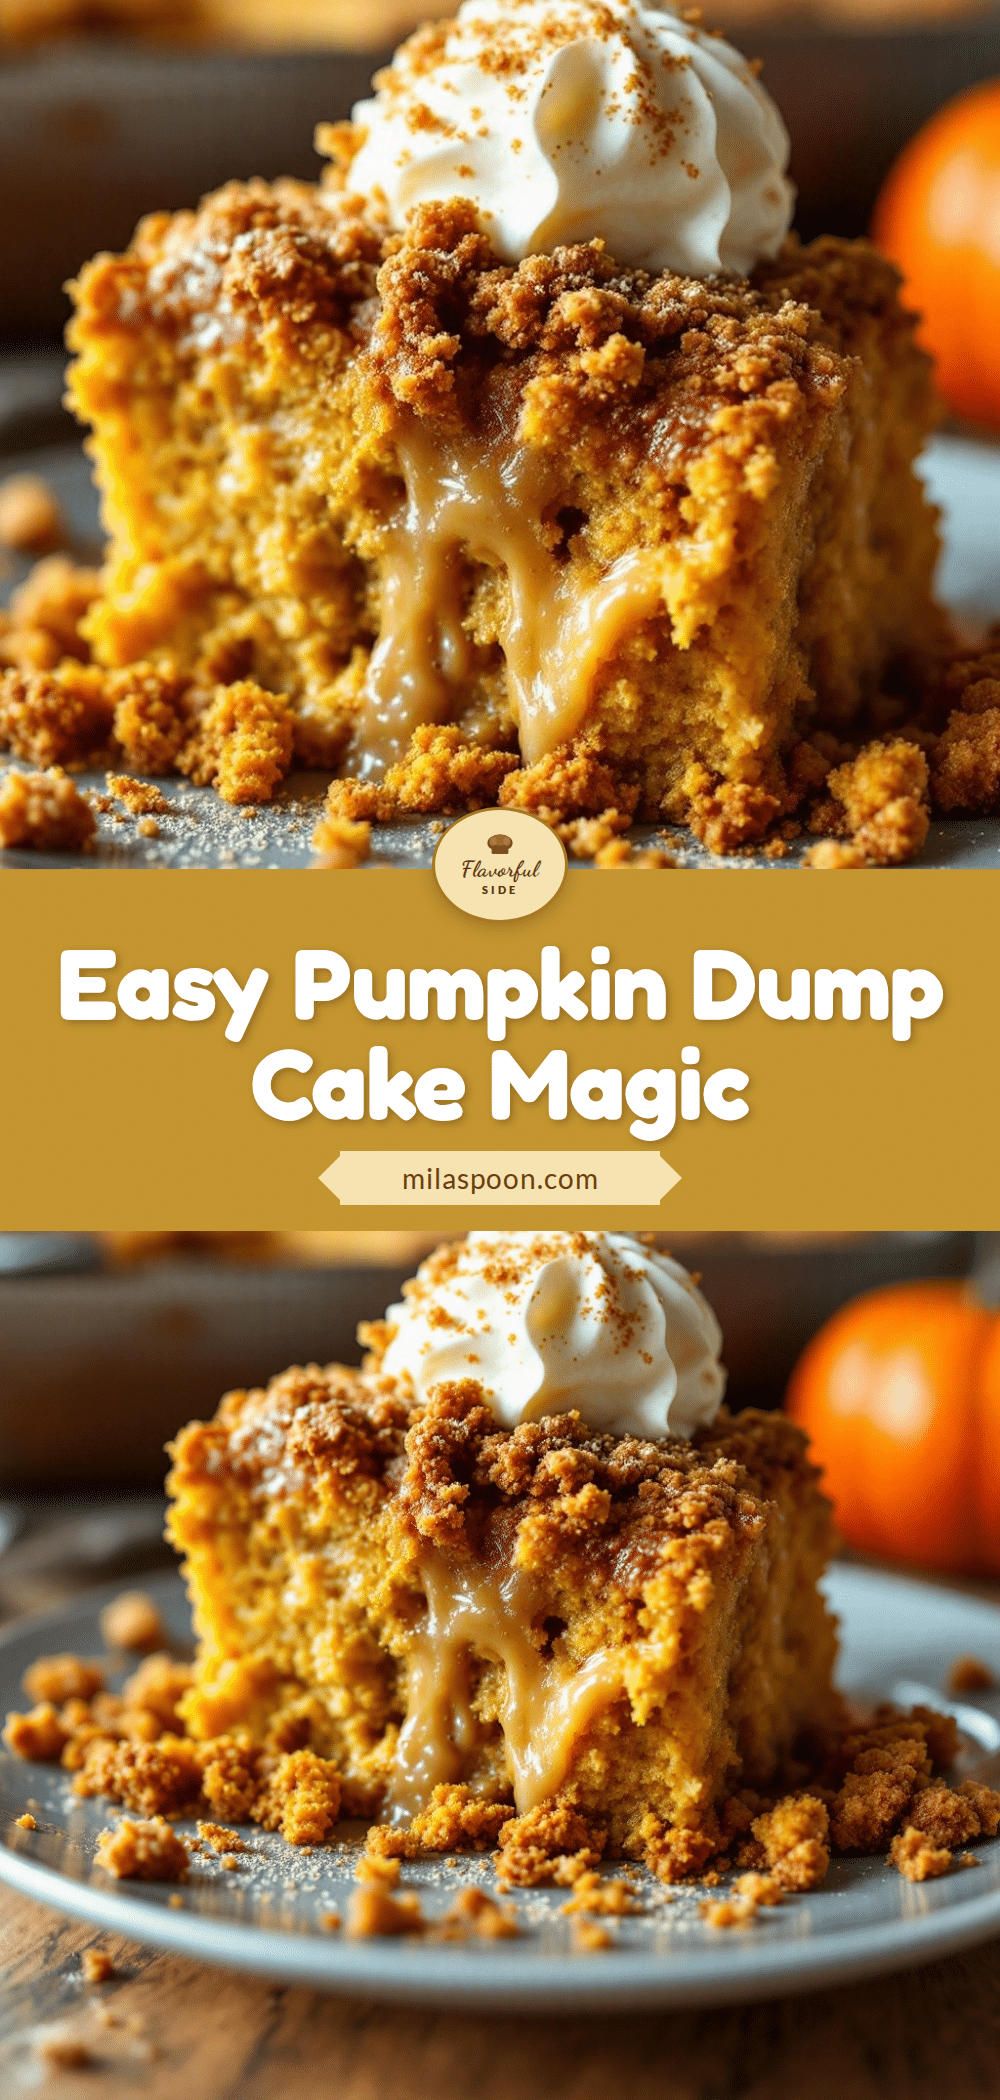
Easy Pumpkin Dump Cake with Yellow Cake Mix (4 Ingredients)
A 4-ingredient miracle that tastes like you spent hours on it. The pumpkin layer stays silky and spiced, while the cake mix on top transforms into something between a crisp and a crumble.
- Prep Time: 10 minutes
- Cook Time: 45 minutes
- Total Time: 55 minutes
- Yield: 12 servings 1x
- Category: Dessert
- Cuisine: American
Ingredients
- 1 can (15 oz) pumpkin puree
- 1 can (12 oz) evaporated milk
- 1 box (15.25 oz) yellow cake mix
- 1 cup (2 sticks) unsalted butter, melted
- 1 teaspoon pumpkin pie spice (optional)
- 1/2 cup chopped pecans or walnuts (optional)
- 1/2 cup chocolate chips (optional)
Instructions
- Preheat your oven to 350°F (175°C). Position the rack in the center of the oven. Spray a 9×13-inch baking dish with nonstick cooking spray or grease it lightly with butter.
- Dump the entire can of pumpkin puree into the prepared baking dish. Add the full can of evaporated milk. If using pumpkin pie spice, add 1 teaspoon now. Whisk everything together right in the pan until smooth and fully combined. Spread evenly across the bottom.
- Open the box of yellow cake mix and sprinkle the dry powder evenly over the pumpkin mixture. Do not stir. Cover the entire surface, including the corners. Break up any clumps with your fingers.
- Drizzle the melted butter evenly over the top of the cake mix. Try to cover as much of the dry mix as possible. Do not stir.
- If using optional toppings (pecans, walnuts, or chocolate chips), sprinkle them over the top now. Press them gently into the buttered cake mix.
- Bake for 40-45 minutes, until the top is golden brown and the edges are bubbly. The center should look set, not jiggly. A toothpick inserted into the topping should come out with a few moist crumbs.
- Cool completely on a cooling rack for at least 30 minutes (2 hours for best results) before serving. The filling will continue to set as it cools.
- Serve warm or at room temperature. Top with whipped cream or vanilla ice cream if desired.
Notes
Do not use pumpkin pie filling; use 100% pure pumpkin puree. Do not prepare the cake mix according to box directions; use it dry. Let the cake cool completely before cutting to allow the filling to set. For a crunchier top, use cold, thinly sliced butter instead of melted butter. Store covered in the refrigerator for up to 5 days. Freezes well for up to 3 months.
Nutrition
- Serving Size: 1 serving
- Calories: 320
- Sugar: 22
- Sodium: 380
- Fat: 18
- Saturated Fat: 11
- Carbohydrates: 38
- Fiber: 2
- Protein: 4
Keywords: pumpkin dump cake, easy pumpkin dessert, 4 ingredient dessert, fall dessert, pumpkin cake with cake mix