Love this? Save it for later!
Share the inspiration with your friends
Standing at the kitchen counter at 6:47 AM, staring into the open fridge with one hand on a half-empty block of cream cheese and the other holding a turkey package that expired tomorrow. The lunchboxes sat empty on the counter, and I could hear my youngest already asking what was for lunch. Again. That’s when the idea hit me—not some elaborate bento box situation, but these little spirals of turkey and cheese that somehow turned into the most requested lunchbox item in our house.
Honestly, I wasn’t trying to be creative. I was trying to survive the morning rush without ordering pizza for the third time that week. But these turkey and cheese pinwheel roll-ups changed everything. They’re the kind of thing you throw together while your coffee brews, and suddenly you’re the parent who actually packed a lunch that comes home empty.
What started as a desperate morning hack became our go-to lunchbox staple. No fuss, no fancy ingredients, just creamy filling wrapped around deli meat and cheese, sliced into perfect little spirals that kids actually eat. And let me tell you, when you find something that works for both a picky kindergartner and a hangry teenager, you hold onto it.
These easy turkey cheese pinwheel lunchbox ideas have saved us more mornings than I can count. They’re the lunch that makes you look like you have your life together—even when you definitely don’t.
Why You’ll Love This Recipe
I’ve tested these pinwheels about fifteen different ways (my family has been very patient), and this version wins every single time. Here’s why these are about to become your new favorite lunchbox hero:
- Ready in 10 Minutes : No seriously, from fridge to lunchbox in under ten minutes. That’s less time than it takes to convince a kid to put on matching socks.
- Simple Ingredients : You probably have everything right now. Tortillas, cream cheese, deli turkey, and cheese slices. That’s it. No fancy grocery store runs required.
- Perfect for Lunchboxes : These hold up beautifully in a lunchbox. No sogginess, no falling apart, just perfect little spirals that stay intact until lunchtime.
- Kid-Approved : My kids fight over the last ones. And I’ve packed these for playdates, school field trips, and even grown-up lunch meetings—they disappear everywhere.
- Endlessly Customizable : Swap the turkey for ham, add spinach, change up the cheese—this recipe bends to whatever you have on hand.
What makes these different from other pinwheel recipes? The cream cheese-to-turkey ratio. Most recipes skimp on the spread, leaving you with dry, sad spirals. I figured out the perfect amount so every bite stays creamy and delicious. Plus, the resting time in the fridge makes all the difference—it’s the secret step that keeps them from unrolling in your kid’s lunchbox.
These aren’t just good for lunchbox food. They’re good food, period. The kind that makes you feel like you’ve got this whole parenting thing figured out, even just for one meal.
What Ingredients You Will Need
This recipe uses simple, everyday ingredients to create something that tastes way more put-together than it actually is. Here’s what you’ll need to grab:
For the Pinwheel Filling
- 8 ounces cream cheese, softened to room temperature (this is crucial—cold cream cheese tears your tortillas)
- 1 tablespoon mayonnaise (adds creaminess and keeps the filling from being too stiff)
- 1/2 teaspoon garlic powder
- 1/4 teaspoon onion powder
- 1/4 teaspoon black pepper
- Pinch of salt
For Assembly
- 4 large flour tortillas (burrito-sized, about 10 inches—the bigger the better for rolling)
- 8 slices deli turkey (I prefer oven-roasted, but any kind works)
- 4 slices provolone cheese (or cheddar, mozzarella, Swiss—whatever you have)
- 1/2 cup fresh spinach leaves, optional but highly recommended (adds color and crunch)
Let me talk about the cream cheese for a second. I’ve tried this with Neufchâtel (the lower-fat version), and honestly, it works fine but the texture is slightly less creamy. Full-fat Philadelphia cream cheese gives you that perfect spreadable consistency that holds everything together. If you’re dairy-free, Kite Hill makes a decent plant-based cream cheese that works in a pinch—just make sure it’s softened properly.
For the tortillas, go with flour over corn every time. Corn tortillas crack and break when you try to roll them tight. I use Mission brand burrito-sized tortillas because they’re flexible without being too thick. If you’re gluten-free, there are some good cassava flour tortillas that roll surprisingly well—just warm them slightly first to prevent cracking.
The turkey matters less than you think. I’ve used everything from fancy honey-roasted deli turkey to the store-brand packaged stuff, and they all work. What matters is that the slices aren’t too thick. Thin-sliced turkey rolls up much more neatly than thick-cut.
Equipment Needed
You don’t need anything fancy here. Here’s what you’ll want to have on hand:
- Cutting board (any size works, but bigger is better for rolling)
- Sharp knife (a serrated bread knife actually works best for clean slices through the tortillas)
- Small mixing bowl for combining the cream cheese mixture
- Spatula or butter knife for spreading
- Plastic wrap for wrapping the rolls before chilling
- Lunchbox containers for packing (I love the ones with separate compartments)
If you don’t have plastic wrap, you can use beeswax wraps or just put the rolled tortillas seam-side down on a plate. The key is keeping them tight while they chill. I’ve also used a tortilla press to flatten my tortillas slightly before filling—it gives you a more even roll. But honestly, that’s totally optional and I only do it when I’m feeling extra.
One thing I learned the hard way: use a serrated knife for cutting. A straight blade squishes the pinwheels flat. A gentle sawing motion gives you clean, pretty spirals every time.
Preparation Method
Let me walk you through this step by step. Once you make these once, you’ll have it memorized—they’re that simple.
- Soften the cream cheese. Take your cream cheese out of the fridge about 30 minutes before you start. If you forgot (I forget constantly), microwave it in 10-second bursts until it’s soft but not melted. You want it spreadable, not runny.
- Mix the filling. In your small bowl, combine the softened cream cheese, mayonnaise, garlic powder, onion powder, pepper, and salt. Stir until everything is smooth and well combined. Taste it—you want it savory but not overpowering. Adjust the seasonings if needed.
- Prepare your workspace. Lay one tortilla flat on your cutting board. If your tortillas are stiff, microwave them for 10 seconds to make them more flexible. This prevents cracking when you roll.
- Spread the cream cheese mixture. Use your spatula to spread about 2-3 tablespoons of the cream cheese mixture evenly over the entire tortilla. Go all the way to the edges—this helps everything stick together. Don’t be shy with it; a dry pinwheel is a sad pinwheel.
- Layer the turkey. Place 2 slices of turkey flat on top of the cream cheese. Overlap them slightly so the whole tortilla is covered. You want a solid layer, not gaps where you’ll end up with cream cheese-only bites.
- Add the cheese. Lay 1 slice of provolone (or your cheese of choice) on top of the turkey. If you’re using spinach, scatter a handful of leaves over the cheese now. Press them down gently so they stick.
- Roll it up tight. Starting from one edge, roll the tortilla as tightly as you can without tearing it. Use your fingers to keep it snug as you go. Think of it like rolling a sleeping bag—you want it firm but not strained. When you reach the end, press down gently to seal.
- Wrap and chill. Wrap the rolled tortilla tightly in plastic wrap. Twist the ends like a candy wrapper to keep it secure. Pop it in the fridge for at least 30 minutes. This is the magic step—chilling sets the cream cheese and helps the pinwheels hold their shape when you cut them. If you’re in a rush, 15 minutes in the freezer works too.
- Slice into pinwheels. Unwrap your chilled roll and place it on the cutting board. Using your serrated knife, slice off the uneven ends (snack for the chef!). Then cut the remaining roll into 1-inch thick slices. A gentle sawing motion gives you clean edges without squishing.
- Pack and serve. Arrange the pinwheels in your lunchbox container. They stack beautifully, so don’t worry about squishing them. Pack them with some fruit, veggies, and maybe a easy no-bake peanut butter oat bites for a complete lunch that actually comes home empty.
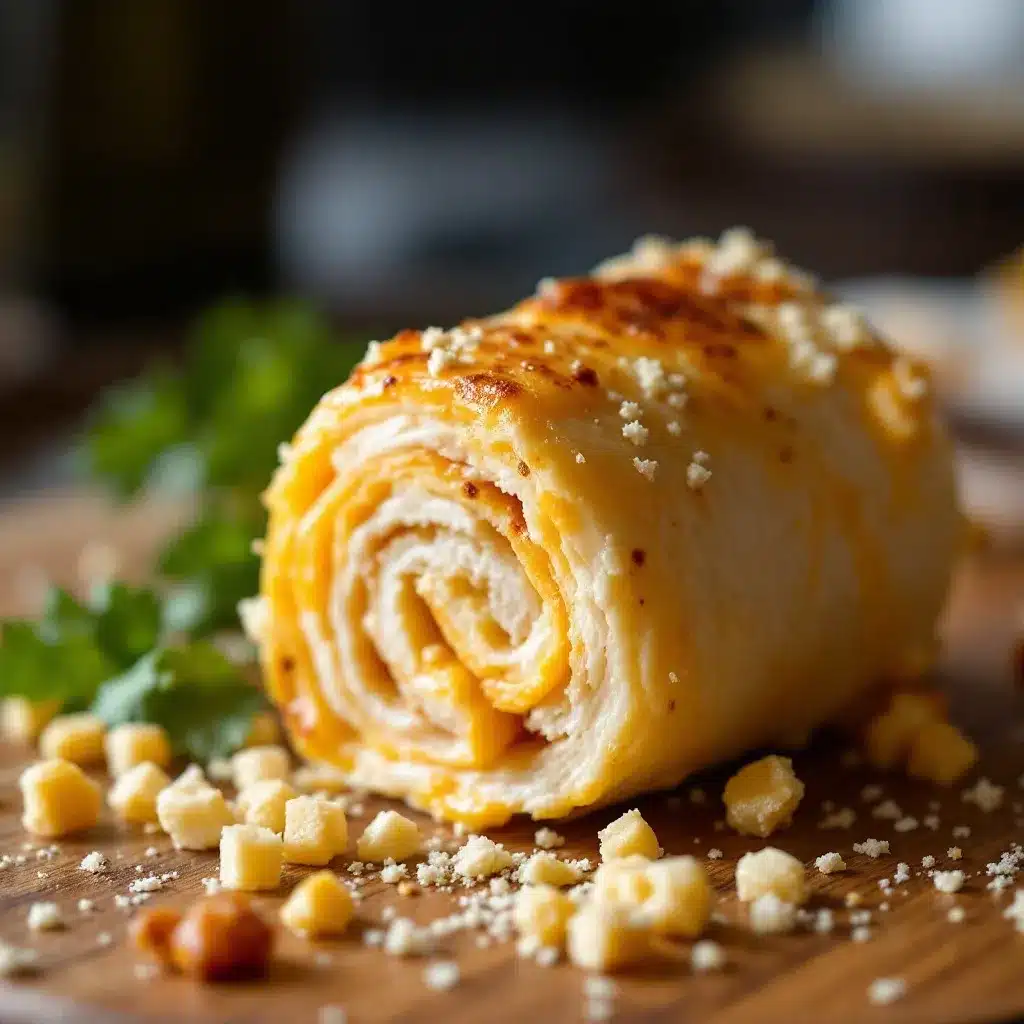
Your pinwheels should look like perfect little spirals—cream cheese, turkey, and cheese visible in every slice. If they look a little messy, don’t worry. They taste the same, and kids don’t care about presentation the way we do.
Cooking Tips & Techniques
After making these about a million times (okay, maybe fifty), I’ve picked up some tricks that make a real difference:
Don’t overfill. I know it’s tempting to pile on the turkey and cheese, but too much filling makes the tortilla impossible to roll. You’ll end up with a fat, lumpy log that falls apart when you slice it. Less really is more here.
Temperature matters. Cold tortillas crack. Room temperature cream cheese spreads like a dream. Cold cream cheese rips your tortillas. I learned this the hard way when I tried to rush through and ended up with torn tortillas and cream cheese everywhere. Take the extra five minutes to let things come to room temperature.
The resting step is non-negotiable. I know you’re busy. I know you want to slice these immediately and get on with your day. But please, please let them rest in the fridge. The cream cheese needs time to firm up again so your pinwheels hold their shape. Slice them too soon and you’ll get squished, messy spirals that unroll in the lunchbox.
Use a damp paper towel. If your tortillas are particularly dry or stiff, place a slightly damp paper towel over them for 30 seconds before rolling. This adds just enough moisture to make them pliable without making them soggy.
Cut with confidence. Don’t saw back and forth like you’re cutting a loaf of bread. Use one smooth, confident motion with your serrated knife. If you hesitate, you’ll squish the pinwheel. Commit to the cut.
Double up for meal prep. These keep beautifully for 3-4 days in the fridge. I make a double batch on Sunday night, slice them all, and pack them in individual containers. Grab and go all week long. It’s a game-changer for busy mornings.
One mistake I still make sometimes: forgetting to seal the edge of the tortilla after rolling. Press down firmly on the seam so it stays closed while chilling. Otherwise, your roll will unspool like a party favor.
Variations & Adaptations
The beauty of this recipe is how flexible it is. Here are some of my favorite variations:
Mediterranean Pinwheels: Swap the turkey for roasted red peppers and add some crumbled feta cheese to the cream cheese mixture. Throw in some kalamata olives if your kids are adventurous. This version is amazing for grown-up lunches.
Everything Bagel Pinwheels: Mix everything bagel seasoning into your cream cheese before spreading. Use smoked turkey and provolone. The salty, savory seasoning takes these to another level. My teenager inhales these.
Veggie-Packed Version: Add shredded carrots, thinly sliced cucumber, and bell pepper strips along with the spinach. The extra crunch is fantastic, and you’re sneaking in vegetables without anyone complaining.
Gluten-Free Option: Use gluten-free tortillas (I like Siete brand cassava flour tortillas) and check your deli meat for gluten. The technique is exactly the same, just warm the tortillas slightly more to prevent cracking.
Low-Carb Version: Swap the flour tortillas for large lettuce leaves or low-carb tortillas. The cream cheese filling holds everything together beautifully. You’ll want to eat these fresh rather than packing them for later, as lettuce gets soggy.
Spicy Southwest Pinwheels: Add a tablespoon of chopped pickled jalapeños to the cream cheese mixture. Use pepper jack cheese instead of provolone. These have a nice kick without being overwhelming—perfect for adults who want a little heat.
I once made a batch with leftover holiday ham and brie cheese, and honestly, they were the best pinwheels I’ve ever made. Don’t be afraid to experiment with what you have. If you’re looking for more lunchbox inspiration, try our easy deconstructed pizza lunchbox with mini mozzarella balls for another no-cook option.
Serving & Storage Suggestions
These pinwheels are incredibly versatile when it comes to serving. Here’s how to make the most of them:
Serving Temperature: Serve them cold straight from the fridge, or let them sit at room temperature for about 10 minutes before eating. Cold pinwheels hold their shape better, but room temperature ones have a softer, more flavorful cream cheese filling.
Lunchbox Pairings: These pair beautifully with fresh fruit (grapes, apple slices, berries), crunchy vegetables (baby carrots, cucumber rounds, cherry tomatoes), and a small treat. For a complete lunch that feels special, add a healthy high-protein bento box with everything bagel chickpeas on the side.
Party Platter: Arrange pinwheels on a platter with toothpicks stuck through each one. They’re perfect for playdates, birthday parties, or even adult gatherings. I’ve brought these to book club and they disappeared before the discussion started.
Storage: Store leftover pinwheels in an airtight container in the refrigerator for up to 4 days. Place a paper towel at the bottom of the container to absorb any excess moisture. If you’re packing them for lunch, put them in a separate compartment from wet foods like fruit to prevent sogginess.
Freezing: You can freeze these! Roll and wrap the uncut logs tightly in plastic wrap, then place them in a freezer bag. Freeze for up to 2 months. When you’re ready to use them, thaw overnight in the fridge, then slice and pack. The texture is slightly different after freezing (the cream cheese gets a bit grainier), but they’re still delicious.
Reheating: These are meant to be eaten cold, so no reheating necessary. If you want a warm version, try toasting the sliced pinwheels in a dry skillet for about 30 seconds per side. The tortilla gets crispy and the cheese melts slightly—it’s a completely different but equally delicious experience.
One thing I love about these pinwheels: the flavors actually get better after a day in the fridge. The garlic and onion powders meld with the cream cheese, and everything comes together beautifully. Day-old pinwheels are my favorite.
Nutritional Information & Benefits
Here’s the approximate nutritional breakdown for one serving (about 4 pinwheels):
- Calories: 280-320
- Protein: 18-22 grams
- Fat: 16-20 grams
- Carbohydrates: 18-22 grams
- Fiber: 2-3 grams
- Sugar: 3-4 grams
- Sodium: 600-800 mg
These pinwheels are a solid source of protein thanks to the turkey and cheese, which helps keep kids full and focused throughout the school day. The cream cheese adds calcium and a bit of healthy fat for brain development. If you add spinach, you’re getting a serving of greens with iron and vitamin K.
For a lower-sodium option, look for low-sodium deli turkey and reduced-fat cream cheese. The flavor is still great, and you cut the sodium by almost half. If you’re watching your carb intake, use low-carb tortillas (they’re widely available now) and you’ll drop to about 8-10 grams of carbs per serving.
These are naturally nut-free (always check your specific brands), which makes them school-safe for classrooms with nut allergies. They’re also vegetarian-friendly if you swap the turkey for roasted vegetables or hummus.
I’m not a nutritionist, just a mom who wants her kids to eat something that isn’t just crackers and fruit snacks. These pinwheels make me feel good about what’s going into their lunchboxes—real food that they actually want to eat.
Conclusion
These easy turkey and cheese pinwheel roll-ups have genuinely changed our lunchbox game. They’re the recipe I never knew I needed, the one that turned chaotic mornings into something almost peaceful. No more standing in front of the fridge at 7 AM wondering what to pack. No more uneaten lunches coming home at the end of the day.
What I love most about these pinwheels is how forgiving they are. You can use whatever tortillas you have, whatever cheese is in your drawer, whatever lunch meat is about to expire. They work with your life, not against it. And isn’t that what we all need—recipes that bend and flex and still turn out delicious?
I’d love to hear how these work for your family. Do your kids have favorite fillings? Have you tried any wild variations? Drop a comment below and share your pinwheel creations. And if you’re looking for more lunchbox wins, check out our smash burger tacos in a thermos for a hot lunch option that’s just as easy.
Here’s to lunches that actually get eaten, mornings that don’t feel like a battle, and the simple joy of a perfectly rolled pinwheel. Happy packing, friends.
Frequently Asked Questions
Can I make these pinwheels the night before?
Absolutely! In fact, I recommend it. Make the rolls, wrap them tightly, and refrigerate overnight. Slice them in the morning before packing. The flavors meld together beautifully overnight, and the cream cheese sets perfectly for clean slicing.
How do I keep pinwheels from getting soggy in a lunchbox?
Pat your spinach leaves completely dry before adding them. Moisture is the enemy of a good pinwheel. Also, pack them in a separate compartment from wet foods like fruit or yogurt. If you’re using a single-container lunchbox, place a paper towel between the pinwheels and any moist items.
Can I use flavored cream cheese?
Yes! Chive and onion cream cheese is fantastic in these. Garden vegetable cream cheese works beautifully too. Just skip the additional seasonings if you’re using a flavored cream cheese, or adjust to taste. The flavored versions add an extra layer of savory goodness without any extra work.
How long do these stay fresh in the fridge?
These pinwheels stay fresh for 3-4 days in an airtight container in the refrigerator. The tortillas may soften slightly after day 3, but they’re still delicious. I don’t recommend keeping them past day 4, as the cream cheese can start to separate and the texture becomes less appealing.
Can I use these for a party or gathering?
Definitely! These are perfect party food. Make them a day ahead, slice them right before serving, and arrange them on a platter with toothpicks. They’re always a hit at potlucks, playdates, and even casual dinner parties. For a fancier presentation, garnish with fresh herbs or a sprinkle of paprika.
Pin This Recipe!

Easy Turkey Cheese Pinwheel Lunchbox Idea

These easy turkey and cheese pinwheel roll-ups are a quick, kid-approved lunchbox solution made with simple ingredients like tortillas, cream cheese, deli turkey, and cheese. Ready in 10 minutes, they hold up beautifully and are endlessly customizable.
- Prep Time: 10 minutes
- Cook Time: 0 minutes
- Total Time: 40 minutes (includes 30 minutes chilling)
- Yield: 4 servings 1x
- Category: Lunch
- Cuisine: American
Ingredients
- 8 ounces cream cheese, softened to room temperature
- 1 tablespoon mayonnaise
- 1/2 teaspoon garlic powder
- 1/4 teaspoon onion powder
- 1/4 teaspoon black pepper
- Pinch of salt
- 4 large flour tortillas (burrito-sized, about 10 inches)
- 8 slices deli turkey (preferably thin-sliced)
- 4 slices provolone cheese (or cheddar, mozzarella, Swiss)
- 1/2 cup fresh spinach leaves (optional)
Instructions
- Soften the cream cheese: Take cream cheese out of fridge 30 minutes before starting, or microwave in 10-second bursts until soft but not melted.
- Mix the filling: In a small bowl, combine softened cream cheese, mayonnaise, garlic powder, onion powder, pepper, and salt. Stir until smooth and well combined. Adjust seasonings to taste.
- Prepare your workspace: Lay one tortilla flat on a cutting board. If stiff, microwave for 10 seconds to make more flexible.
- Spread the cream cheese mixture: Use a spatula to spread about 2-3 tablespoons of the mixture evenly over the entire tortilla, going all the way to the edges.
- Layer the turkey: Place 2 slices of turkey flat on top of the cream cheese, overlapping slightly to cover the whole tortilla.
- Add the cheese: Lay 1 slice of provolone on top of the turkey. If using spinach, scatter a handful of leaves over the cheese and press down gently.
- Roll it up tight: Starting from one edge, roll the tortilla as tightly as possible without tearing. Use fingers to keep it snug. Press down gently to seal the end.
- Wrap and chill: Wrap the rolled tortilla tightly in plastic wrap, twisting the ends like a candy wrapper. Refrigerate for at least 30 minutes (or 15 minutes in the freezer if in a rush).
- Slice into pinwheels: Unwrap the chilled roll and place on a cutting board. Using a serrated knife, slice off the uneven ends, then cut the remaining roll into 1-inch thick slices using a gentle sawing motion.
- Pack and serve: Arrange pinwheels in a lunchbox container. They stack well. Pack with fruit, veggies, or other sides.
Notes
For best results, let cream cheese come to room temperature. Chilling the rolled tortillas is essential for clean slices. Use a serrated knife for cutting to avoid squishing. These keep for 3-4 days in the fridge and can be frozen for up to 2 months (uncut logs).
Nutrition
- Serving Size: 4 pinwheels
- Calories: 300
- Sugar: 3.5
- Sodium: 700
- Fat: 18
- Saturated Fat: 9
- Carbohydrates: 20
- Fiber: 2.5
- Protein: 20
Keywords: turkey pinwheels, cheese pinwheels, lunchbox ideas, easy lunch, kid-friendly, no-cook lunch, meal prep


