Love this? Save it for later!
Share the inspiration with your friends
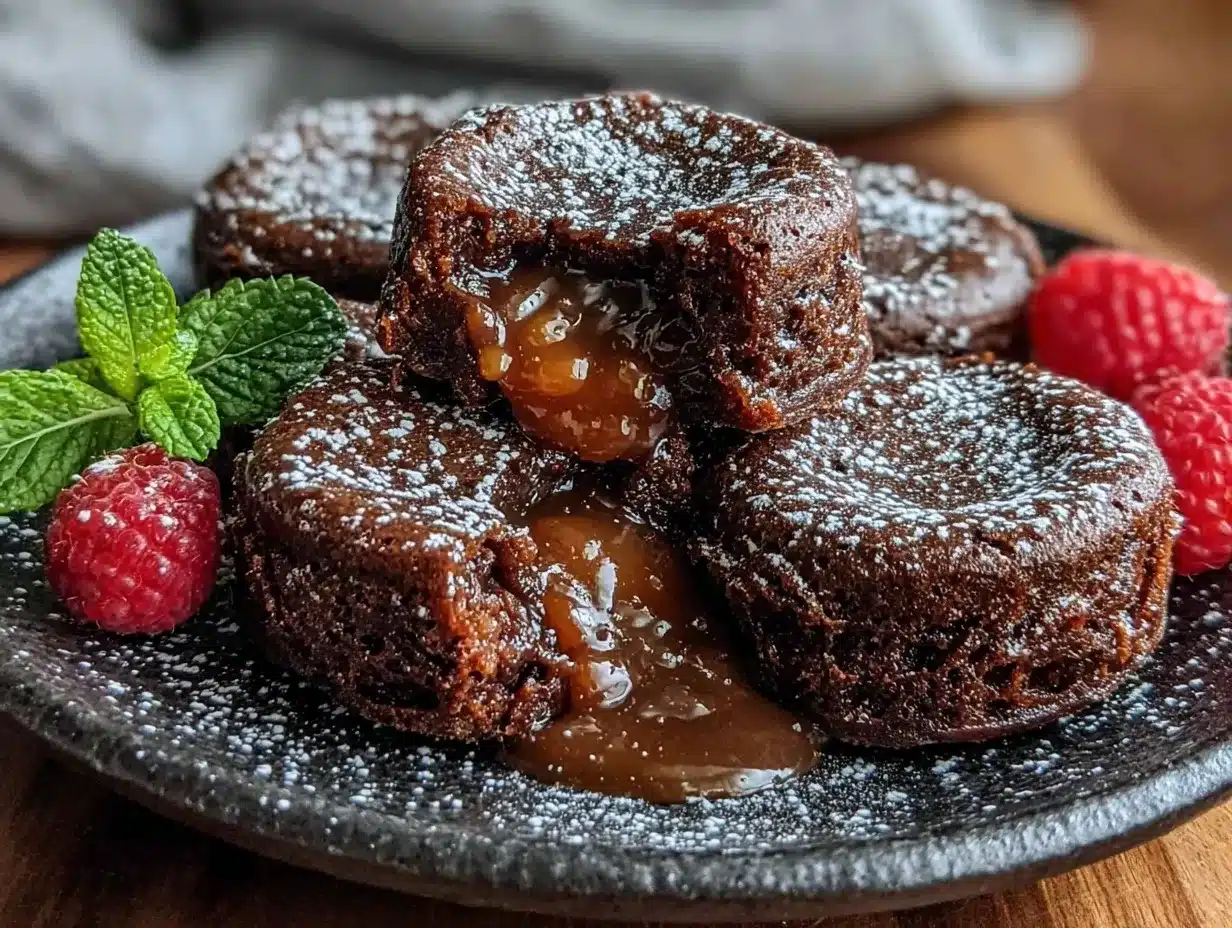
The first time I tasted these decadent flourless chocolate lava cakes, I was sitting in a tiny, bustling café in Asheville, North Carolina. Honestly, I wasn’t expecting much — I’d asked for something gluten-free, and figured it might be a bit dry or crumbly. Instead, what arrived was a little cup of molten magic, warm and rich, with a gooey center that oozed like liquid velvet the moment my spoon broke through. The chocolate aroma alone was enough to make me pause mid-bite, savoring the moment.
I remember that afternoon clearly. The café was packed, and the clatter of dishes mingled with soft jazz in the background. I’d been juggling a hectic week, and this unexpected dessert felt like a tiny celebration just for me. I tried to replicate it at home right away, but you know how it goes—my first few attempts were more lava flop than lava cake! Somewhere between melting chocolate too fast and overbaking, I had my share of messes in the kitchen (including a cracked ramekin that still sits on my counter as a reminder).
Eventually, I nailed the balance: a rich, fudgy cake exterior with a molten, gooey center that’s gluten-free and irresistibly indulgent. Whether you’re gluten-sensitive or just craving a sinfully delicious treat, this recipe has become my go-to when I want something special without fuss. Maybe you’ve been there too—looking for that perfect dessert that feels both luxurious and achievable. That’s exactly why I keep making these flourless chocolate lava cakes. They’re a little slice of happiness, any day of the week.
Why You’ll Love This Recipe
Honestly, this flourless chocolate lava cakes recipe is a keeper. After countless trials and tweaks, it’s now family-approved and chef-tested, delivering a dessert experience that’s both effortless and show-stopping. Here’s why it stands out:
- Quick & Easy: You can whip this up in under 30 minutes, perfect when dessert cravings hit unexpectedly or when you want to impress without the stress.
- Simple Ingredients: No need for any special flours or weird additives. Most of these are pantry staples you probably already have on hand.
- Perfect for Special Occasions: Whether it’s a dinner party, date night, or holiday celebration, this gluten-free delight makes every occasion feel a little more indulgent.
- Crowd-Pleaser: Gluten-free or not, this recipe tends to vanish quickly. Kids, adults, picky eaters—everyone loves it.
- Unbelievably Delicious: The rich, fudgy texture paired with the molten chocolate center is a total treat for your taste buds. It’s like a chocolate hug in cake form.
What really makes this recipe different is the technique I use to gently fold the egg whites into the chocolate mixture, giving the cakes a light, airy texture while keeping them wonderfully gooey inside. Plus, the chocolate choice is crucial—I recommend using a good-quality dark chocolate with at least 70% cocoa for that deep, intense flavor.
This isn’t just another dessert; it’s the kind of recipe that makes you close your eyes after the first bite and smile. It’s comfort food that respects dietary needs without skimping on soul. You’ll find yourself reaching for it again and again.
What Ingredients You Will Need
This recipe uses simple, wholesome ingredients to deliver bold flavor and satisfying texture without the fuss. Most are pantry staples, and substitutions are easy if needed.
- Unsalted butter (6 tablespoons / 85 grams, plus extra for greasing) – adds richness and helps with the molten center
- Bittersweet or semisweet dark chocolate (6 ounces / 170 grams) – I prefer brands like Ghirardelli or Valrhona for their depth of flavor
- Granulated sugar (1/2 cup / 100 grams) – balances the bitterness of the chocolate
- Large eggs (3 whole, plus 3 egg whites) – room temperature for best volume
- Pure vanilla extract (1 teaspoon) – adds warmth to the chocolate notes
- Salt (a pinch) – enhances the chocolate flavor
- Gluten-free cocoa powder (2 tablespoons) – for dusting ramekins and a subtle chocolate boost
Substitution Tips: If you want a dairy-free version, swap the butter for coconut oil, but expect a slight coconut flavor. For a lower sugar option, try coconut sugar or a natural sweetener like erythritol, but adjust to taste. If you don’t have cocoa powder on hand, you can skip dusting the ramekins; just grease them extra well.
Equipment Needed
- Ramekins: Six 6-ounce (180 ml) ramekins are ideal. If you don’t have ramekins, small oven-safe custard cups or muffin tins can work, but the baking time might need adjusting.
- Mixing bowls: One large and one medium, preferably glass or metal for better egg white whipping.
- Electric mixer or whisk: An electric hand mixer makes whipping the egg whites easier, but a sturdy whisk and some elbow grease will do.
- Double boiler or microwave-safe bowl: For melting chocolate and butter gently.
- Spatula: A rubber or silicone spatula for folding ingredients delicately.
Personally, I’ve found that investing in a good set of ramekins makes this recipe feel extra special. Plus, cleaning them is a breeze if you grease and dust them properly. If you’re on a budget, muffin tins work fine—just watch the baking time so the cakes don’t overcook or undercook.
Preparation Method
- Preheat your oven to 425°F (220°C). This high temperature is key to setting the outside quickly while keeping the center molten. Grease six 6-ounce ramekins with butter, then dust them lightly with cocoa powder, tapping out the excess. This step helps the cakes release easily after baking. (Prep time: 5 minutes)
- Melt the butter and chocolate together. Use a double boiler or microwave in 30-second bursts, stirring until smooth. Be careful not to overheat the chocolate—it should be glossy and silky, not grainy or burnt. Let it cool slightly while you prepare the eggs. (Prep time: 5 minutes)
- Separate the eggs. Place the yolks in one bowl and the whites in another. Add the granulated sugar to the yolks and whisk vigorously until pale and slightly thickened. Stir in the vanilla extract and the melted chocolate mixture. (Prep time: 5 minutes)
- Whip the egg whites. Using a clean, dry bowl and beaters, whisk the egg whites with a pinch of salt until they hold soft peaks. This step is critical for the cake’s airy texture. Don’t overbeat or they’ll become dry and clumpy. (Prep time: 5-7 minutes)
- Fold the egg whites into the chocolate mixture. Gently fold one-third of the whites into the chocolate to lighten it, then fold in the remaining whites carefully to avoid deflating. The batter should look smooth and slightly airy. (Prep time: 3 minutes)
- Divide the batter evenly among the prepared ramekins. Smooth the tops with a spatula. Place the ramekins on a baking sheet for easy handling. (Prep time: 2 minutes)
- Bake for 12-14 minutes. The edges should be set and firm, but the center will still jiggle slightly when you gently shake the pan. This jiggle means the lava inside is molten and ready. (Cook time: 12-14 minutes)
- Let the cakes cool for 1-2 minutes. This short rest allows the cakes to firm up just enough to unmold easily. Run a knife around the edges, then carefully invert each cake onto a plate. (Prep time: 2 minutes)
- Serve immediately. These cakes are best enjoyed warm, either plain or with a dusting of powdered sugar, fresh berries, or a scoop of vanilla ice cream.
Tip: If the cakes slide out too easily or break, check the greasing and cocoa dusting step next time, and be gentle when unmolding. Also, ovens vary—start checking at 12 minutes to avoid overbaking.
Cooking Tips & Techniques
The key to perfect flourless chocolate lava cakes lies in timing and gentle handling. Here are some lessons I learned the hard way:
- Don’t skip room temperature eggs. Cold eggs don’t whip up well, which can leave the batter dense instead of light and airy.
- Be patient melting chocolate. Rushing this step can cause the chocolate to seize or burn, ruining the texture.
- Gentle folding is crucial. Vigorous stirring deflates the whipped egg whites, and your cakes won’t rise or have that signature molten center.
- Watch the baking time closely. Even a few extra minutes can turn lava cakes into dry chocolate muffins. Use your oven light and jiggle test to check doneness.
- Multitask by prepping ramekins while chocolate melts. It saves time and keeps the process smooth.
Once, I left one cake in the oven too long because I got distracted by a phone call—lesson learned! It turned out more like a fudgy brownie, still tasty but missing that molten surprise. So, keep your timer close, and enjoy the process. Honestly, the little imperfections just make the experience more memorable.
Variations & Adaptations
Want to switch things up? Here are some ideas I’ve tried and loved, plus a few for common dietary needs:
- Berry Lava Cakes: Add a whole raspberry or a small spoonful of raspberry jam in the center of each ramekin before baking for a fruity surprise inside.
- Peanut Butter Twist: Drop a teaspoon of natural peanut butter into the center of the batter before baking. The salty-sweet combo is heavenly.
- Vegan Version: Substitute eggs with a flax egg mixture (1 tablespoon ground flaxseed + 3 tablespoons water per egg, chilled) and use dairy-free chocolate and coconut oil instead of butter. Texture will be slightly different but still delicious.
- Spiced Chocolate: Add a pinch of cayenne pepper or cinnamon to the batter for a warming, unexpected kick.
- Mini Lava Cakes: Use mini muffin tins to make bite-sized versions. Bake for 8-10 minutes and watch carefully.
My favorite personal twist is adding a tiny sprinkle of sea salt on top right before serving. It contrasts beautifully with the rich chocolate and makes the flavors pop.
Serving & Storage Suggestions
These flourless chocolate lava cakes are best served warm and fresh out of the oven—trust me, that molten center is the star of the show. I like to plate them with a dusting of powdered sugar and a few fresh berries or a dollop of whipped cream for extra flair.
If you want to prep ahead, you can assemble the batter in the ramekins, cover tightly with plastic wrap, and refrigerate for up to 24 hours. When ready to bake, add a minute or two to the baking time.
Leftovers (if you’re lucky enough to have any) can be stored in an airtight container in the refrigerator for 2-3 days. Reheat gently in the microwave for about 20 seconds—just enough to warm the center without drying out the edges.
Flavors tend to mellow a bit over time, so I recommend enjoying them as soon as possible for that fresh-baked magic. Pair these with a glass of cold milk, coffee, or even a rich red wine for a decadent finish.
Nutritional Information & Benefits
Each lava cake contains approximately 320 calories, 25 grams of fat, 20 grams of carbohydrates, and 6 grams of protein. The recipe is naturally gluten-free, making it suitable for those with gluten sensitivities or celiac disease.
Dark chocolate is a powerful antioxidant source, containing flavonoids that may support heart health and improve circulation. Using real butter and whole eggs adds satisfying richness and essential nutrients like vitamin A and choline.
While this dessert is indulgent, it’s made with simple, real ingredients, without processed fillers or gluten-containing flours. So, it’s a treat that feels honest and lovingly made.
Conclusion
Why bother making flourless chocolate lava cakes? Because they bring a little joy and warmth to your kitchen, no matter the occasion. This recipe is straightforward, reliable, and delivers that gooey, chocolatey bliss every time. I love how it manages to feel fancy without the fuss, and it’s always met with smiles and requests for seconds.
Feel free to tweak it to suit your taste or dietary needs—the variations are endless and fun to experiment with. Honestly, once you’ve mastered this recipe, you’ll find yourself reaching for it whenever you want a special treat that’s both gluten-free and utterly decadent.
Give it a try, and don’t be shy about sharing your own twists or questions below—I’d love to hear how your lava cakes turn out!
FAQs
- Can I make these lava cakes ahead of time? Yes! You can prepare the batter in ramekins, cover, and refrigerate for up to 24 hours. Just add a minute or two to the baking time when ready.
- What if I don’t have ramekins? Small oven-safe dishes or muffin tins work as alternatives. Baking times may vary slightly, so keep an eye on them.
- How do I know when the lava cakes are done? The edges should be set and firm, but the center will jiggle slightly when you gently shake the pan—that’s your molten center!
- Can I use milk chocolate instead of dark chocolate? You can, but dark chocolate (at least 70% cocoa) offers better flavor and richness. Milk chocolate may make the cakes sweeter and less intense.
- Are these cakes suitable for a vegan diet? The original recipe isn’t, but you can make a vegan version by substituting eggs with flax eggs and using dairy-free butter and chocolate.
Pin This Recipe!

Flourless Chocolate Lava Cakes
Decadent, gluten-free flourless chocolate lava cakes with a rich, fudgy exterior and a molten, gooey center. Perfect for special occasions or an indulgent treat.
- Prep Time: 22-27 minutes
- Cook Time: 12-14 minutes
- Total Time: 34-41 minutes
- Yield: 6 servings 1x
- Category: Dessert
- Cuisine: American
Ingredients
- 6 tablespoons unsalted butter (85 grams), plus extra for greasing
- 6 ounces bittersweet or semisweet dark chocolate (170 grams), preferably 70% cocoa or higher
- 1/2 cup granulated sugar (100 grams)
- 3 large eggs, room temperature
- 3 large egg whites, room temperature
- 1 teaspoon pure vanilla extract
- Pinch of salt
- 2 tablespoons gluten-free cocoa powder (for dusting ramekins)
Instructions
- Preheat your oven to 425°F (220°C). Grease six 6-ounce ramekins with butter, then dust them lightly with cocoa powder, tapping out the excess.
- Melt the butter and chocolate together using a double boiler or microwave in 30-second bursts, stirring until smooth. Let it cool slightly.
- Separate the eggs. Place the yolks in one bowl and the whites in another. Add the granulated sugar to the yolks and whisk vigorously until pale and slightly thickened. Stir in the vanilla extract and the melted chocolate mixture.
- Whip the egg whites with a pinch of salt until they hold soft peaks. Do not overbeat.
- Gently fold one-third of the egg whites into the chocolate mixture to lighten it, then fold in the remaining whites carefully to avoid deflating the batter.
- Divide the batter evenly among the prepared ramekins and smooth the tops with a spatula. Place the ramekins on a baking sheet.
- Bake for 12-14 minutes until the edges are set but the center jiggles slightly when shaken.
- Let the cakes cool for 1-2 minutes. Run a knife around the edges and carefully invert each cake onto a plate.
- Serve immediately, optionally with powdered sugar, fresh berries, or vanilla ice cream.
Notes
Use room temperature eggs for best volume. Melt chocolate gently to avoid burning. Fold egg whites gently to keep batter airy. Start checking cakes at 12 minutes to avoid overbaking. For dairy-free version, substitute butter with coconut oil and use dairy-free chocolate. You can prepare batter in ramekins and refrigerate up to 24 hours before baking, adding 1-2 minutes to baking time.
Nutrition
- Serving Size: 1 lava cake (approxi
- Calories: 320
- Fat: 25
- Carbohydrates: 20
- Protein: 6
Keywords: flourless chocolate lava cakes, gluten-free dessert, molten chocolate cake, easy chocolate dessert, gluten-free lava cake