Love this? Save it for later!
Share the inspiration with your friends
“You have to see this poke cake!” my friend texted me, and honestly, I wasn’t prepared for what came next. A cascade of colors, bright and cheerful, all stacked into one glorious dessert. It was a spontaneous celebration in cake form, full of vibrant rainbow layers that just screamed joy. I had made poke cakes before, but never with such a bold, playful twist. The idea of combining that classic, tender poke cake texture with cream cheese frosting and a full spectrum of colors? It felt like a perfect way to honor pride and happiness all in one bite.
I remember standing in my kitchen late that night, poking holes into the warm cake layers, watching the rainbow-colored gelatin seep in and transform the cake into something utterly magical. It wasn’t just about looks — the texture was silky and moist, and that cream cheese frosting added just the right tang to balance the sweetness. Honestly, it felt like this recipe was more than just dessert; it was a little act of celebration, of color and love, baked into a slice of cake.
This vibrant rainbow pride layered poke cake with cream cheese frosting isn’t just a pretty face on the dessert table. It’s a recipe that stuck with me because it’s simple to make, fun to assemble, and brings out smiles every time. And if you’re someone who loves bright desserts that double as conversation starters, well, this might just become your new favorite.
Why You’ll Love This Recipe
After making this rainbow pride layered poke cake multiple times, I can say it holds a special place in my baking rotation. Here’s why it stands out:
- Quick & Easy: The entire cake comes together in about an hour, including baking and poking time — perfect for last-minute celebrations or when you want a colorful treat without fuss.
- Simple Ingredients: No need to hunt down exotic items. You likely have the basics already — cake mix, gelatin, cream cheese, and some food coloring.
- Perfect for Pride and Parties: Its cheerful appearance and joyful vibe make it a hit for pride month gatherings, birthdays, or any occasion that calls for a splash of color.
- Crowd-Pleaser: I’ve served this at potlucks and family get-togethers, and it always disappears quickly — kids and adults alike love the texture and taste.
- Unbelievably Delicious: The cream cheese frosting adds a lovely tangy contrast that cuts through the sweetness, and the gelatin poked into the cake keeps every bite moist and tender.
What sets this apart from other poke cakes? The method of layering rainbow gelatin colors, one by one, so each slice reveals a vibrant, colorful surprise. Plus, the cream cheese frosting isn’t just slapped on—it’s whipped to silky perfection, lending a light richness that feels just right. Honestly, it’s the kind of dessert that makes you close your eyes after the first bite and smile. It’s comfort food with a festive twist.
What Ingredients You Will Need
This recipe combines straightforward ingredients that work together to create a colorful, moist, and flavorful cake. Here’s what you’ll need to make this vibrant rainbow pride layered poke cake with cream cheese frosting:
- For the Cake:
- 1 white or yellow cake mix (about 15.25 oz / 432 g) – I recommend Duncan Hines for reliable texture.
- Ingredients listed on the cake mix box (usually water, eggs, and oil).
- For the Gelatin Layers:
- 6 small boxes of flavored gelatin (3 oz / 85 g each) in red, orange, yellow, green, blue, and purple – use classic flavors like cherry, orange, lemon, lime, blueberry, and grape.
- Boiling water (for dissolving gelatin).
- Cold water or ice cubes (to help set layers quickly).
- For the Cream Cheese Frosting:
- 8 oz (225 g) cream cheese, softened – I prefer Philadelphia brand for smoothness.
- 1/2 cup (113 g) unsalted butter, softened (adds richness and creaminess).
- 3 to 4 cups (360–480 g) powdered sugar, sifted (adjust sweetness to taste).
- 1 teaspoon vanilla extract – real vanilla makes all the difference.
All these ingredients are pantry-friendly and easy to find year-round. If you want a dairy-free frosting, swapping cream cheese with a vegan cream cheese alternative works well. For a gluten-free version, choose a gluten-free cake mix and double-check your gelatin flavors.
Equipment Needed
- 9×13 inch (23×33 cm) baking pan – standard size perfect for layering and slicing.
- Mixing bowls – at least two; one for cake batter, one for gelatin mixing.
- Electric mixer or stand mixer – helps cream the frosting smoothly (though a sturdy whisk can work in a pinch).
- Measuring cups and spoons – precise measuring ensures perfect texture.
- Wooden skewer or fork – for poking holes evenly into the cake.
- Spatula – for spreading frosting evenly.
If you don’t have a 9×13 pan, a similarly sized glass or metal dish will do. I once tried this in an 8×8 pan; it worked but the layers were taller and more intense, which was fun but took longer to set. For frosting, using a stand mixer gave me the fluffiest results, but hand mixing can work with a bit more elbow grease.
Preparation Method
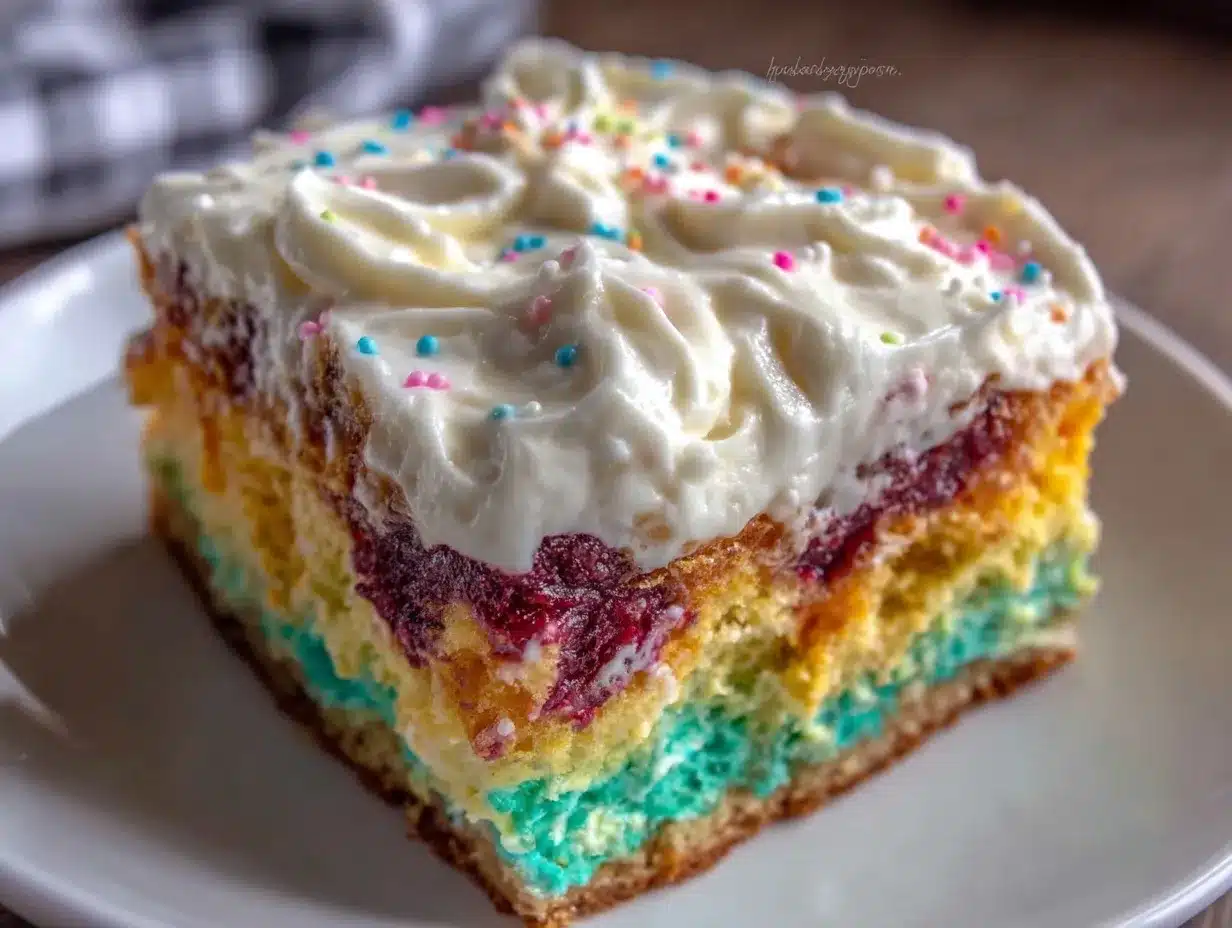
- Prepare the Cake Batter: Preheat your oven to 350°F (175°C). Follow the cake mix instructions to prepare the batter, usually combining cake mix, water, eggs, and oil. Whisk until smooth, about 2 minutes.
- Bake the Cake: Pour batter evenly into the greased 9×13 pan. Bake for 28 to 32 minutes or until a toothpick inserted in the center comes out clean. Let it cool completely on a wire rack (about 1 hour). Cooling is crucial to keep the gelatin from melting in the next steps.
- Poke Holes in the Cake: Using a wooden skewer or fork, poke holes about 1 inch (2.5 cm) apart all over the cake surface. The holes should be deep but not through the bottom of the pan. This step lets the gelatin soak in and create that unique poke cake texture.
- Prepare the Gelatin Layers: For each color, dissolve one box of gelatin in 1 cup (240 ml) boiling water, stirring until fully dissolved. Then add 1/2 cup (120 ml) cold water or ice to cool it slightly. Pour the first color (red) evenly over the cake holes, allowing it to settle into the holes but not overflow.
- Chill to Set Each Layer: Place the cake in the fridge for about 15 to 20 minutes until the first gelatin layer is firm. Repeat the process with each remaining gelatin color (orange, yellow, green, blue, purple), pouring each over the set cake and chilling after each pour. This layering creates the vibrant rainbow effect inside.
- Prepare the Cream Cheese Frosting: While the cake chills, beat the softened cream cheese and butter together until smooth and creamy (about 2-3 minutes). Gradually add powdered sugar, one cup at a time, mixing well after each addition. Stir in vanilla extract. Adjust consistency by adding more powdered sugar if needed.
- Frost the Cake: Once the final gelatin layer is set (about 30 minutes), spread the cream cheese frosting evenly over the top. Use a spatula to create soft peaks or smooth it out for a polished look.
- Chill Before Serving: Refrigerate the cake for at least 1 hour to allow the frosting to firm up and flavors to meld. Slice and serve chilled for best texture.
Pro Tip: When pouring each gelatin color, pour slowly and evenly to avoid mixing the colors. If you want to speed up setting, a quick 10-minute blast in the freezer (watch carefully!) helps without freezing the cake.
Cooking Tips & Techniques
Making a poke cake with multiple gelatin layers might sound tricky, but a few tips make all the difference. First, patience is your friend. Let each gelatin layer chill properly before pouring the next to keep those bright, distinct bands intact.
Also, don’t skip cooling the cake fully before poking and pouring gelatin. If the cake is warm, the gelatin melts and colors will bleed together, turning your vibrant layers into a sad, muddy mess. I learned this the hard way during an early attempt!
Using a wooden skewer for poking holes works better than a fork because it creates neat, uniform holes without tearing the cake. This helps the gelatin seep evenly and keeps the cake’s structure intact.
When frosting, cold cream cheese or butter are tough to whip smooth, so make sure both are softened to room temperature for silky frosting. If you want a lighter frosting, add a splash of milk or cream to loosen it up.
And don’t forget about timing — prepping the frosting while the cake chills makes the process smoother. Multitasking like this keeps you from feeling rushed and helps everything come together beautifully.
Variations & Adaptations
- Dairy-Free Version: Swap the cream cheese and butter with vegan alternatives, such as vegan cream cheese and margarine. Coconut-based options give a subtle tropical hint.
- Flavor Twists: Use flavored gelatin that complements your frosting—like swapping out lemon for raspberry or blueberry to match your taste. Or add a splash of fresh fruit puree into the cream cheese frosting for a fruity touch.
- Seasonal Adaptations: For summer, try layering fresh berry jams or purees between the gelatin layers for an extra burst of flavor and color. In winter, warm spices like cinnamon or nutmeg in the cake batter can add cozy notes.
- Gluten-Free Option: Use a gluten-free cake mix to keep the recipe safe for gluten-sensitive eaters without sacrificing texture.
- Personal Variation: I once added a thin layer of crushed graham crackers between the cake and the first gelatin layer for a surprising crunch that guests loved. It’s a fun way to add texture if you want to experiment.
Serving & Storage Suggestions
This vibrant rainbow pride layered poke cake is best served chilled, straight from the fridge. The cream cheese frosting tastes so fresh when cool, and the gelatin layers hold their beautiful colors and texture.
For a festive presentation, slice the cake with a sharp knife dipped in hot water to get clean edges that show each colorful layer clearly. Serve with a dollop of whipped cream or fresh berries for an extra pop.
Leftovers keep well in the refrigerator for up to 5 days, tightly wrapped or stored in an airtight container to prevent drying out. The flavors actually meld more over time, making the cake even more delightful the next day.
If you want to freeze it, cover the frosted cake tightly with plastic wrap and foil, and freeze for up to 2 months. Thaw overnight in the fridge before serving — the texture holds up surprisingly well.
Pair this cake with a light beverage like sparkling water with lemon or a fruity herbal tea for a refreshing balance.
Nutritional Information & Benefits
Each slice of this rainbow pride layered poke cake contains approximately:
| Calories | Fat | Carbohydrates | Protein |
|---|---|---|---|
| 320 kcal | 14 g | 45 g | 4 g |
This dessert isn’t exactly health food, but it features some benefits. The cream cheese adds a bit of protein and calcium, while the gelatin includes collagen peptides that some find beneficial for skin and joints. Using real fruit-flavored gelatin instead of artificial colors can make a small difference if you’re picky about additives.
For those mindful of dietary needs, there are gluten-free and dairy-free options that keep the recipe inclusive without losing any fun or flavor.
Conclusion
This vibrant rainbow pride layered poke cake with cream cheese frosting is one of those recipes that brings color and joy to any occasion. It’s approachable enough for a beginner baker but impressive enough to wow a crowd. I love how it transforms a simple cake into a festive, multi-layered treat that tells a story with every slice.
Feel free to make it your own—swap flavors, try different frosting styles, or add your personal touches. Baking this cake always reminds me that food can celebrate more than just hunger; it can celebrate identity, community, and happiness.
So, when you’re ready to brighten up your next gathering, this poke cake will be there, ready to share smiles and surprises. And if you like playing with colorful desserts, you might want to check out my mini lemon blueberry cheesecakes perfect for parties for another fun, crowd-pleasing idea.
FAQs
- Can I use homemade cake instead of a cake mix? Absolutely! A simple vanilla or white cake recipe works well here as long as it’s sturdy enough to hold the gelatin layers.
- What if I don’t have all six colors of gelatin? You can use fewer colors or mix and match flavors you like. The effect will be less rainbow-like but still delicious.
- How do I prevent the gelatin from mixing between layers? Chill each layer fully before pouring the next. Pour slowly and evenly to avoid disturbing the set gelatin.
- Can I make this cake ahead of time? Yes, it actually tastes better after chilling overnight as the flavors meld together nicely.
- Is this cake suitable for kids’ parties? Definitely! The vibrant colors and sweet flavors make it a hit with children and adults alike.
Pin This Recipe!
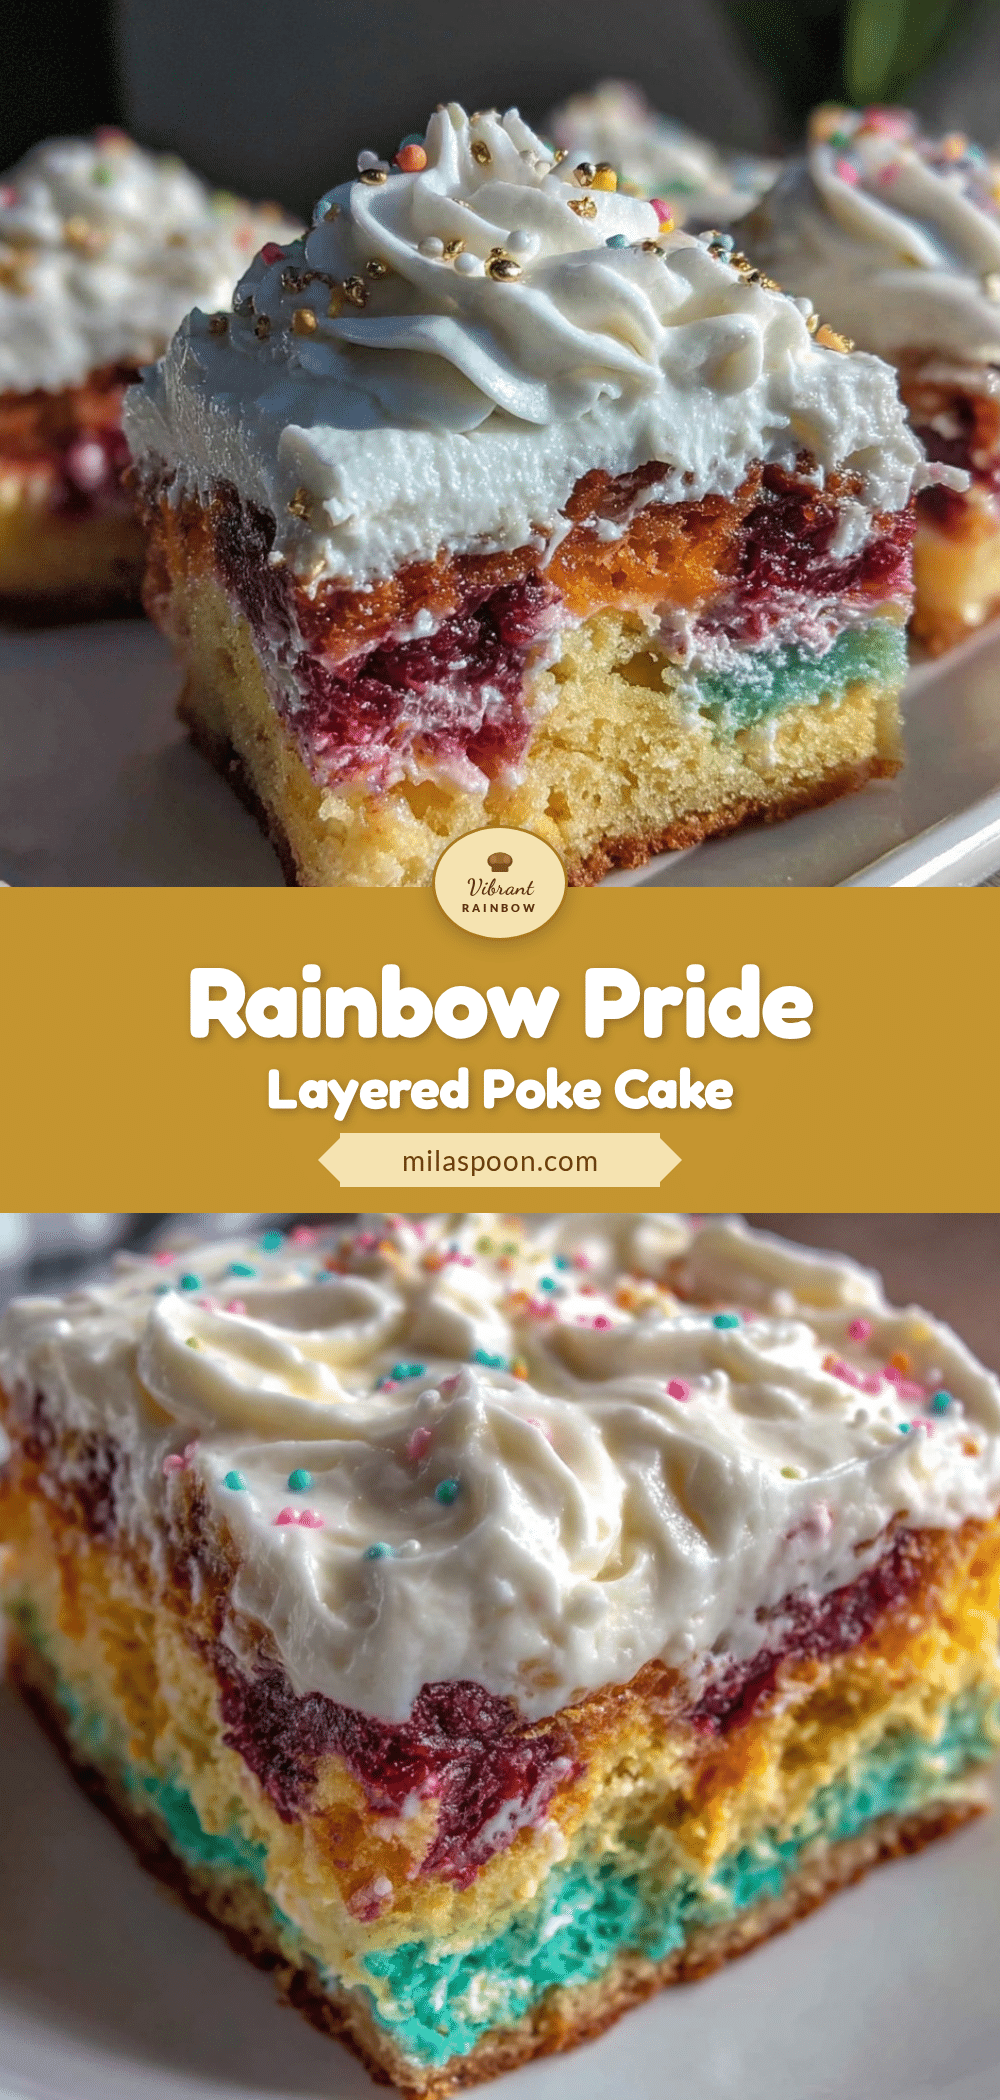
Vibrant Rainbow Pride Layered Poke Cake
A colorful and joyful poke cake featuring rainbow gelatin layers soaked into a tender cake, topped with silky cream cheese frosting. Perfect for celebrations and pride events.
- Prep Time: 15 minutes
- Cook Time: 30 minutes
- Total Time: 1 hour 45 minutes
- Yield: 12 servings 1x
- Category: Dessert
- Cuisine: American
Ingredients
- 1 white or yellow cake mix (about 15.25 oz / 432 g)
- Ingredients listed on the cake mix box (usually water, eggs, and oil)
- 6 small boxes of flavored gelatin (3 oz / 85 g each) in red, orange, yellow, green, blue, and purple (classic flavors like cherry, orange, lemon, lime, blueberry, and grape)
- Boiling water (for dissolving gelatin)
- Cold water or ice cubes (to help set layers quickly)
- 8 oz (225 g) cream cheese, softened
- 1/2 cup (113 g) unsalted butter, softened
- 3 to 4 cups (360–480 g) powdered sugar, sifted
- 1 teaspoon vanilla extract
Instructions
- Preheat oven to 350°F (175°C). Prepare cake batter according to cake mix instructions, whisking until smooth.
- Pour batter evenly into a greased 9×13 inch baking pan. Bake for 28 to 32 minutes or until a toothpick inserted in the center comes out clean. Cool completely on a wire rack (about 1 hour).
- Using a wooden skewer or fork, poke holes about 1 inch apart all over the cake surface, deep but not through the bottom.
- For each gelatin color, dissolve one box of gelatin in 1 cup boiling water, stirring until fully dissolved. Add 1/2 cup cold water or ice to cool slightly.
- Pour the first gelatin color evenly over the cake holes, allowing it to settle but not overflow. Chill in the fridge for 15 to 20 minutes until set.
- Repeat the gelatin pouring and chilling process with each remaining color (orange, yellow, green, blue, purple) to create rainbow layers.
- While the cake chills, beat softened cream cheese and butter together until smooth (2-3 minutes). Gradually add powdered sugar, mixing well after each addition. Stir in vanilla extract and adjust consistency if needed.
- Once the final gelatin layer is set (about 30 minutes), spread the cream cheese frosting evenly over the top with a spatula.
- Refrigerate the cake for at least 1 hour before serving to allow frosting to firm and flavors to meld. Slice and serve chilled.
Notes
Cool the cake completely before poking holes and pouring gelatin to prevent melting and color bleeding. Pour gelatin layers slowly and chill each layer fully before adding the next to maintain distinct colors. Use softened cream cheese and butter for smooth frosting. For faster setting, a quick 10-minute freezer blast can help but watch carefully to avoid freezing.
Nutrition
- Serving Size: 1 slice (1/12 of cak
- Calories: 320
- Fat: 14
- Carbohydrates: 45
- Protein: 4
Keywords: poke cake, rainbow cake, layered cake, cream cheese frosting, gelatin layers, pride cake, colorful dessert, easy cake recipe


