Love this? Save it for later!
Share the inspiration with your friends
My nephew Leo showed up at my door last October 30th, holding a bag of frozen bread dough and looking panicked. “We forgot to plan the Halloween party snacks,” he announced, and honestly, I couldn’t argue—I’d been so busy testing my pumpkin cream cheese swirl muffins for Thanksgiving prep that October slipped right past me. The kid was expecting something spooky, and all I had was that bag of dough, some olives, and a jar of marinara. I remember standing there, staring at the ingredients, and then it hit me—those old witch finger cookies, but savory. Breadstick version. We shaped the first one together, pressing an almond slice into the tip for a nail, and Leo laughed so hard he snorted. “It looks like Aunt Margo’s hand!” he yelled. I knew we were onto something good.
These witch finger breadsticks ended up being the hit of his school party the next day—gone in fifteen minutes, with parents asking for the recipe. They’re creepy in the best way, but also genuinely delicious, with that chewy, salty breadstick texture that pairs perfectly with warm marinara. There’s something about watching people hesitate before taking a bite that never gets old. The almond fingernails, the little knuckle indentations—they look ridiculous and unsettling all at once. And that’s exactly the point, isn’t it? Halloween food should make you laugh and cringe at the same time.
I’ve made them every year since, and they’ve become our go-to for Halloween parties, movie marathons, and even classroom treats when the teachers want something fun but not overloaded with sugar. They’re simple enough that kids can help shape them, and the reaction when someone dips a “finger” into “blood” sauce is pure comedy gold. Trust me on this one—you need these at your next spooky gathering.
Why You’ll Love These Witch Finger Breadsticks
Let me tell you why this recipe has earned a permanent spot in my Halloween rotation. After testing it with three different types of dough, two different “nail” options, and more sauce variations than I care to admit, I can confidently say this version is the one.
- Quick & Easy: From package to table in under 30 minutes using store-bought dough. Perfect for last-minute Halloween prep or when you realize the party is tomorrow and you have nothing planned.
- Simple Ingredients: You need bread dough, almonds, olive oil, garlic salt, and marinara sauce. That’s it. No fancy grocery run required.
- Perfect for Halloween Parties: These are the appetizer that gets photographed, shared, and talked about. Kids love the creepiness, adults appreciate the taste.
- Crowd-Pleaser: I’ve served these at parties with kids aged 4 to 14, and they all gobble them up. Even picky eaters can’t resist the fun factor.
- Unbelievably Delicious: The garlicky, salted breadstick exterior with the tangy marinara dip is genuinely good—not just “good for a Halloween recipe.”
What makes these different from every other witch finger recipe out there is the texture. Most versions use cookie dough or puff pastry, which either crumbles or gets too flaky. Using bread dough gives you that satisfying chew, the kind you want for dipping. Plus, the almond nails toast up beautifully in the oven, adding a nutty crunch that contrasts perfectly with the soft bread. It’s not just a gimmick—it’s a genuinely well-crafted appetizer that happens to look like a severed finger.
These breadsticks have that perfect Halloween energy—spooky enough to impress, simple enough to actually make. Every time I serve them, someone asks for the recipe, and that’s the best compliment a food blogger can get.
What Ingredients You Will Need
This recipe uses straightforward ingredients that you can find at any grocery store. The magic happens in the shaping and the presentation, not in obscure specialty items.
For the Breadsticks
- 1 pound frozen bread dough, thawed (I prefer Rhode’s or Bridgford for consistent results—they rise evenly and hold their shape well)
- 2 tablespoons olive oil (for brushing; use a good quality one for better flavor, but standard works fine)
- 1 teaspoon garlic salt (or regular salt plus garlic powder if you prefer controlling the ratio)
- 1 teaspoon dried parsley (optional, for a witchy “wart” effect)
- 24 whole raw almonds (one per breadstick; look for ones that are relatively uniform in size for consistent fingernails)
- 1 egg, beaten (for egg wash, gives that golden, slightly shiny finish)
For the Marinara Blood Dip
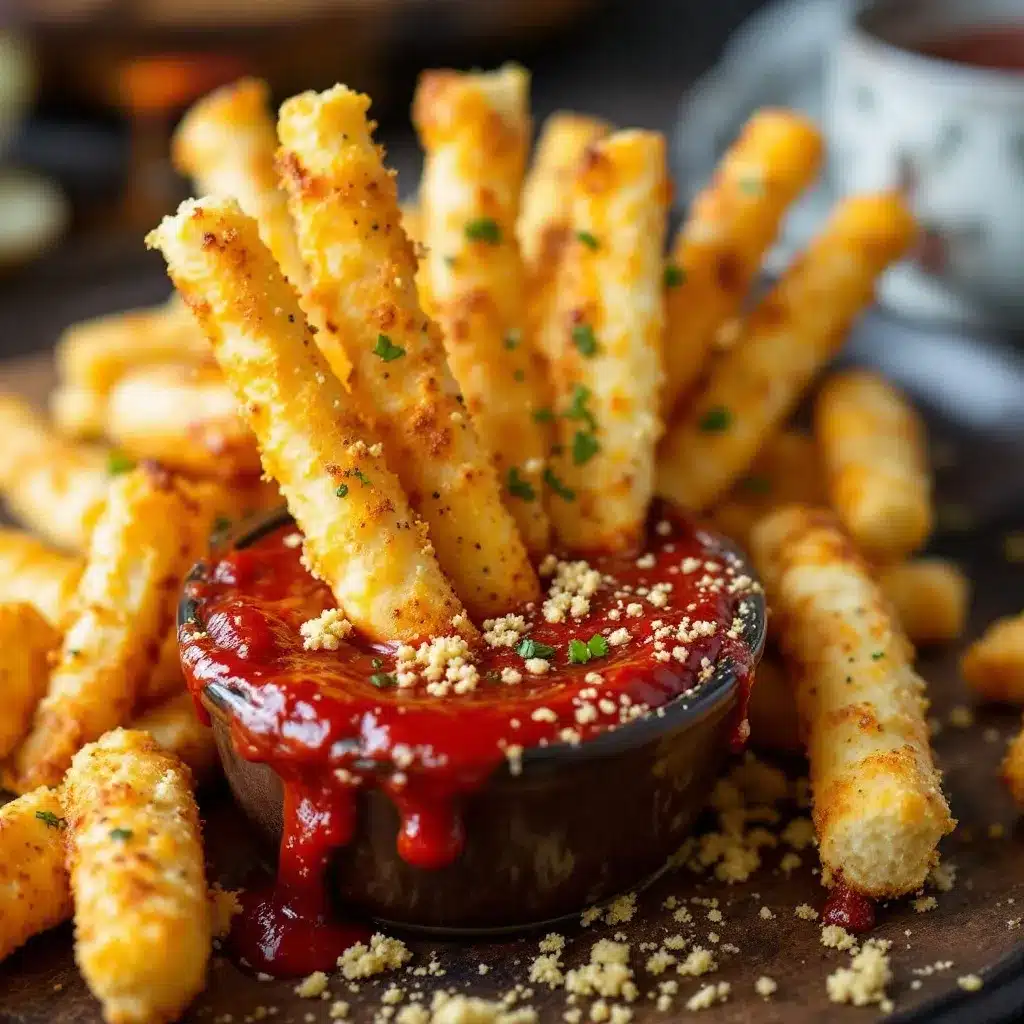
- 1 cup high-quality marinara sauce (I recommend Rao’s or Victoria—they’re thick enough to cling to the breadsticks without being watery)
- 1 tablespoon tomato paste (deepens the color to a more convincing “blood” red)
- 1 teaspoon red wine vinegar (adds tanginess and a slightly darker hue)
- 1/2 teaspoon smoked paprika (gives a subtle smokiness and deepens the color further)
- Pinch of black pepper
For the almond “fingernails,” I’ve tried sliced almonds, slivered almonds, and even cashews, but whole raw almonds work best. They’re the right shape and size, and they toast to a beautiful golden brown that looks surprisingly like a real nail. If you’re serving someone with nut allergies, you can use a small piece of red bell pepper or even a sliver of cheese for the nail effect—it won’t look quite as authentic, but it still works.
The dough choice matters here. I’ve made these with homemade pizza dough, canned biscuit dough, and even crescent roll dough. The bread dough version is the winner because it gives you that chewy, substantial texture that stands up to dipping without falling apart. Biscuit dough works in a pinch but tends to be more crumbly. Crescent roll dough is too delicate and buttery for the witch finger effect—it spreads too much in the oven and loses the finger shape.
For the marinara, don’t skip the tomato paste. It thickens the sauce so it clings to the breadsticks instead of running off like actual blood. The smoked paprika is optional but adds a lovely depth that makes people wonder what makes the sauce so good.
Equipment Needed
- Baking sheet (rimmed preferred, to catch any oil drips)
- Parchment paper or silicone baking mat (prevents sticking and makes cleanup a breeze)
- Pastry brush (for egg wash and olive oil; a silicone one is easiest to clean)
- Sharp knife or bench scraper (for cutting dough and scoring knuckle lines)
- Small bowl (for beaten egg)
- Small saucepan (for warming the marinara dip)
- Measuring spoons
- Cutting board (for shaping the breadsticks)
- Serving platter (something spooky-looking adds to the effect—I use a black slate board)
If you don’t have a pastry brush, you can use a paper towel to dab the egg wash on, though it won’t be as even. A bench scraper makes cutting the dough much easier than a knife, but a sharp chef’s knife works perfectly fine. I’ve made these in a pinch with just a butter knife and my hands—don’t let missing equipment stop you.
One tip: use a light-colored baking sheet if you have one. Dark sheets absorb more heat and can brown the bottoms too quickly. If you only have dark sheets, reduce the oven temperature by 25 degrees and check them a few minutes early.
Preparation Method
Preheat your oven to 375°F (190°C). Line a baking sheet with parchment paper and set aside. This is one of those recipes where prep matters, so get everything ready before you start handling the dough.
Step 1: Prepare the Dough
If using frozen bread dough, thaw it according to package directions—usually about 2-3 hours at room temperature or overnight in the fridge. The dough should be soft and pliable but not sticky. Lightly flour your work surface and your hands. Divide the dough into 12 equal pieces. For consistent sizing, I use a bench scraper to cut the dough in half, then each half into six pieces. Each piece should be roughly the size of a golf ball.
Step 2: Shape the Fingers
Take one piece of dough and roll it between your palms into a rope about 4-5 inches long. The shape should be slightly thicker at one end (the base of the finger) and tapered at the other (the fingertip). Place it on the prepared baking sheet. Repeat with remaining dough pieces, spacing them about 2 inches apart—they’ll expand as they rise and bake.
Step 3: Create the Knuckles
Using the back of a knife or a bench scraper, gently press 2-3 horizontal lines across each “finger” to create knuckle indentations. Don’t cut all the way through—just deep enough to leave a visible mark. You want the bread to puff up around these lines during baking, creating realistic-looking knuckles. I press firmly but gently, about 1/4 inch deep.
Step 4: Add the Fingernails
Press one whole almond into the tapered end of each breadstick, pointed end facing outward. The almond should be embedded about 1/3 of the way into the dough so it stays put during baking. If your almonds are particularly large, you can trim them slightly with a knife. Make sure the almond is pressed in firmly—loose almonds will fall off during baking.
Step 5: Apply Egg Wash and Seasoning
In a small bowl, beat the egg with 1 tablespoon of water. Using a pastry brush, lightly coat each breadstick with the egg wash. This gives them that golden, slightly shiny finish that makes them look almost too realistic. Sprinkle each breadstick with garlic salt and dried parsley if using. The parsley adds little green flecks that look like warts or dirt—perfect for a witchy aesthetic. Don’t oversalt; the garlic salt adds plenty of flavor.
Step 6: Add the “Wrinkles” (Optional but Recommended)
For extra realism, use a toothpick to draw tiny lines around the knuckle indentations and at the base of the almond nail. These small details make a big difference in the final appearance. I also press a few tiny indentations on the sides of the fingers to look like wrinkles or veins.
Step 7: Let Them Rise
Cover the breadsticks loosely with plastic wrap or a clean kitchen towel and let them rise in a warm place for 20-30 minutes. They should puff up slightly but not double in size. If you’re short on time, you can skip this step, but the texture won’t be as light and chewy.
Step 8: Bake
Place the baking sheet in the preheated oven and bake for 12-15 minutes, or until the breadsticks are golden brown and the almonds are lightly toasted. The internal temperature should reach about 190°F (88°C) if you want to be precise. Rotate the pan halfway through for even browning. Watch them closely toward the end—almonds can burn quickly.
Step 9: Prepare the Marinara Blood Dip
While the breadsticks are baking, combine the marinara sauce, tomato paste, red wine vinegar, smoked paprika, and black pepper in a small saucepan. Warm over medium-low heat, stirring occasionally, until heated through. The tomato paste will thicken the sauce to a more “blood-like” consistency. Transfer to a serving bowl and let it cool slightly—you want it warm but not hot enough to burn tongues.
Step 10: Serve
Let the breadsticks cool on the baking sheet for 5 minutes before transferring to a serving platter. Arrange them in a pile that looks vaguely hand-like, or scatter them casually for a more gruesome effect. Place the bowl of marinara in the center or off to the side. Serve warm.
A note on timing: these are best served fresh from the oven. The texture deteriorates as they cool, and the almonds lose their crunch. If you’re making them for a party, shape and rise them ahead of time, then bake just before serving. The marinara can be made a day in advance and reheated.
Cooking Tips & Techniques
After making these witch finger breadsticks more times than I can count, I’ve learned a few things the hard way. Let me save you some trouble.
The Dough Matters More Than You Think
I tried making these with canned biscuit dough once, thinking it would save time. They spread into blobs. The fingers lost all definition, and the “nails” looked like sad little almonds floating on puffy clouds. Bread dough has structure—it holds its shape, rises predictably, and gives you that satisfying chew. If you’re in a real pinch, pizza dough works as a second choice. Just avoid anything that’s designed to be flaky or layered.
Don’t Overwork the Dough
When shaping the fingers, handle the dough as little as possible. Overworking it develops too much gluten, making the breadsticks tough instead of tender. Roll them gently, shape them once, and leave them alone. If the dough starts resisting, let it rest for 5 minutes before continuing.
The Almond Nail Trick
I learned this one through trial and error: press the almond in at a slight angle, not straight in. Real fingernails grow at an angle, and this small detail makes the breadsticks look significantly more realistic. Also, if your almonds are whole but uneven, you can snap them in half lengthwise to get a more nail-like shape. The flat side faces up, the rounded side is the nail tip.
Temperature Control
Your oven temperature matters. I’ve had batches where the bottoms burned before the tops were golden. If your oven runs hot, reduce the temperature to 350°F (175°C) and bake for 15-18 minutes instead. If it runs cool, you might need 375°F for the full 15 minutes. Get to know your oven’s quirks—it makes a difference.
The Blood Sauce Consistency
The first time I made the marinara dip, it was too thin. It dripped everywhere and looked more like watery tomato soup than blood. Adding the tomato paste was the game-changer. It thickens the sauce to a consistency that clings to the breadsticks without being gloppy. If your sauce is still too thin, simmer it for a few extra minutes to reduce it. If it’s too thick, add a splash of water or broth.
Multitasking Strategy
While the breadsticks are rising, prep the marinara and set the table. While they’re baking, warm the sauce and arrange your serving platter. This recipe comes together in about 45 minutes total, but active time is only about 15 minutes. The rest is rising and baking time.
Variations & Adaptations
One of the best things about this recipe is how adaptable it is. Here are some variations I’ve tried and loved.
Gluten-Free Version
Use a good quality gluten-free bread dough or pizza dough. I’ve had success with the Schar brand gluten-free bread mix. The texture is slightly different—a bit more crumbly—but the shape holds well enough. Add an extra tablespoon of olive oil to the dough to help with moisture retention. The gluten-free version won’t rise as much, so shape the fingers slightly thicker than you think you need.
Vegan Witch Fingers
Replace the egg wash with a mixture of 1 tablespoon maple syrup and 1 tablespoon water. It won’t give the same golden sheen, but it will help the seasonings stick. Use a plant-based marinara sauce (most are naturally vegan). For the dough, choose a vegan bread dough—most frozen bread doughs are vegan, but check the label to be sure.
Spicy Blood Dip
Add 1 teaspoon of red pepper flakes or 1/2 teaspoon of cayenne pepper to the marinara sauce. The heat gives the dip an extra kick that pairs beautifully with the garlicky breadsticks. I’ve also added a splash of sriracha for a different kind of heat. Call it “infected blood” for extra Halloween points.
Cheese-Stuffed Fingers
Before shaping the dough, press a small cube of mozzarella cheese into the center of each piece. Wrap the dough around the cheese completely, then shape into fingers. The cheese melts during baking, creating a gooey center that oozes out when bitten. It’s messy but delicious. Just be careful—the cheese gets extremely hot.
Herb-Infused Dough
Knead 1 teaspoon of dried rosemary, 1 teaspoon of dried thyme, and 1/2 teaspoon of black pepper into the dough before shaping. The herbs give the breadsticks an earthy, savory flavor that elevates them beyond standard garlic breadsticks. This version pairs especially well with a basil-heavy marinara.
Sweet Version
For a dessert twist, use sweet bread dough or cinnamon roll dough. Skip the garlic salt and parsley. Instead, brush with melted butter and sprinkle with cinnamon sugar before baking. Use a strawberry or raspberry sauce for the “blood” dip. The almond nails still work, and the sweet-savory combination is surprisingly good. My nephew Leo actually prefers this version now.
Serving & Storage Suggestions
These breadsticks are best served warm, straight from the oven. The contrast between the warm, chewy bread and the cool (or warm) marinara is part of the experience. Arrange them on a dark platter or black slate board for maximum spooky effect. I like to scatter a few fake spider webs around the platter and add plastic spiders for garnish. A small bowl of the marinara “blood” in the center completes the picture.
For a full Halloween spread, these pair beautifully with a roasted tomato basil soup for dipping or alongside a creamy green chili corn chowder for a heartier meal. They also work well with a simple green salad dressed with a tangy vinaigrette to cut through the richness.
Storage
Store leftover breadsticks in an airtight container at room temperature for up to 2 days. They will lose their crunch and become softer, but they’re still edible. Do not refrigerate—the refrigerator dries out bread products and makes them stale faster.
Reheating
The best way to reheat these is in a 350°F (175°C) oven for 5-7 minutes. This restores some of the crispness. You can also use an air fryer at 350°F for 3-4 minutes. The microwave will make them soft and rubbery—avoid it if possible. If you must microwave, wrap them in a damp paper towel and heat for 15 seconds, but accept that the texture won’t be the same.
Freezing
You can freeze the shaped, unbaked breadsticks. Place them on a baking sheet and freeze until solid, then transfer to a freezer bag. They’ll keep for up to 3 months. Bake directly from frozen, adding 5-7 minutes to the baking time. The almond nails might shift slightly during freezing, so check them after baking.
Make-Ahead Tips
The marinara dip can be made up to 3 days in advance and stored in the refrigerator. Reheat gently on the stovetop or in the microwave. You can also shape the breadsticks and refrigerate them (covered) for up to 4 hours before baking. Let them sit at room temperature for 15 minutes before putting them in the oven.
The flavors actually develop nicely over time. Day-old breadsticks are excellent crumbled over salads or used as croutons in soup. I’ve even chopped them up and added them to stuffing for a Halloween-themed Thanksgiving side dish.
Nutritional Information & Benefits
Per serving (2 breadsticks with 2 tablespoons marinara):
- Calories: 245
- Total Fat: 8g
- Saturated Fat: 1.5g
- Cholesterol: 31mg
- Sodium: 580mg
- Total Carbohydrates: 36g
- Dietary Fiber: 3g
- Sugars: 4g
- Protein: 8g
These breadsticks offer a few surprising nutritional benefits. Almonds are rich in vitamin E, magnesium, and healthy monounsaturated fats. The marinara sauce provides lycopene, a powerful antioxidant linked to heart health. The bread dough contains B vitamins from the enriched flour.
For a Halloween treat, these are relatively balanced—they have protein from the egg wash and almonds, fiber from the tomatoes and whole wheat if you use whole wheat dough, and moderate calories. They’re certainly healthier than candy or sugar-laden Halloween desserts.
If you’re watching your sodium, reduce the garlic salt or use a low-sodium alternative. The bread dough itself contains salt, so you can skip the added salt entirely and rely on the garlic powder for flavor. For a lower-carb option, use a low-carb bread dough or cauliflower-based dough, though the texture will be different.
Potential allergens: wheat (gluten), almonds (tree nuts), eggs. The marinara is typically free of major allergens but check labels for hidden ingredients.
Conclusion
These witch finger breadsticks are everything I want in a Halloween recipe—they’re fun, creepy, genuinely delicious, and simple enough that anyone can make them. Every time I serve them, I watch people’s faces cycle through hesitation, laughter, and then genuine enjoyment as they reach for another one. That’s the magic of Halloween food: it brings people together, makes them smile, and tastes good doing it.
I love that this recipe has become a tradition in my family. Leo is fourteen now, and he still asks for “the finger breadsticks” every October. He’s started making them himself, adding his own twists like spicy blood dip or cheese-stuffed versions. That’s what cooking is about, isn’t it? Taking something simple and making it your own.
I’d love to hear how yours turn out. Did you try any variations? Did the kids at your party freak out? Drop a comment below and let me know. And if you’re looking for more Halloween inspiration, I’ve got plenty of spooky recipes waiting for you. Happy haunting, and happy eating!
Frequently Asked Questions
Can I use homemade bread dough instead of frozen?
Absolutely! Homemade bread dough works beautifully. Use your favorite recipe, or try a simple no-knead dough. Just make sure it’s a standard bread dough, not a brioche or enriched dough, which would be too soft and buttery to hold the finger shape.
How do I keep the almond nails from falling off during baking?
Press the almond firmly into the dough, embedding it about 1/3 of the way. Make sure the dough completely surrounds the base of the almond. If your almonds are particularly smooth, you can dip them in a little egg wash before pressing them in—the egg acts as a glue.
Can I make these ahead of time for a party?
Yes! Shape the breadsticks up to 4 hours ahead, cover them with plastic wrap, and refrigerate. Let them sit at room temperature for 15 minutes before baking. You can also freeze the shaped, unbaked breadsticks for up to 3 months.
What can I use instead of almonds for the fingernails?
Try sliced almonds, slivered almonds, or even a small piece of red bell pepper for a nut-free option. For a sweet version, use a white chocolate chip or a piece of dried fruit. The shape doesn’t have to be perfect—the fun is in the imperfection.
Can I make these in an air fryer?
Yes! Preheat your air fryer to 350°F (175°C). Place the breadsticks in a single layer in the basket (you may need to work in batches). Cook for 8-10 minutes, flipping halfway through, until golden brown. The air fryer version is actually crispier than the oven version.
Pin This Recipe!
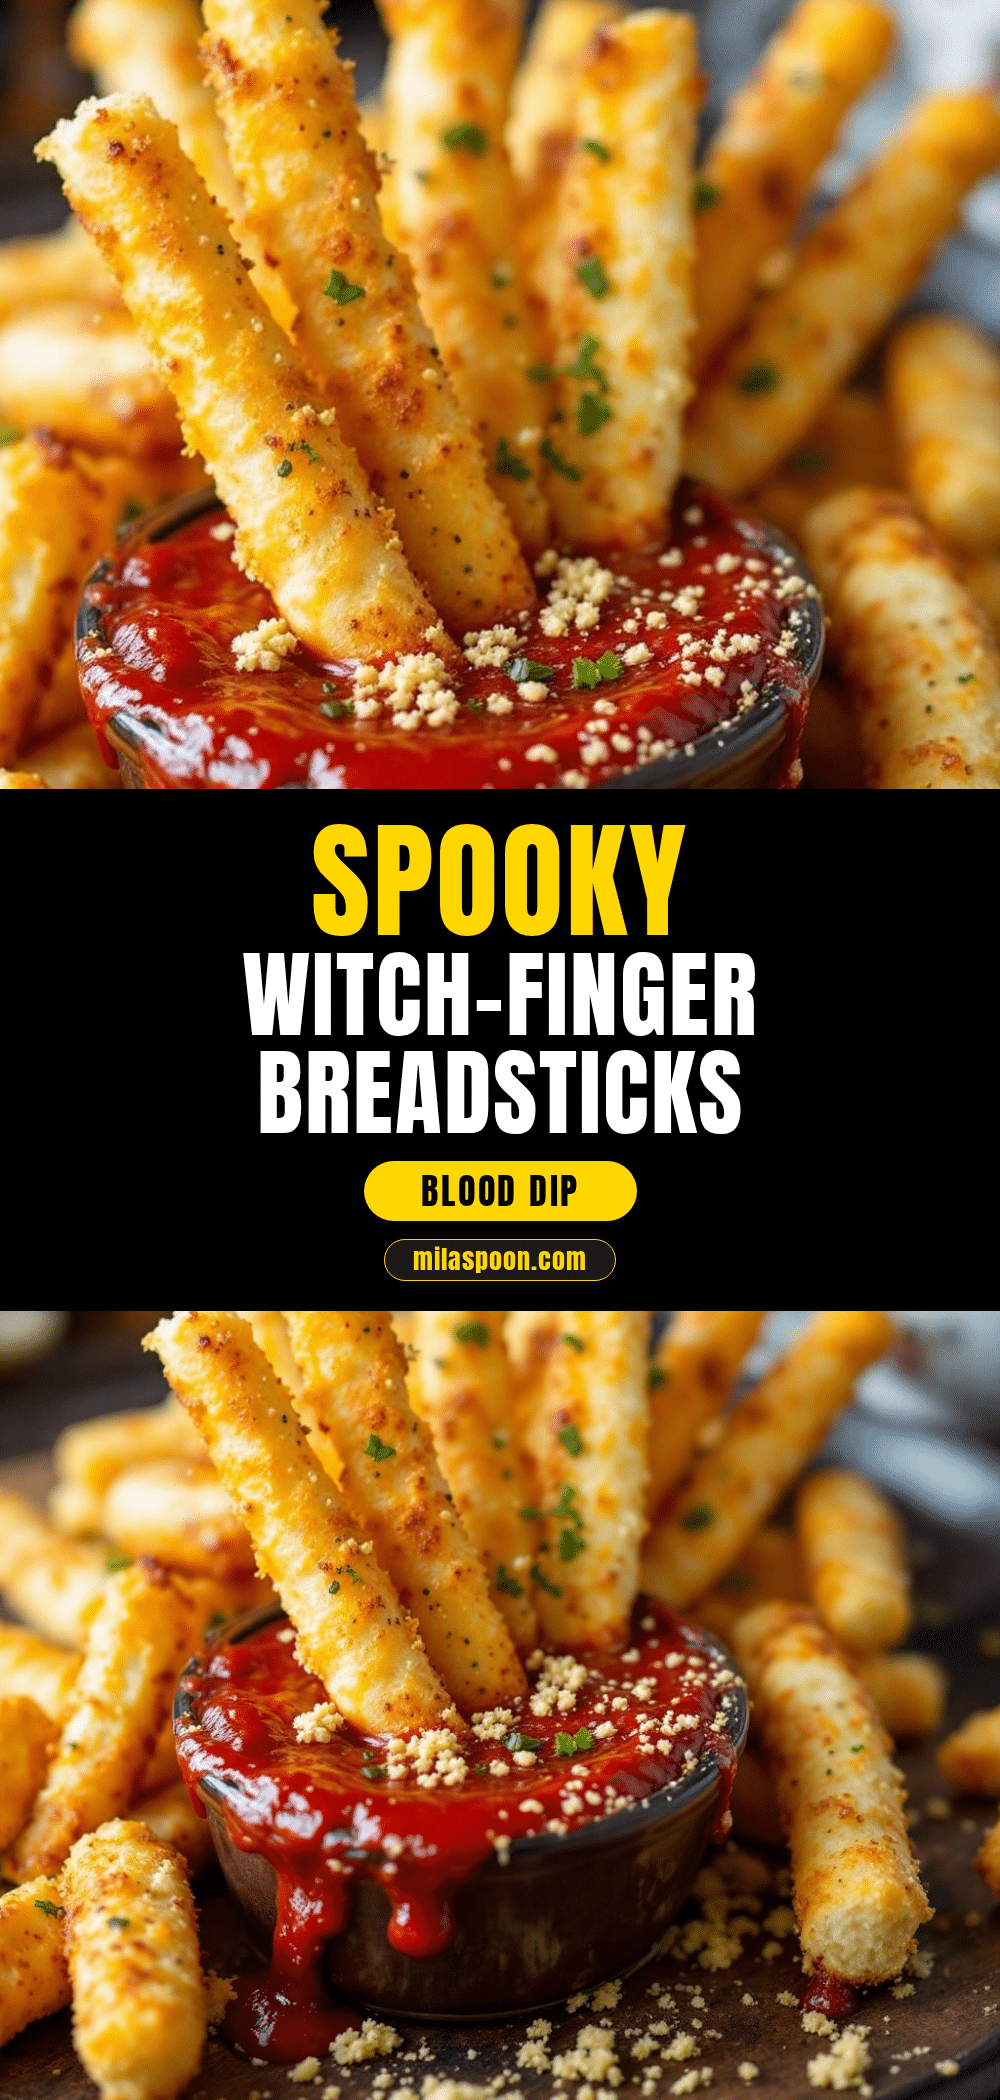
Witch Finger Breadsticks: Spooky Best Halloween Appetizer
These savory witch finger breadsticks are made with frozen bread dough, shaped like creepy fingers with almond nails, and served with a marinara ‘blood’ dip. They’re a fun, delicious Halloween appetizer that kids and adults love.
- Prep Time: 15 minutes
- Cook Time: 15 minutes
- Total Time: 45 minutes
- Yield: 12 servings 1x
- Category: Appetizer
- Cuisine: American
Ingredients
- 1 pound frozen bread dough, thawed
- 2 tablespoons olive oil
- 1 teaspoon garlic salt
- 1 teaspoon dried parsley (optional)
- 24 whole raw almonds
- 1 egg, beaten
- 1 cup high-quality marinara sauce
- 1 tablespoon tomato paste
- 1 teaspoon red wine vinegar
- 1/2 teaspoon smoked paprika
- Pinch of black pepper
Instructions
- Preheat oven to 375°F (190°C). Line a baking sheet with parchment paper.
- Divide the dough into 12 equal pieces. Roll each piece into a rope about 4-5 inches long, slightly thicker at one end and tapered at the other.
- Place ropes on the prepared baking sheet, spacing them about 2 inches apart.
- Using the back of a knife, gently press 2-3 horizontal lines across each ‘finger’ to create knuckle indentations.
- Press one whole almond into the tapered end of each breadstick, pointed end facing outward, embedding it about 1/3 of the way into the dough.
- In a small bowl, beat the egg with 1 tablespoon of water. Brush each breadstick with the egg wash.
- Sprinkle each breadstick with garlic salt and dried parsley (if using).
- For extra realism, use a toothpick to draw tiny lines around the knuckle indentations and at the base of the almond nail.
- Cover the breadsticks loosely with plastic wrap or a kitchen towel and let rise in a warm place for 20-30 minutes.
- Bake for 12-15 minutes, until golden brown and the almonds are lightly toasted. Rotate the pan halfway through.
- While the breadsticks bake, combine marinara sauce, tomato paste, red wine vinegar, smoked paprika, and black pepper in a small saucepan. Warm over medium-low heat, stirring occasionally, until heated through.
- Let the breadsticks cool on the baking sheet for 5 minutes before transferring to a serving platter. Serve warm with the marinara dip.
Notes
For best results, use frozen bread dough (Rhode’s or Bridgford). Press almonds in at a slight angle for realism. The marinara dip can be made up to 3 days ahead. Shaped breadsticks can be refrigerated for up to 4 hours before baking. For a gluten-free version, use gluten-free bread dough. For a vegan version, replace egg wash with maple syrup and water.
Nutrition
- Serving Size: 2 breadsticks with 2
- Calories: 245
- Sugar: 4
- Sodium: 580
- Fat: 8
- Saturated Fat: 1.5
- Carbohydrates: 36
- Fiber: 3
- Protein: 8
Keywords: Halloween appetizer, witch finger breadsticks, spooky breadsticks, Halloween party food, breadstick fingers, savory Halloween snack


