Love this? Save it for later!
Share the inspiration with your friends
“These wings are honestly better than the restaurant ones.” My brother-in-law said that through a mouthful of chicken, reaching for a third napkin, and I knew I had something. It wasn’t a compliment he gave lightly—this is a man who orders wings everywhere we go. Buffalo, dry rub, smoked, grilled, you name it. But these crispy sticky honey garlic chicken wings? They made him go quiet mid-bite, which for him is basically a standing ovation.
The thing is, I wasn’t even trying to compete with anyone. It was a Tuesday night, and I had a bag of chicken wings thawing in the fridge that I’d forgotten about. You know how that goes—suddenly you’re committed to cooking something, and your brain is scrambling for a plan that doesn’t require another trip to the store. Honey, soy sauce, garlic, a little cornstarch for that crunch. It sounded good on paper, but honestly, I was skeptical. Oven-baked wings can go one of two ways: crispy and glorious, or sad and flabby. There’s rarely an in-between.
What came out of that oven changed my wing game forever. The skin was shatteringly crisp, lacquered in this glossy, sweet-savory glaze that clung to every ridge and cranny. Sticky fingers, happy sighs, and an empty platter in under fifteen minutes. That was the moment I stopped ordering wings at restaurants. Why would I, when I could make these at home, exactly the way I wanted them, any night of the week? This recipe is the one I keep coming back to, the one friends text me about after Super Bowl parties, the one that makes people close their eyes and just chew for a second. Trust me on this one.
Why You’ll Love This Recipe
These crispy sticky honey garlic chicken wings aren’t just another wing recipe. They’re the result of multiple test batches, a few burned fingers, and one very sticky kitchen counter. I’ve dialed in every detail so you don’t have to guess.
- Oven-Baked, Not Fried: You get that deep crunch without the mess of deep frying. Less oil, less hassle, same satisfying snap when you bite in.
- Perfectly Balanced Glaze: Sweet honey meets savory garlic and a touch of soy sauce for umami. It’s not cloying—it’s crave-worthy.
- Simple Pantry Ingredients: Chances are you already have most of these in your kitchen. No fancy trips to specialty stores required.
- Crowd-Pleaser Guaranteed: I’ve served these at game days, casual dinners, and even a birthday party. The platter empties every single time.
- Make-Ahead Friendly: You can prep the wings and the glaze separately, then bake when you’re ready. Perfect for entertaining.
What sets these wings apart is the technique. Baking powder is the secret weapon here—it helps dry out the skin in the oven, creating that crackly texture you usually only get from a fryer. And the glaze? It’s cooked down on the stovetop until it’s thick and sticky, then brushed on in layers during the last few minutes of baking. No soggy skin, no watery sauce. Just pure, unadulterated wing perfection.
These wings have become my go-to for pretty much any occasion that calls for something indulgent. They’re the kind of food that makes you forget about your phone, lean over the table, and just enjoy the moment. And honestly, isn’t that what good food is supposed to do?
What Ingredients You Will Need
This recipe relies on simple, everyday ingredients that come together to create something surprisingly complex. Each component plays a specific role, from building the crunch to creating that glossy, addictive glaze.
For the Wings:
- 3 pounds chicken wing sections (flats and drumettes), patted very dry with paper towels
- 1 ½ tablespoons baking powder (aluminum-free, not baking soda—this is crucial for crispiness)
- 1 teaspoon kosher salt
- ½ teaspoon black pepper
- ½ teaspoon garlic powder
- ½ teaspoon onion powder
For the Sticky Honey Garlic Glaze:
- ⅓ cup honey (use a runny, liquid honey for easy mixing)
- ¼ cup low-sodium soy sauce (or tamari for gluten-free)
- 4 cloves garlic, finely minced (don’t use jarred stuff here—fresh makes a real difference)
- 1 tablespoon rice vinegar (adds brightness and cuts through the sweetness)
- 1 teaspoon sesame oil (optional, but adds a lovely nutty undertone)
- 1 tablespoon cornstarch mixed with 2 tablespoons cold water (slurry, for thickening)
- Pinch of red pepper flakes (optional, for a little heat)
For Garnish (Optional but Recommended):
- 2 tablespoons toasted sesame seeds
- 2 green onions, thinly sliced on the diagonal
- Lime wedges, for squeezing
A few notes on ingredient selection: I prefer using fresh garlic here because the flavor is sharper and more aromatic. When you cook minced garlic in the glaze, it softens and sweetens, and fresh cloves do that better than pre-minced. For the honey, any liquid honey works—I’ve used clover honey and wildflower honey with great results. Avoid honey that has crystallized, as it won’t incorporate as smoothly into the glaze.
If you’re watching your sodium, you can use reduced-sodium soy sauce without sacrificing flavor. And for those who like a bit of heat, don’t skip the red pepper flakes—they add a subtle warmth that complements the sweetness beautifully. You can also swap in sriracha or gochujang for a different kind of kick, but we’ll get to variations later.
Equipment Needed
You don’t need a lot of fancy gear to make these wings, which is part of what makes this recipe so approachable. Here’s what you’ll need:
- Baking Sheet: A rimmed baking sheet is essential—it catches any drips and prevents a mess in your oven. I use a half-sheet pan (18×13 inches) for a full batch of wings.
- Wire Rack: This is the key to crispy wings. Placing a wire rack inside the baking sheet allows hot air to circulate all around the wings, so they crisp up evenly on all sides. No flipping required.
- Large Mixing Bowl: For tossing the wings with the dry seasoning mixture. A bowl with high sides prevents the baking powder from flying everywhere.
- Small Saucepan: For making the honey garlic glaze. A heavy-bottomed saucepan works best to prevent burning.
- Whisk: For combining the glaze ingredients smoothly.
- Pastry Brush: For brushing the glaze onto the wings during the last few minutes of baking. Silicone brushes are easy to clean and don’t shed bristles.
- Tongs: For flipping and moving the hot wings around.
- Paper Towels: Lots of them. Patting the wings dry is the single most important step for crispy skin.
If you don’t have a wire rack, you can still make these wings—just flip them halfway through baking. The results won’t be quite as evenly crispy, but they’ll still be delicious. I’ve also used a cooling rack from my baking supplies in a pinch, and it worked perfectly. Just make sure it’s oven-safe up to 400°F.
Preparation Method
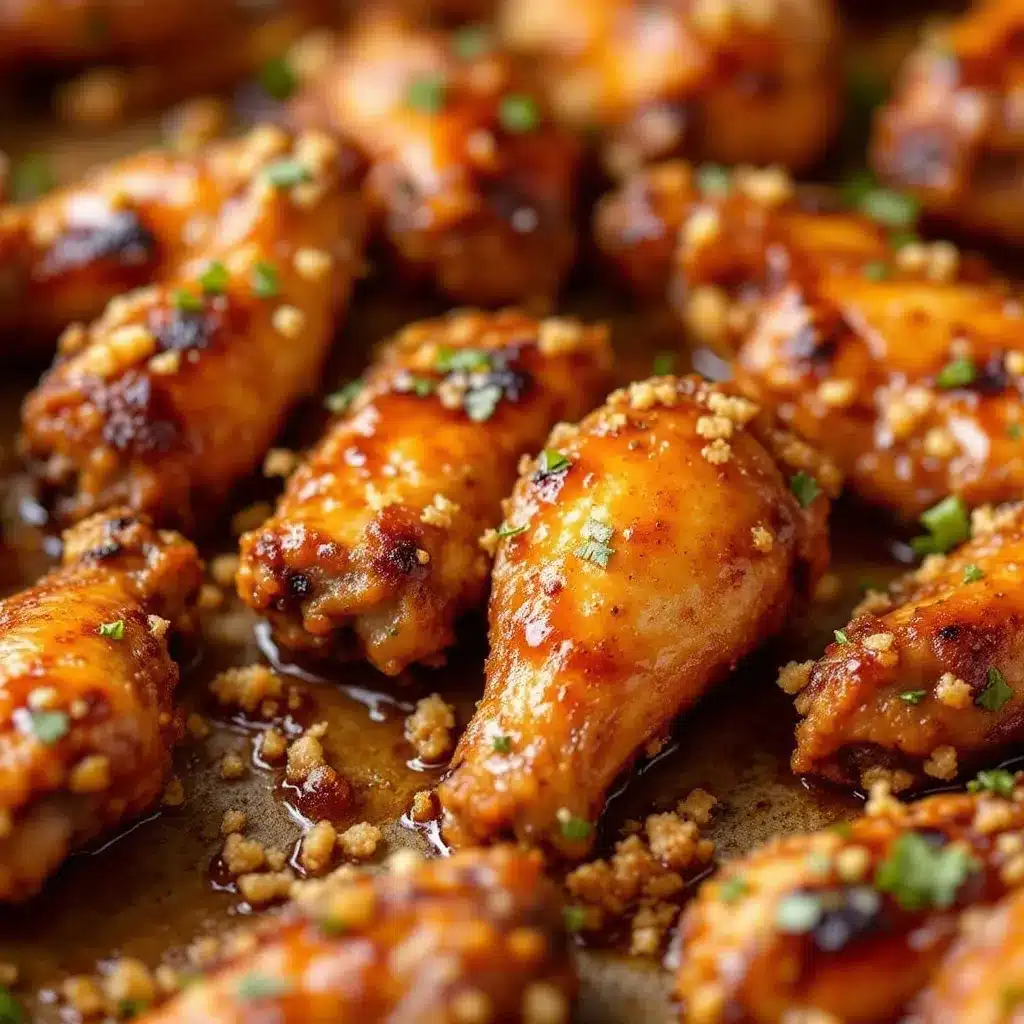
Let’s get cooking. This method is broken down into clear steps, and I’ve included visual cues and timing tips so you know exactly what to look for at each stage.
- Prep the Wings: Start by patting your chicken wings very dry with paper towels. This is not a step to rush through. Excess moisture is the enemy of crispy skin. I usually go through three or four paper towels for a full batch. Once they’re dry, place them in a large mixing bowl.
- Season the Wings: In a small bowl, whisk together the baking powder, kosher salt, black pepper, garlic powder, and onion powder. Sprinkle this mixture over the wings and toss well with your hands, making sure every piece is evenly coated. The baking powder might look like a lot, but trust the process—it’s what creates that bubbly, crackly skin. Let the wings sit at room temperature for 15 minutes while you preheat the oven. This resting time allows the baking powder to start working on the skin.
- Preheat and Prep the Pan: Preheat your oven to 400°F (200°C). Place a wire rack inside a rimmed baking sheet and lightly spray it with cooking spray or brush it with a little oil. This prevents the wings from sticking.
- Arrange the Wings: Place the seasoned wings on the wire rack in a single layer, making sure they’re not touching. Crowding the pan will trap steam and prevent crisping. If you need to, use two baking sheets or bake in batches.
- Bake the Wings: Bake for 30 minutes at 400°F. After 30 minutes, flip each wing using tongs. This isn’t strictly necessary if you’re using a wire rack, but I find it helps with even browning. Bake for another 20-25 minutes, until the wings are golden brown and the skin looks bubbly and crisp. The internal temperature should reach 165°F (74°C). If you want them extra crispy, you can turn on the broiler for the last 2-3 minutes—just watch them carefully so they don’t burn.
- Make the Glaze: While the wings are baking, prepare the glaze. In a small saucepan, combine the honey, soy sauce, minced garlic, rice vinegar, sesame oil (if using), and red pepper flakes. Bring to a simmer over medium heat, stirring occasionally. Let it bubble gently for 2-3 minutes, until the garlic becomes fragrant and the mixture thickens slightly.
- Thicken the Glaze: Give your cornstarch slurry a quick stir (it settles fast) and pour it into the simmering glaze. Stir continuously for about 30-60 seconds, until the glaze thickens to a syrupy consistency. It should coat the back of a spoon. Remove from heat and set aside. The glaze will continue to thicken as it cools.
- Glaze the Wings: When the wings come out of the oven, let them rest for 2 minutes. Then, using a pastry brush, generously brush each wing with the honey garlic glaze. Flip them and brush the other side. For maximum sticky goodness, brush on a second layer after the first one sets.
- Finish and Serve: Transfer the glazed wings to a serving platter. Sprinkle with toasted sesame seeds and sliced green onions. Serve immediately with lime wedges on the side for squeezing. The lime adds a bright acidity that cuts through the richness beautifully.
Cooking Tips & Techniques
I’ve made these wings more times than I can count, and I’ve learned a few things along the way. Here are my best tips for guaranteed success.
Don’t Skip the Drying Step. I cannot emphasize this enough. Wet skin will steam instead of crisp, and you’ll end up with rubbery wings. Pat them dry, then pat them dry again. If you have time, you can even leave them uncovered in the fridge for an hour—this dries out the skin even further.
The Baking Powder Must Be Aluminum-Free. Some baking powders contain aluminum, which can leave a metallic aftertaste on your wings. Check the label and look for one that says “aluminum-free.” Brands like Bob’s Red Mill and Rumford are reliable choices.
Let the Wings Rest Before Glazing. I learned this the hard way. If you brush the glaze on piping-hot wings straight out of the oven, it can slide right off. Let them rest for 2-3 minutes so the surface cools slightly and the glaze adheres better.
Double-Glaze for Maximum Flavor. The first layer of glaze soaks into the warm skin. The second layer stays on top, creating that glossy, sticky finish that makes these wings so addictive. Trust me, the extra 30 seconds is worth it.
Watch the Glaze Carefully. Honey-based glazes can burn quickly. Keep the heat at medium or medium-low, and stir frequently. If the glaze starts to bubble too aggressively, reduce the heat. A burned glaze is bitter and can’t be saved.
Use a Meat Thermometer. Chicken wings are small and cook quickly, but it’s still worth checking the internal temperature to be safe. Insert the thermometer into the thickest part of a drumette, avoiding the bone. 165°F is the magic number.
Variations & Adaptations
One of the best things about this recipe is how easily it adapts to different tastes and dietary needs. Here are a few variations I’ve tried and loved.
Spicy Honey Sriracha Wings: Add 1-2 tablespoons of sriracha to the glaze along with the honey. The heat balances the sweetness perfectly. I made these for a game day party and they disappeared faster than the regular version.
Garlic Lovers’ Wings: Double the garlic in the glaze and add 2 extra cloves, finely minced. Roast the garlic in the glaze for a few extra minutes to mellow its sharpness. These are for people who believe there’s no such thing as too much garlic.
Air Fryer Method: If you have an air fryer, you can make these wings in half the time. Cook the seasoned wings at 375°F for 12-15 minutes, shaking the basket halfway through. Then glaze and air fry for another 2-3 minutes until sticky and caramelized. This method yields incredibly crispy results with even less oil.
Gluten-Free Option: Simply swap the soy sauce for tamari or coconut aminos. Everything else in the recipe is naturally gluten-free. Make sure your baking powder is also gluten-free (most brands are, but check the label).
Honey Garlic Chicken Thighs: This glaze works beautifully on bone-in, skin-on chicken thighs. Bake the thighs at 400°F for about 40-45 minutes, then glaze and broil for 2-3 minutes. It’s a completely different but equally delicious meal.
Keto-Friendly Version: Replace the honey with a sugar-free honey substitute (like Lakanto) or use a monk fruit-based sweetener. The glaze won’t be quite as sticky, but it still tastes fantastic. Pair it with a side of roasted broccoli or cauliflower rice.
Serving & Storage Suggestions
These wings are best served hot and fresh, straight from the oven. The contrast between the crispy skin and the sticky glaze is at its peak within the first 15 minutes. Arrange them on a large platter, sprinkle with sesame seeds and green onions, and serve with lime wedges for squeezing.
What to Serve With Them: These wings pair beautifully with cooling, creamy sides. Try them alongside my creamy cucumber dill salad—the tangy dressing cuts through the richness of the glaze. A simple coleslaw or a bowl of steamed rice also works wonderfully. For a full spread, add crisp garlic dill refrigerator pickles on the side for a bright, acidic contrast.
Storage: Leftover wings can be stored in an airtight container in the refrigerator for up to 3 days. The glaze will soften the skin over time, so they won’t be as crispy when reheated. To restore some crunch, reheat them in an air fryer at 375°F for 4-5 minutes, or in a 400°F oven for 8-10 minutes. Avoid microwaving, as it will make the skin rubbery.
Freezing: You can freeze the baked (un-glazed) wings for up to 2 months. Let them cool completely, then place them in a single layer on a baking sheet and freeze until solid. Transfer to a freezer-safe bag or container. When ready to serve, reheat directly from frozen at 400°F for 15-18 minutes, then glaze and broil for 2-3 minutes. The glaze itself can also be frozen separately in a small container.
Make-Ahead Tip: If you’re hosting, you can bake the wings a few hours ahead of time and keep them at room temperature. When your guests arrive, reheat them in a hot oven for 5 minutes, then glaze and serve. This takes the stress out of party prep.
Nutritional Information & Benefits
Let’s be real—these wings are an indulgence. But they’re made with whole ingredients, and there are a few surprising nutritional bright spots.
Estimated Nutritional Values (per serving, about 5-6 wings):
- Calories: 420
- Protein: 28g
- Fat: 22g
- Carbohydrates: 28g
- Sugar: 24g
- Sodium: 780mg
Chicken wings are a good source of protein, which keeps you full and satisfied. The skin contains collagen, which is beneficial for joint health and skin elasticity. Garlic is known for its anti-inflammatory and immune-boosting properties, thanks to a compound called allicin. And while honey is still sugar, it does contain trace amounts of antioxidants and can soothe a sore throat.
Dietary Considerations: This recipe can be made gluten-free (with tamari), nut-free, and dairy-free. It is not suitable for low-carb or keto diets unless you substitute the honey. The wings are also egg-free and soy-free if you use coconut aminos instead of soy sauce.
Allergen Note: This recipe contains soy (soy sauce) and sesame (sesame oil and seeds). If you have allergies, adjust accordingly.
I’m not here to pretend these wings are health food. They’re a treat, and that’s okay. Sometimes you need a meal that’s purely about pleasure, and these wings deliver on that front without any guilt.
Conclusion
These crispy sticky honey garlic chicken wings have earned a permanent spot in my regular rotation. They’re the recipe I turn to when I want to impress without stress, when I need a crowd-pleaser for game day, or when I just want to treat myself to something truly delicious. The combination of shatteringly crisp skin and that glossy, sweet-savory glaze is honestly addictive—in the best way.
What I love most about this recipe is how forgiving it is. You can tweak the heat, adjust the sweetness, swap in different garnishes, and it still works. It’s a blueprint for great wings, not a rigid formula. So don’t be afraid to make it your own. Add extra garlic if you’re a garlic fiend. Throw in some chili crisp for extra heat. Serve them with a side of ranch or blue cheese—I won’t judge.
I’d love to hear how these turn out for you. Drop a comment below and let me know if you tried any variations, or tag me in your photos on social media. And if you’re looking for more wing inspiration, check out my crispy air fryer chicken wings trio for three more flavor combinations that are just as good. Happy cooking, and don’t forget the napkins!
Frequently Asked Questions
Can I make these wings in an air fryer instead of the oven?
Absolutely! The air fryer method is actually my go-to for smaller batches. Cook the seasoned wings at 375°F for 12-15 minutes, shaking the basket halfway through. Then brush on the glaze and air fry for another 2-3 minutes. The results are incredibly crispy and the cooking time is cut in half.
Why do I need to use baking powder on the wings?
Baking powder is the secret to crispy oven-baked wings. It raises the pH of the skin, which helps it brown faster and more evenly. It also creates tiny bubbles on the surface of the skin, giving it that crackly, fried-like texture. Just make sure you’re using aluminum-free baking powder to avoid any metallic aftertaste.
Can I use frozen chicken wings for this recipe?
You can, but you’ll need to thaw them completely first. Frozen wings release a lot of moisture as they cook, which will prevent the skin from crisping up. Thaw them in the refrigerator overnight, then pat them very dry with paper towels before seasoning. The drying step is even more important with previously frozen wings.
How do I prevent the glaze from burning in the oven?
The key is to add the glaze at the very end of baking. Brush it on during the last 5-7 minutes of cooking, or even after the wings come out of the oven. Honey and sugar burn quickly at high temperatures, so keeping the glazing time short is essential. Broiling for 2-3 minutes after glazing is fine, but watch them constantly.
Can I double this recipe for a large party?
Definitely! This recipe doubles or triples easily. Just make sure you’re not overcrowding the baking sheet. Use multiple racks in your oven or bake in batches. You can also keep the first batch warm in a 200°F oven while the second batch cooks. The glaze recipe can be doubled as well—just use a larger saucepan.
Pin This Recipe!
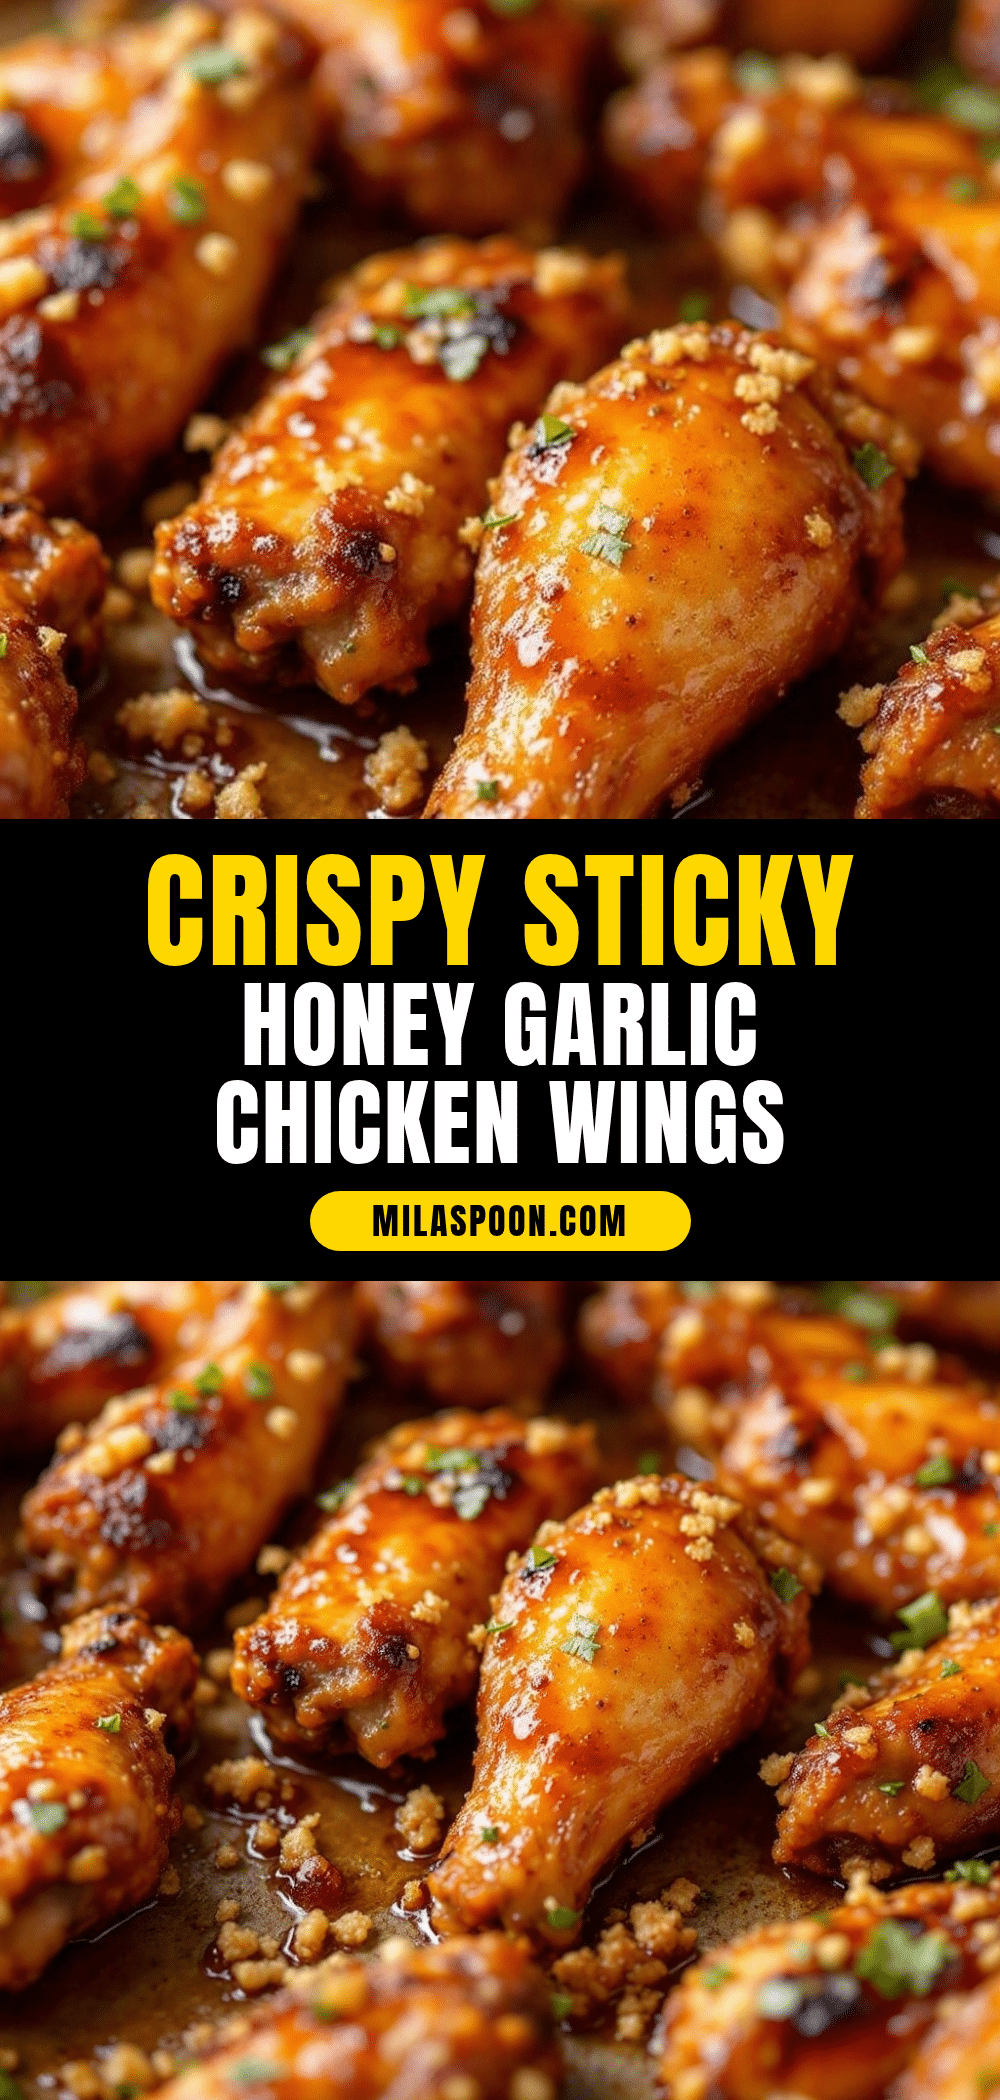
Crispy Sticky Honey Garlic Chicken Wings Recipe
These oven-baked chicken wings are shatteringly crisp, lacquered in a glossy sweet-savory honey garlic glaze. A crowd-pleasing recipe that’s better than takeout, made with simple pantry ingredients.
- Prep Time: 15 minutes
- Cook Time: 50 minutes
- Total Time: 1 hour 5 minutes
- Yield: 4 servings 1x
- Category: Appetizer
- Cuisine: American
Ingredients
- 3 pounds chicken wing sections (flats and drumettes), patted very dry with paper towels
- 1 ½ tablespoons baking powder (aluminum-free)
- 1 teaspoon kosher salt
- ½ teaspoon black pepper
- ½ teaspoon garlic powder
- ½ teaspoon onion powder
- ⅓ cup honey (runny, liquid honey)
- ¼ cup low-sodium soy sauce (or tamari for gluten-free)
- 4 cloves garlic, finely minced
- 1 tablespoon rice vinegar
- 1 teaspoon sesame oil (optional)
- 1 tablespoon cornstarch mixed with 2 tablespoons cold water (slurry)
- Pinch of red pepper flakes (optional)
- 2 tablespoons toasted sesame seeds (for garnish)
- 2 green onions, thinly sliced on the diagonal (for garnish)
- Lime wedges (for serving)
Instructions
- Prep the Wings: Pat chicken wings very dry with paper towels. Place in a large mixing bowl.
- Season the Wings: In a small bowl, whisk together baking powder, kosher salt, black pepper, garlic powder, and onion powder. Sprinkle over wings and toss well to coat evenly. Let sit at room temperature for 15 minutes.
- Preheat and Prep the Pan: Preheat oven to 400°F (200°C). Place a wire rack inside a rimmed baking sheet and lightly spray with cooking spray or brush with oil.
- Arrange the Wings: Place seasoned wings on the wire rack in a single layer, not touching.
- Bake the Wings: Bake for 30 minutes. Flip each wing using tongs, then bake for another 20-25 minutes until golden brown and crispy (internal temperature reaches 165°F/74°C). For extra crispiness, broil for 2-3 minutes at the end.
- Make the Glaze: While wings bake, combine honey, soy sauce, minced garlic, rice vinegar, sesame oil (if using), and red pepper flakes in a small saucepan. Bring to a simmer over medium heat, stirring occasionally. Cook for 2-3 minutes until garlic is fragrant and mixture thickens slightly.
- Thicken the Glaze: Stir cornstarch slurry, then pour into simmering glaze. Stir continuously for 30-60 seconds until thickened to a syrupy consistency. Remove from heat.
- Glaze the Wings: Let baked wings rest for 2 minutes. Using a pastry brush, generously brush each wing with glaze. Flip and brush the other side. Apply a second layer for extra stickiness.
- Finish and Serve: Transfer glazed wings to a serving platter. Sprinkle with toasted sesame seeds and sliced green onions. Serve immediately with lime wedges.
Notes
Pat wings very dry for crispiest skin. Use aluminum-free baking powder to avoid metallic taste. Let wings rest 2-3 minutes before glazing so glaze adheres. Double-glaze for maximum flavor. Watch glaze carefully to prevent burning. For air fryer: cook seasoned wings at 375°F for 12-15 minutes, then glaze and air fry 2-3 minutes.
Nutrition
- Serving Size: About 5-6 wings
- Calories: 420
- Sugar: 24
- Sodium: 780
- Fat: 22
- Saturated Fat: 6
- Carbohydrates: 28
- Protein: 28
Keywords: chicken wings, honey garlic, crispy wings, oven-baked wings, sticky wings, game day appetizer


